
Shopping Cart
*continental US addresses only
Of the many finishing techniques available, I love the look the look of hemstitching best of all. Today we’re going to show you how to hem your weaving projects while they're still on the loom, a simple and easy finishing technique that results in a clean, neatly secured cloth. No sewing machine necessary!

If you’ve ever felt stressed about your projects unravelling or if you don’t have a sewing machine or serger to finish edges, hemstitching is a great technique that secures your raw edge into tidy little bundles while it’s still on the loom. Once you’ve cut your fabric off your loom, it can be left as is, used to twist fringes, or folded under a hem. Best of all, it requires no fancy tools—all you need to hemstitch is a darning or tapestry needle (which also comes in handy to fix broken warp threads). Read on for our hemstitching tutorial and learn how to use this technique on your next weaving project.
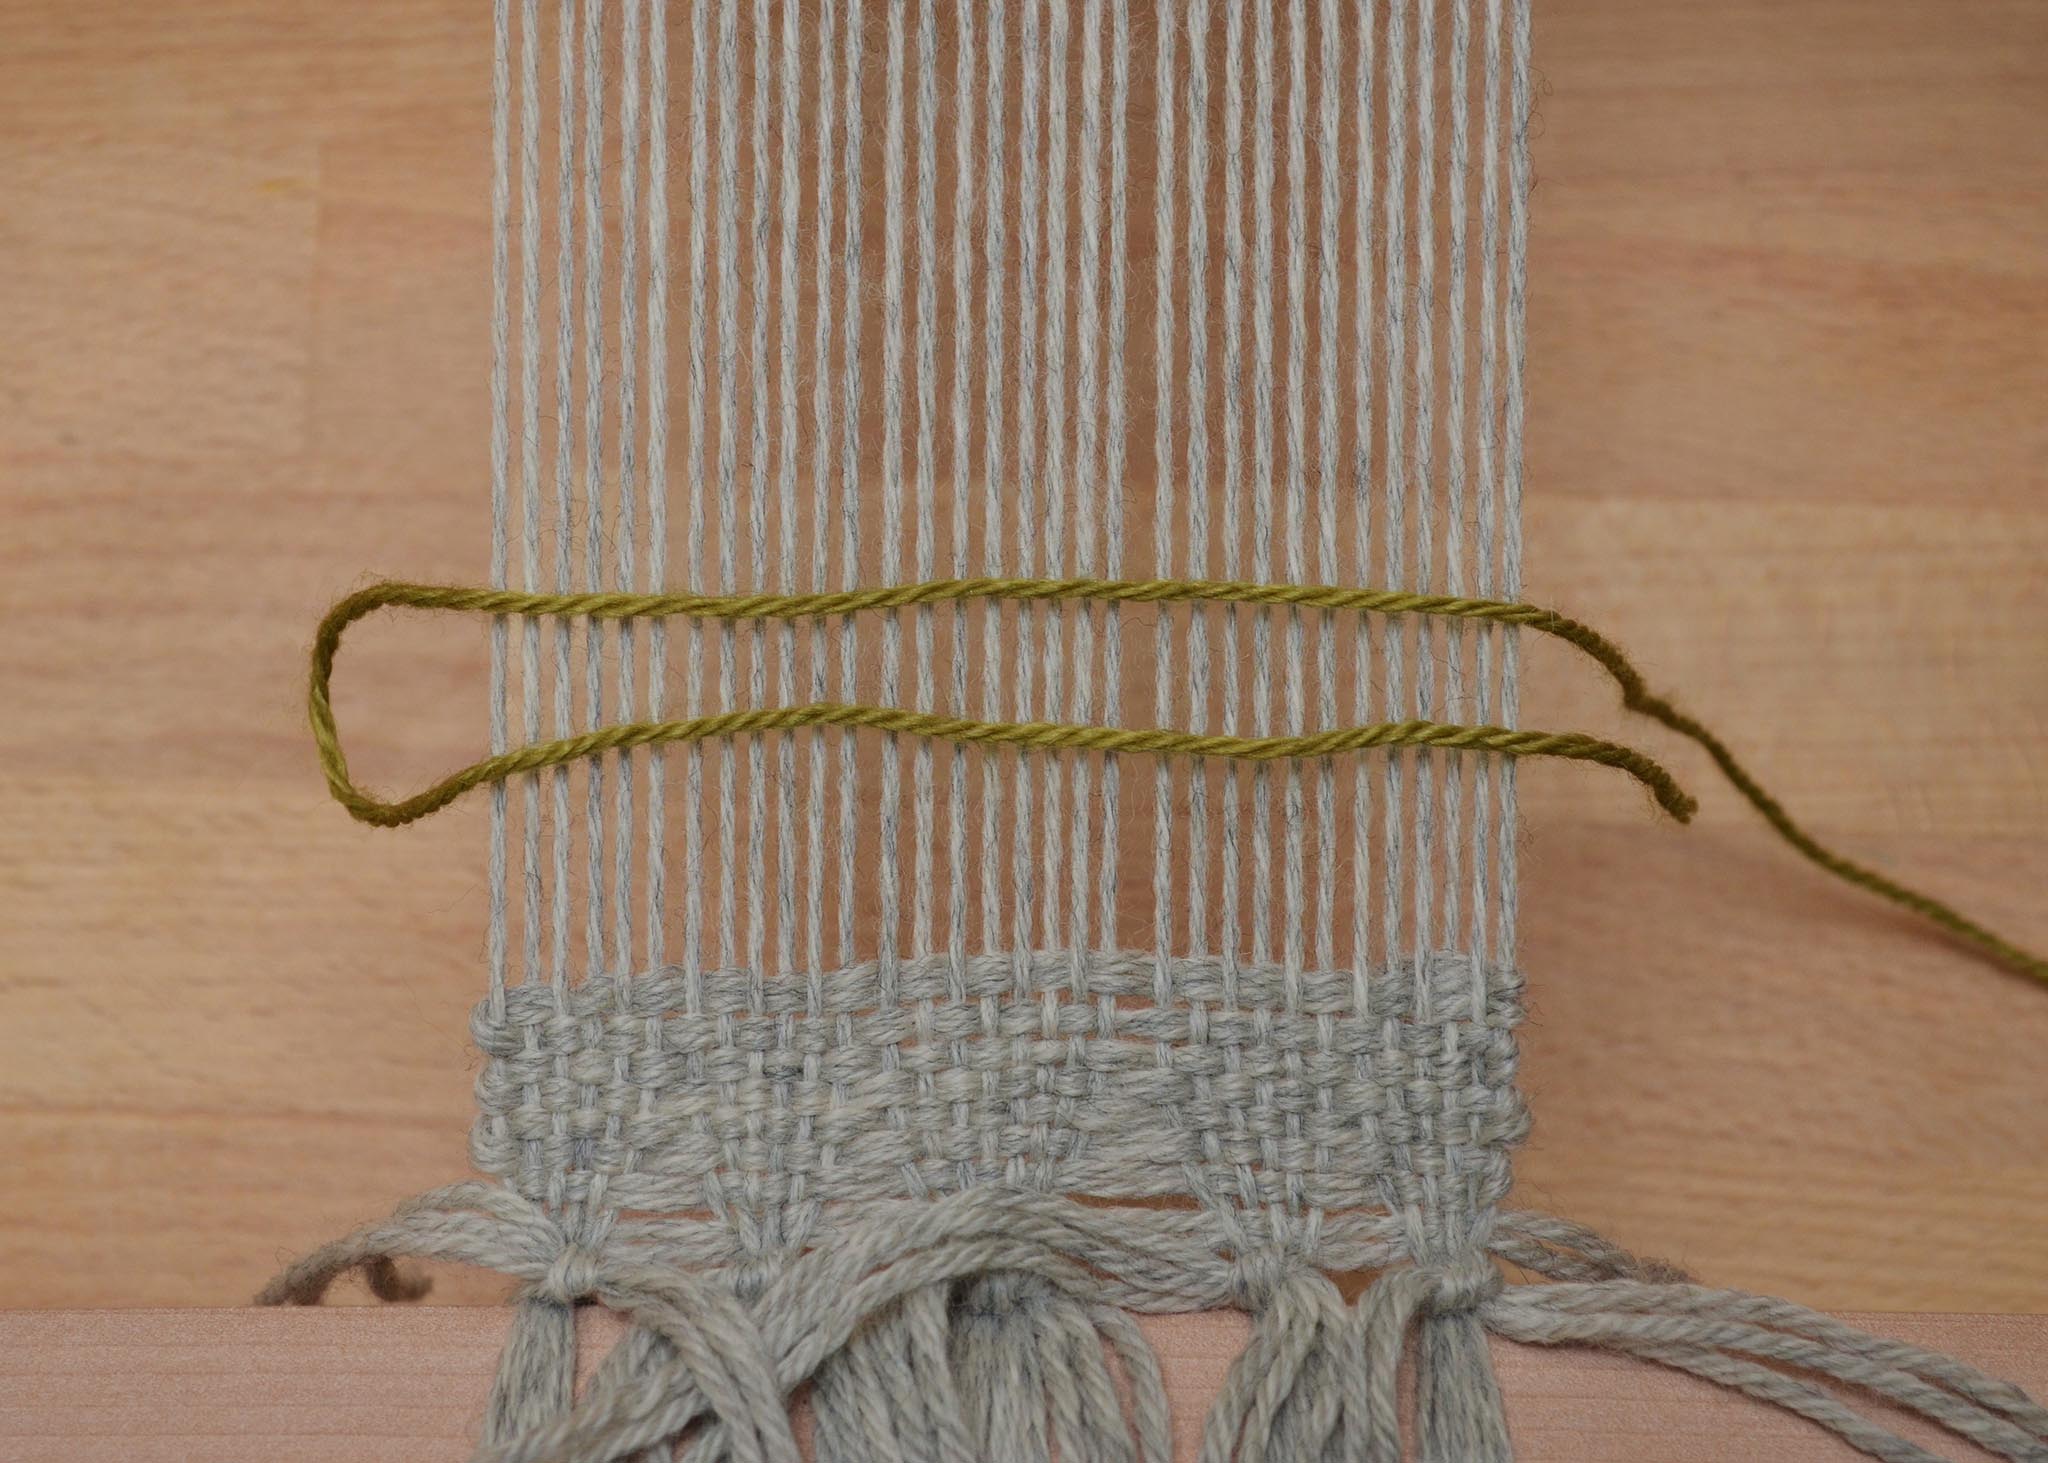
Weave three picks. The first pick should have a tail coming out of the right hand selvedge that’s approximately 3 times the width of your fabric. If the width at the reed is 10”, your tail should measure 30”. Your hemstitch will be traveling from right to left.

Thread the yarn tail onto your darning or tapestry needle and bring it over 4 ends and then down between those ends and the rest of the warp. Pass your needle behind these 4 warp ends and through the loop that’s been created by the start of the tail. Pull tight.
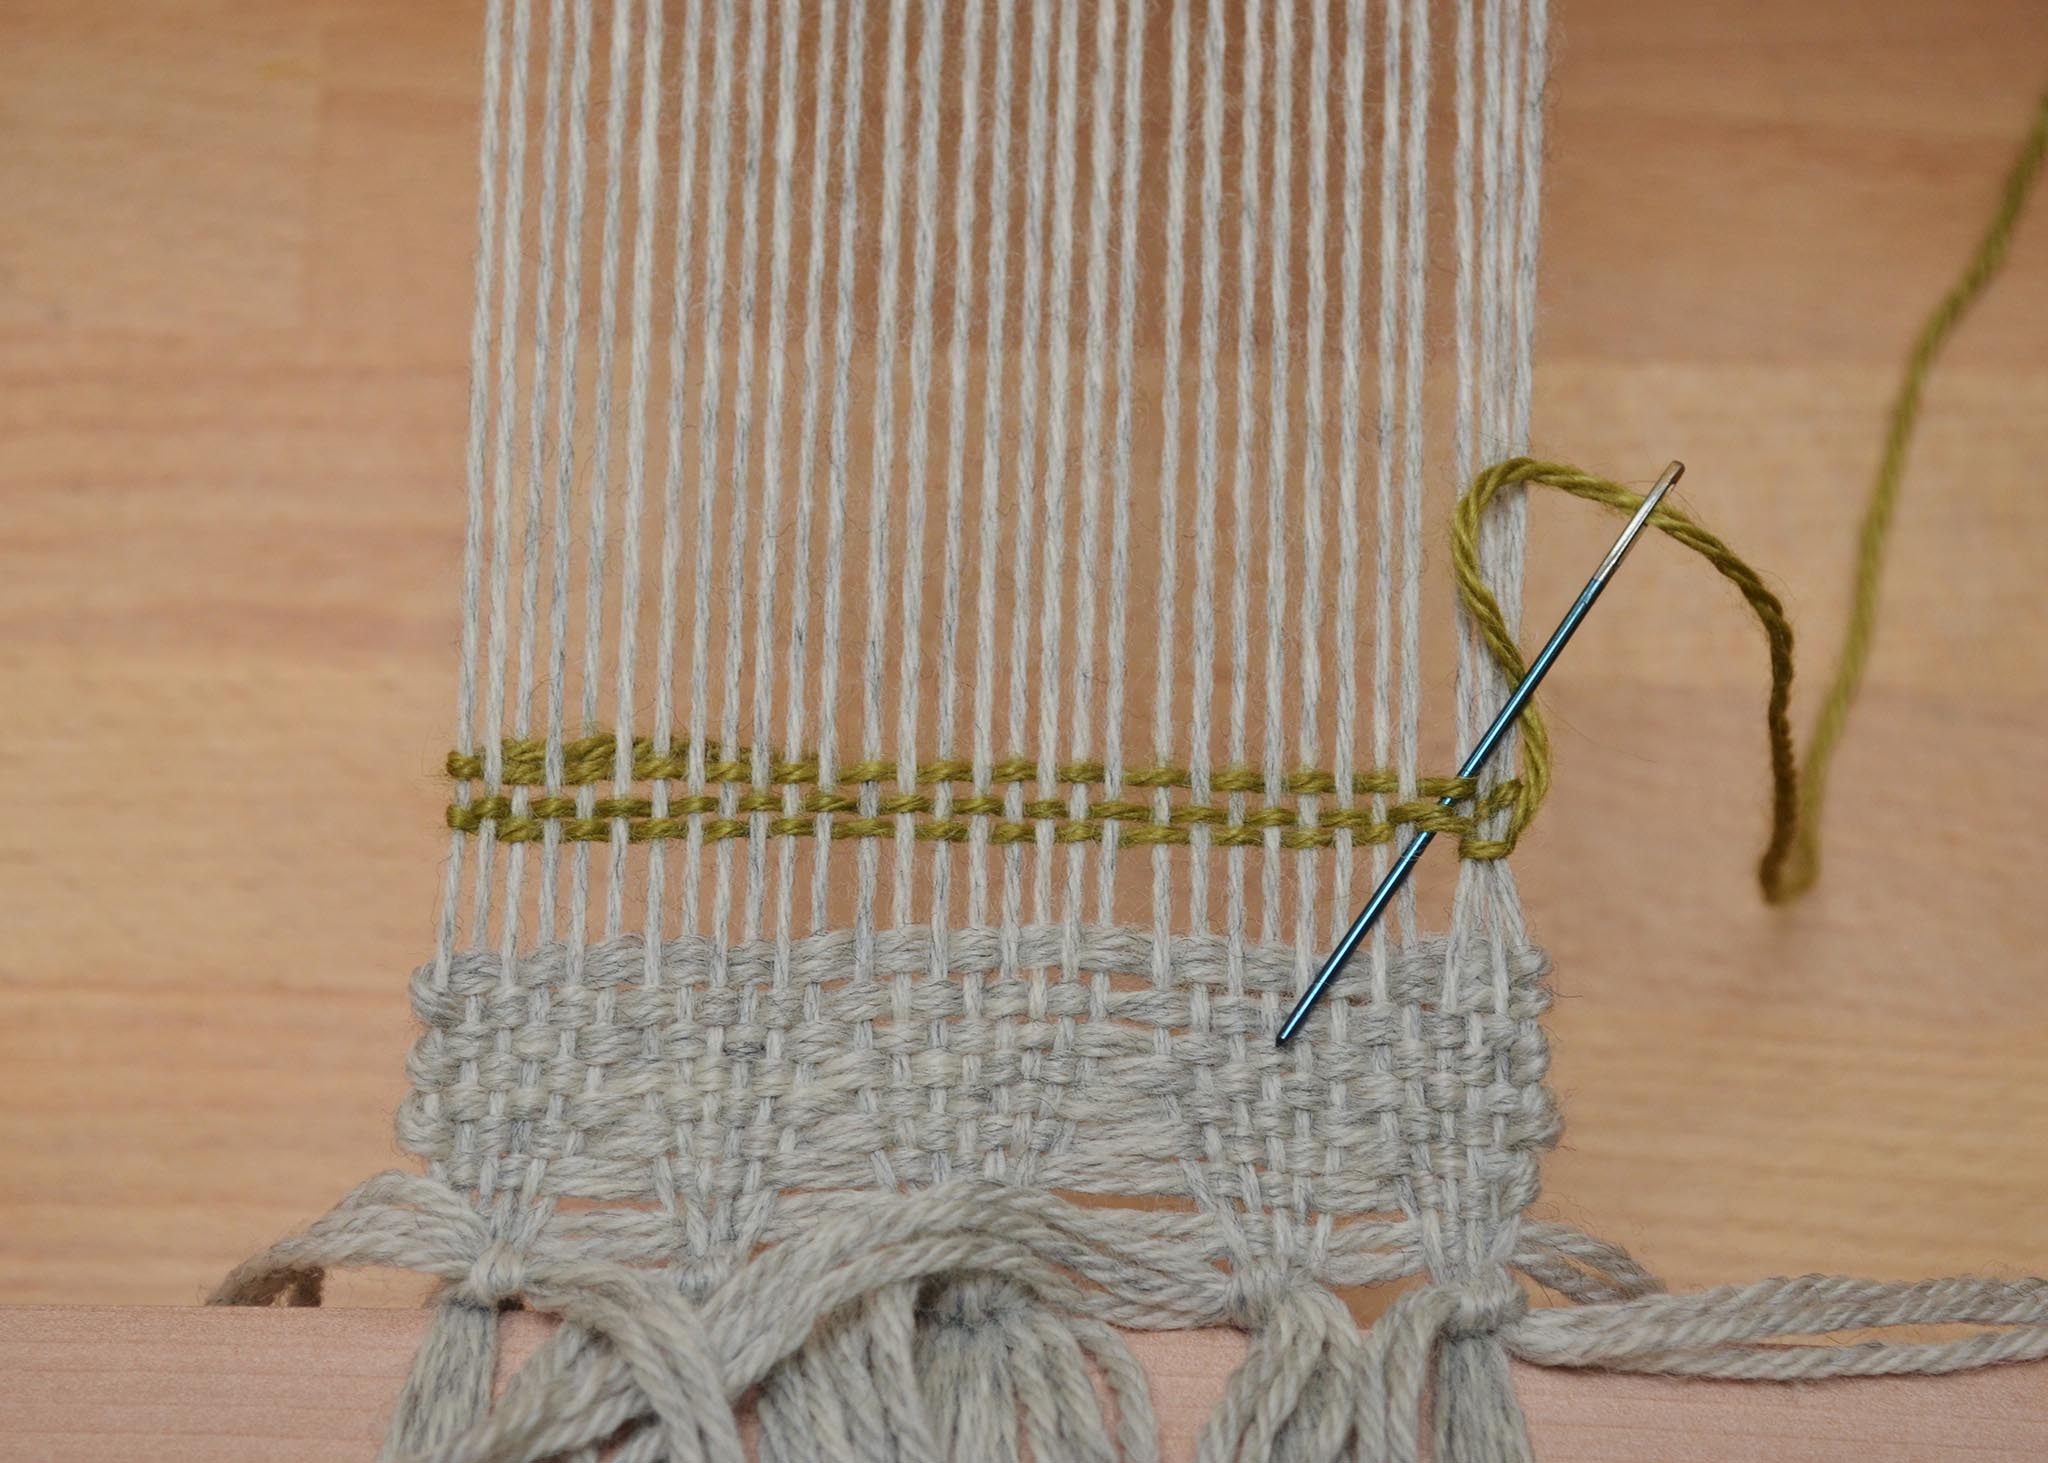
Moving to the left, your needle passes behind three weft picks in the space between the first group of stitched warp ends and the rest of your warp. The needle goes from the top to the bottom.

Pass your needle over the front of the next 4 ends and then down between those ends and the rest of the warp. Pass your needle behind these four ends and bring it to the front of your work in the space between this group and the last group. Pull tight. Note that you are not making a loop or a knot—just wrapping this bundle with your tail.

Repeat steps 3 and 4 across the length of your warp until you reach the final bundle of four.

You will secure the last group of warp threads by passing your needle through the loop created by the tail. Tuck the remaining yarn into your warp with your next pick of weft, and continue weaving!

When you reach the end of your weaving, you’ll want to finish with your yarn tail at the left selvedge edge—you’ll be traveling from left to right this time! Trim the yarn so that you have approximately 3 times the width of the fabric.

Thread the tail onto your darning or tapestry needle and bring it over 4 ends and then down between those ends and the rest of the warp. Pass your needle behind these 4 warp ends and through the loop that’s been created by the start of the tail. Pull tight.

Moving to the right, your needle passes behind three weft picks in the space between the first group of stitched warp ends and the rest of your warp. The needle goes from the bottom to the top.

Pass your needle over the front of the next 4 ends and then down between those ends and the rest of the warp. Pass your needle behind these four ends and bring it to the front of your work in the space between this group and the last group. Pull tight. Note that you are not making a loop or a knot—just wrapping this bundle with your tail.

Repeat steps 3 and 4 across the length of your warp until you reach the final bundle of four. You will secure the last group of warp threads by passing your needle through the loop created by the tail. To secure your hemstitch, needle weave the tail into your warp—I usually like to go to the selvedge and then return towards the middle of the cloth for a few picks.
Cut your project off - you’re all done!
Amanda Rataj is an artist and weaver living and working in Hamilton, Ontario. She studied at the Ontario College of Art and Design University and has developed her contemporary craft practice through research-based projects, artist residencies, professional exhibitions, and lectures. Her textile focus of the material and conceptual nature of vernacular, everyday objects used for the home and body; her work (and weaving patterns) are available at her website, and at Guildworks, or by commission.
