0

Shopping Cart

*continental US addresses only

Your Cart is Empty

Free Pattern to Weave these Silk Noil Neck Scarves

Silk Noil Neck Scarves Free Weaving Pattern

Flourish Silk Noil Neck Scarves

*Please note, we no longer carry this yarn, but you are welcome to use this pattern as inspiration!*

Soft, textured, and oh so simple. These elegant silk noil neck scarves by Emma Rhodes are designed to be woven on a floor loom OR a rigid heddle loom. Our Treenway 10/2 Undyed Silk Noiland Japanese Silk Noil yarns weave together beautifully and become even softer after washing and wearing. Whip up this silky duo over the weekend and wear them on your neck, wrist, hair, or purse. Below you will find all the instructions and materials needed to make a pair of neck ties to complement your wardrobe. 

Materials 

Warp: 1 skein of un-dyed Treenway 10/2 Silk Noil

Weft:2 cones of Japanese Silk Noil 

Silk Noil Neck Scarves Free Weaving Pattern

Silk Noil Neck Scarves Free Weaving Pattern

Project Notes

  • Tools required: 2-4 shaft loom or rigid heddle loom12 dent reedboat shuttle or stick shuttle
  • Structure: Plain weave 
  • EPI: 12 
  • Width at reed: 4.5"
  • Warp ends: 56
  • Warp length: ~113" (3.1 yards) 
  • Length measured under tension at loom: Each scarf should measure about 40-43" under tension. Make sure to weave about 1/2" - 1" with scrap yarn at the beginning and end of each scarf for spacing. 
  • Finished dimensions: 2 neck scarves that measure approximately 4" wide by 36-40" long (depending on personal preference) 
  • Finishing details: Machine stitched frayed edge (or hand stitched if you prefer)
  • Care instructions: Hand wash cold with a mild detergent and air dry, press and steam as needed


Pattern & Sewing Instructions 

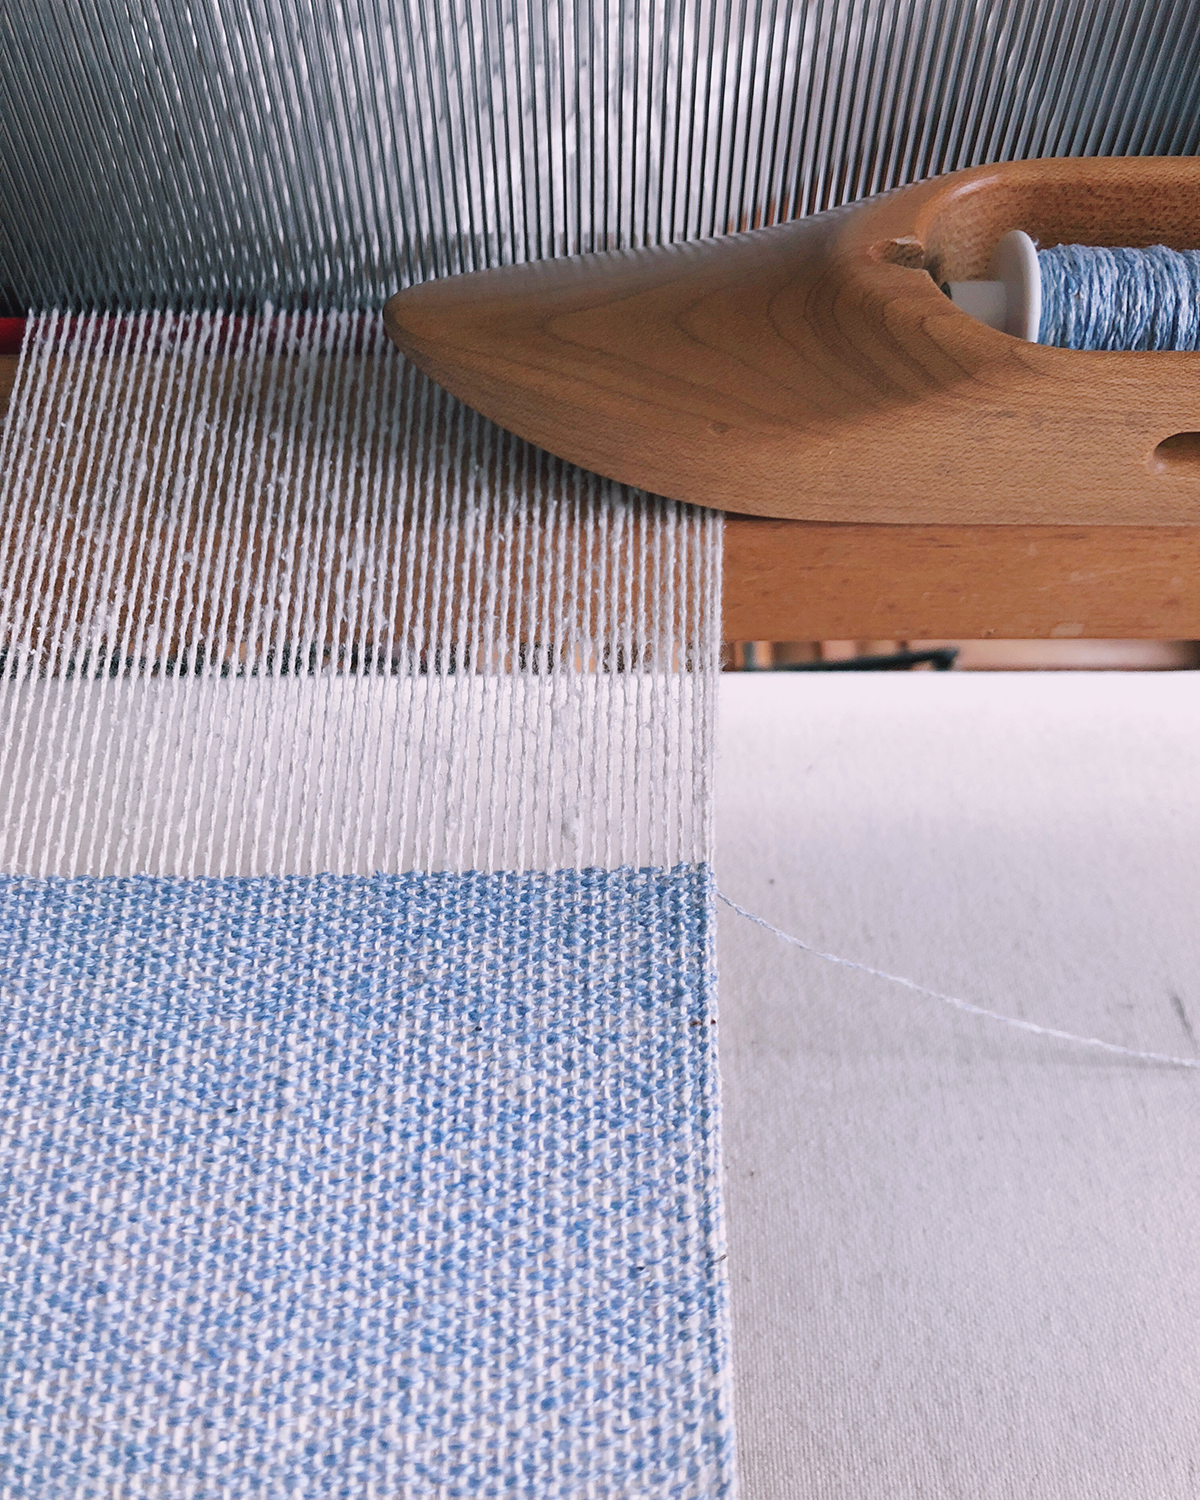
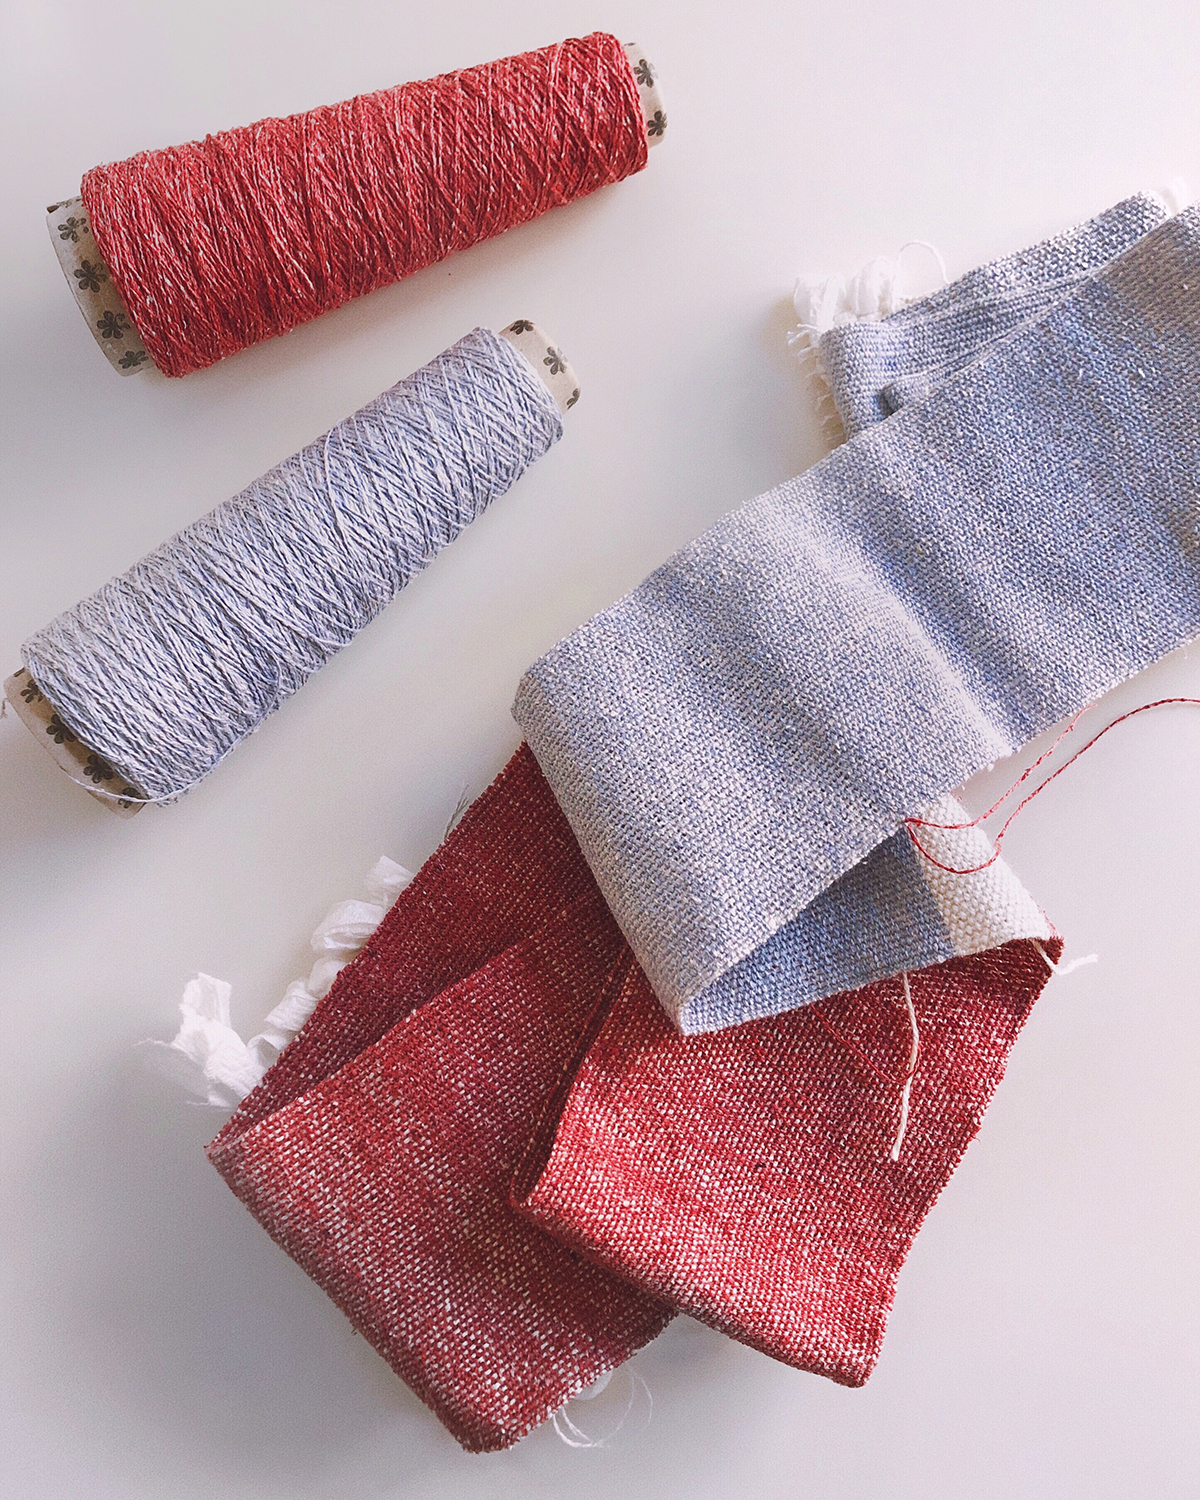
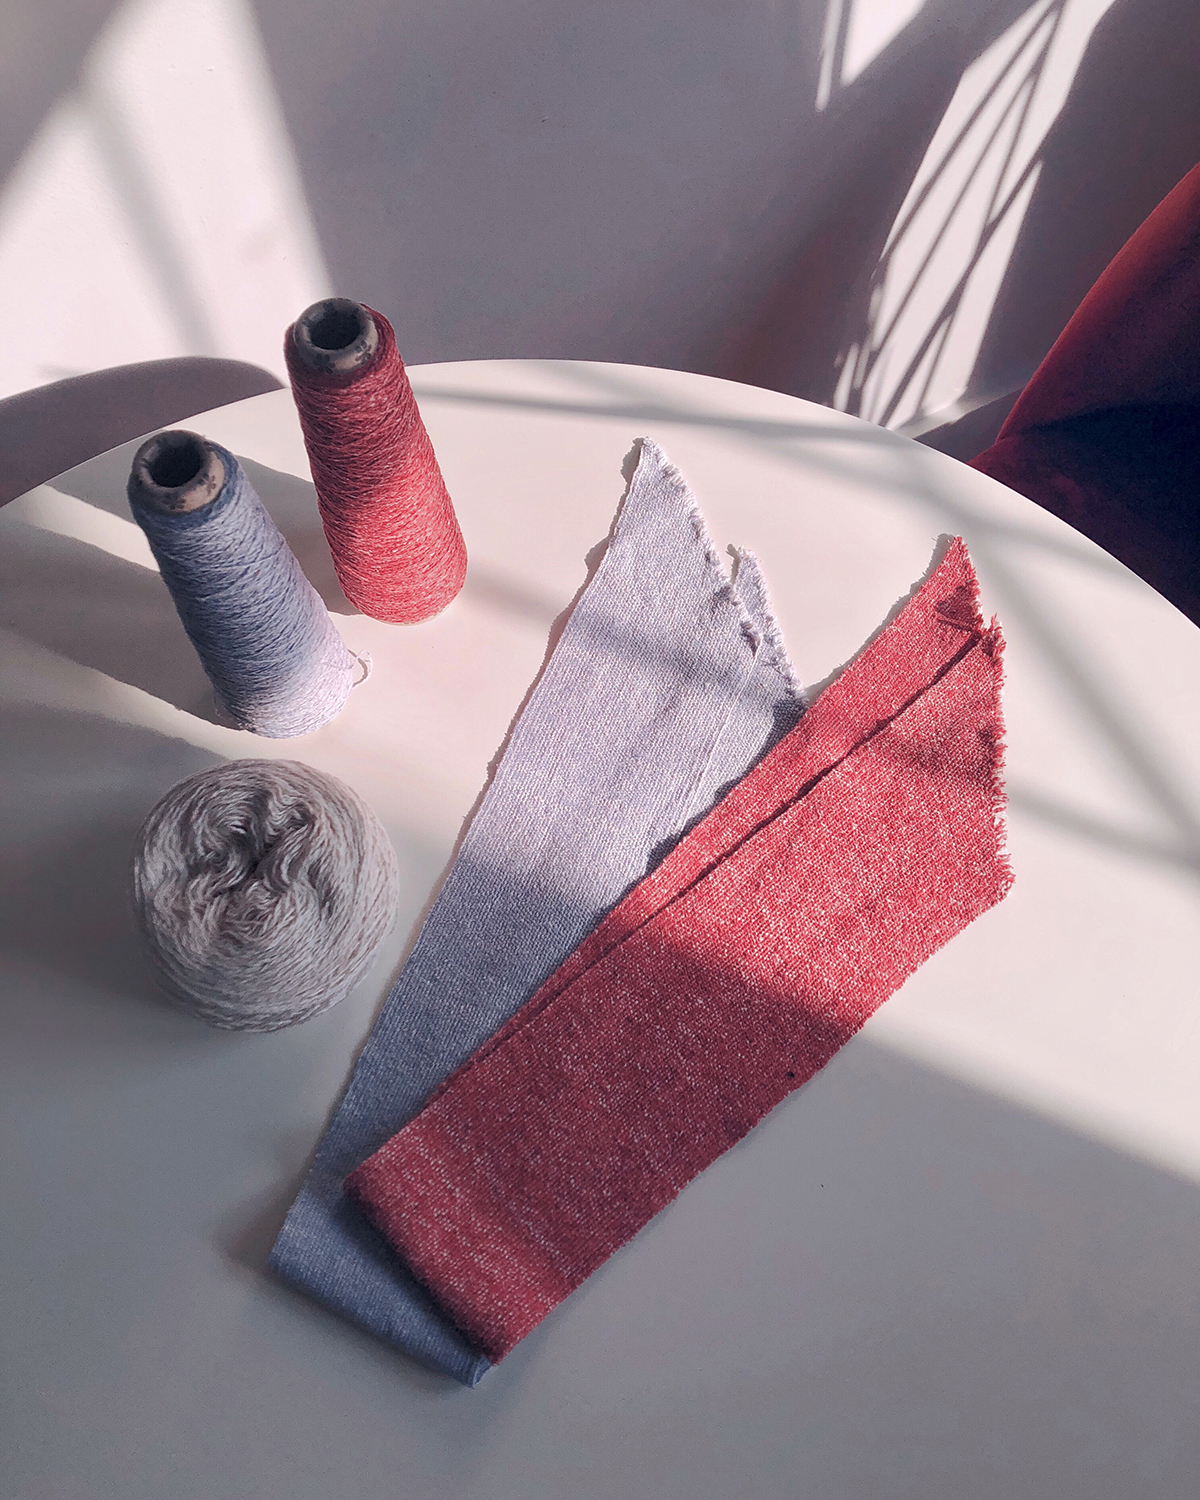
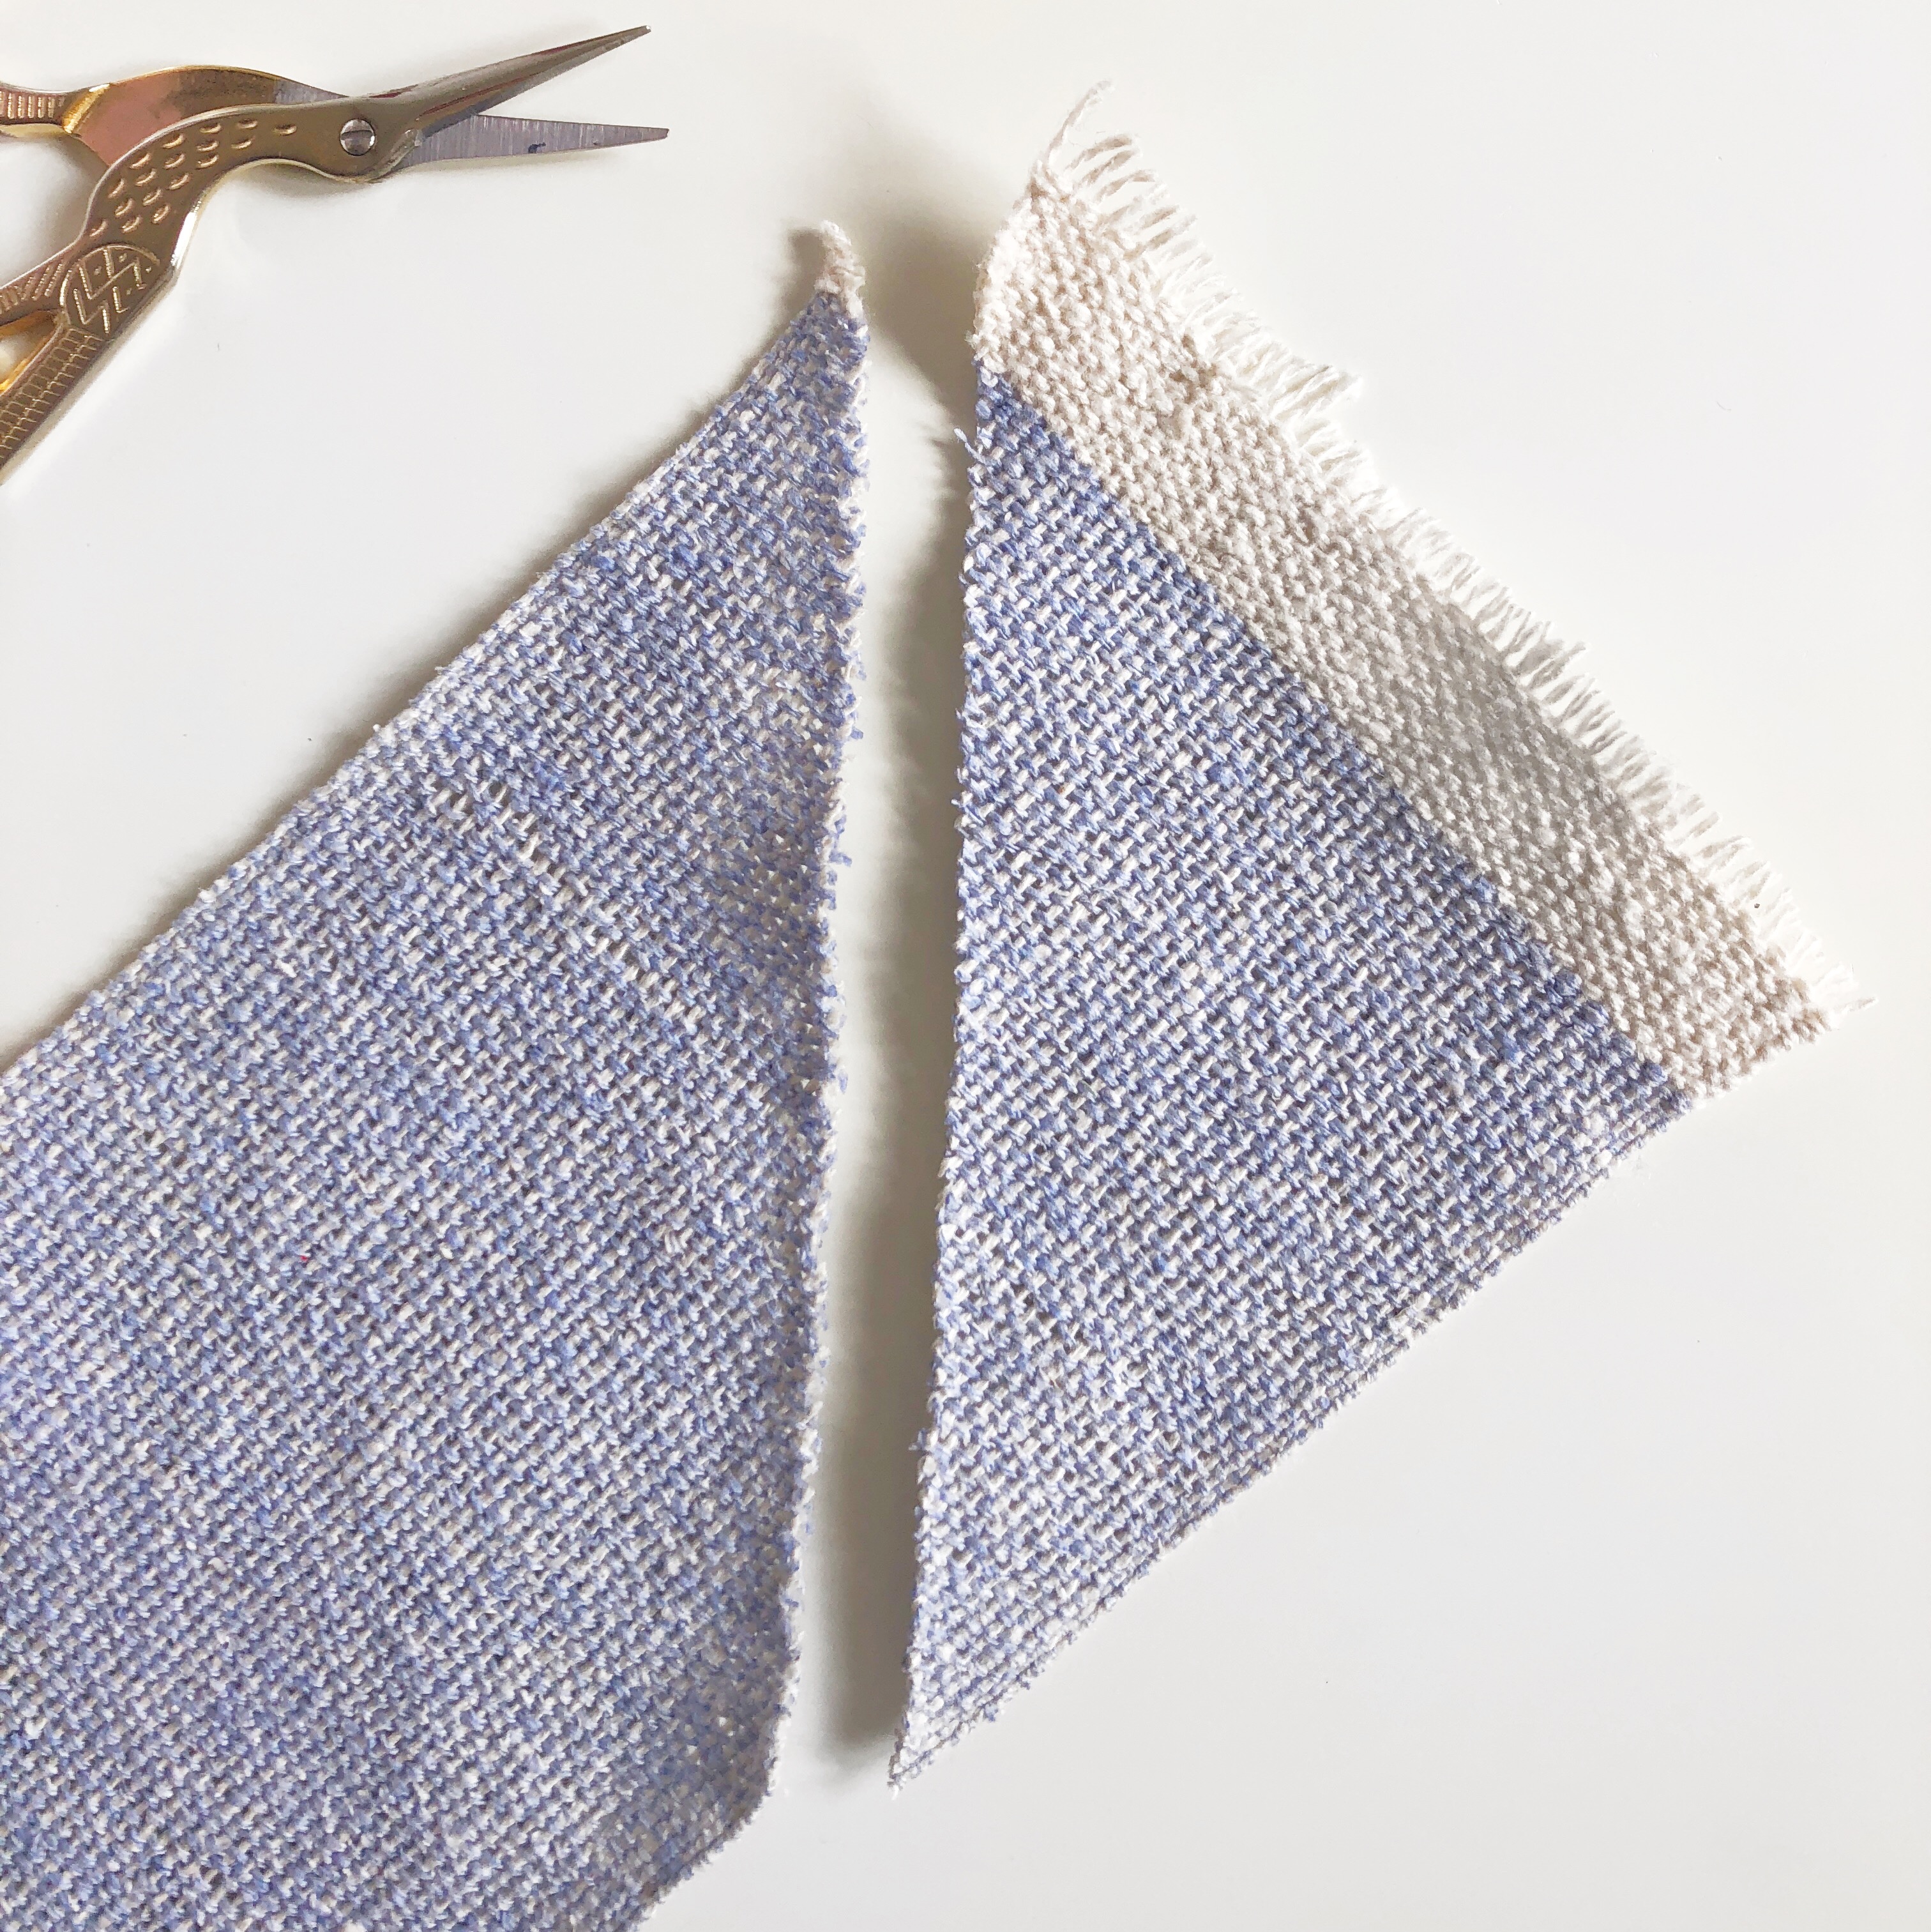
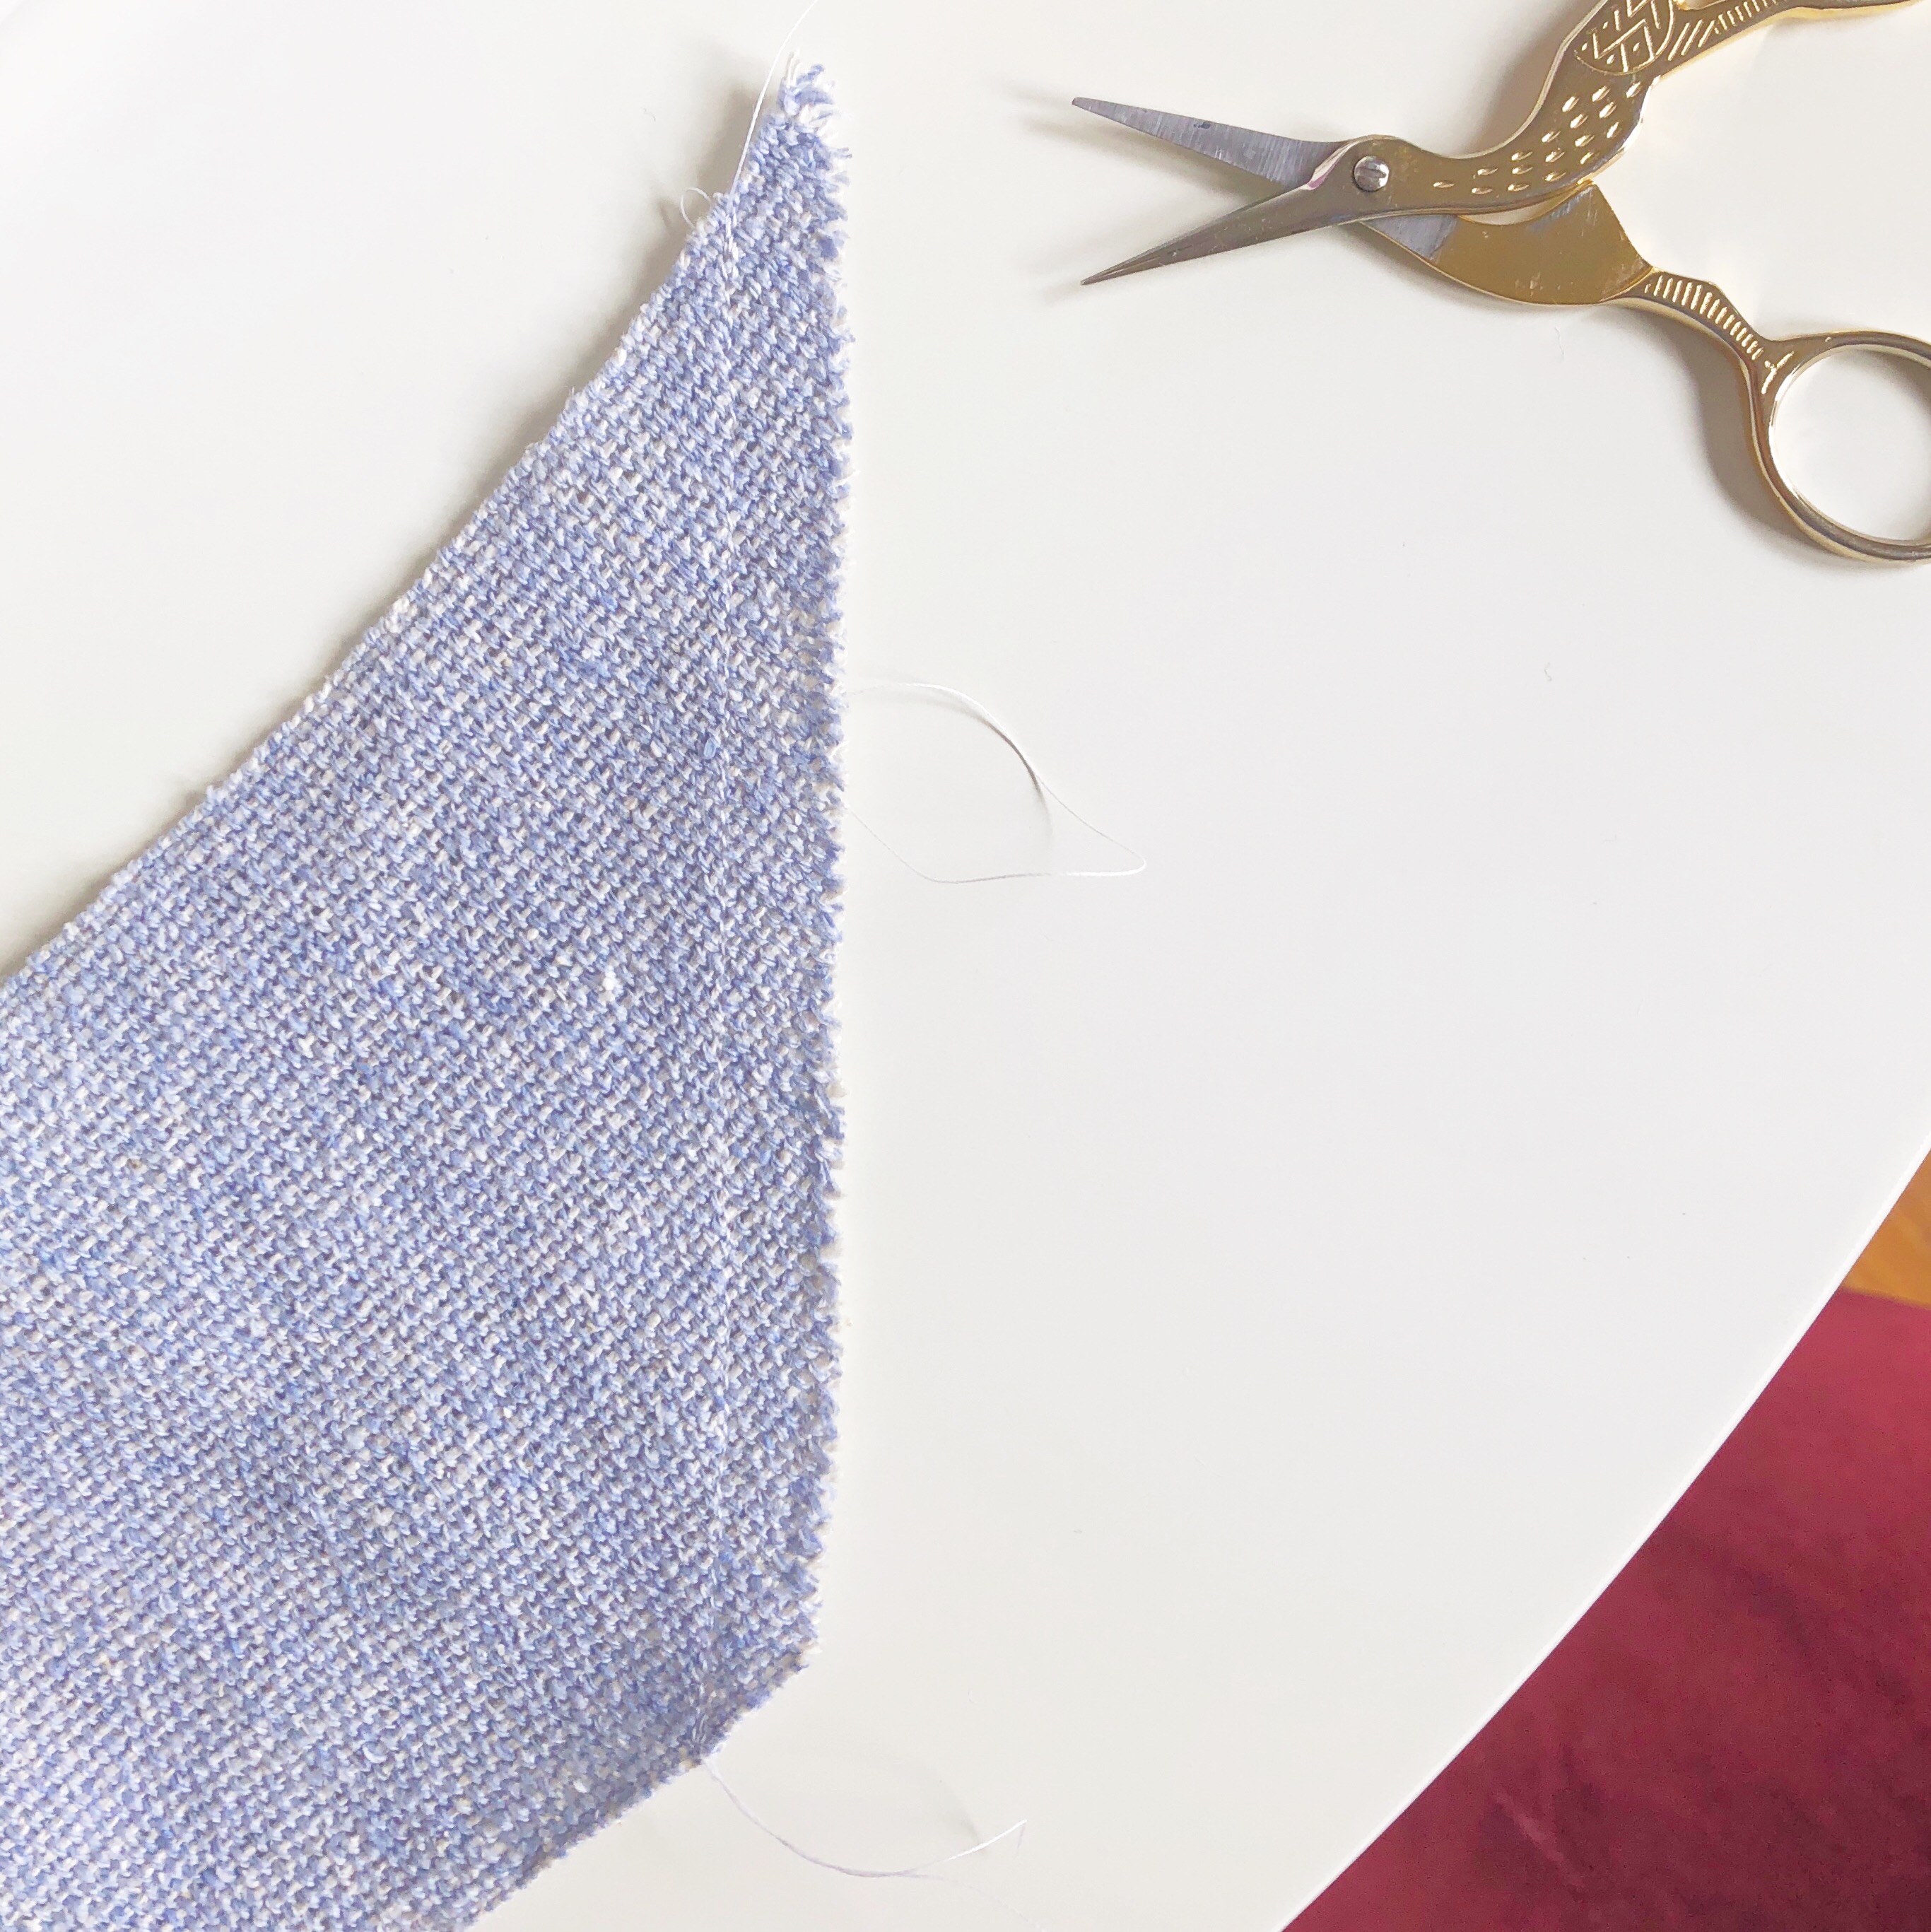
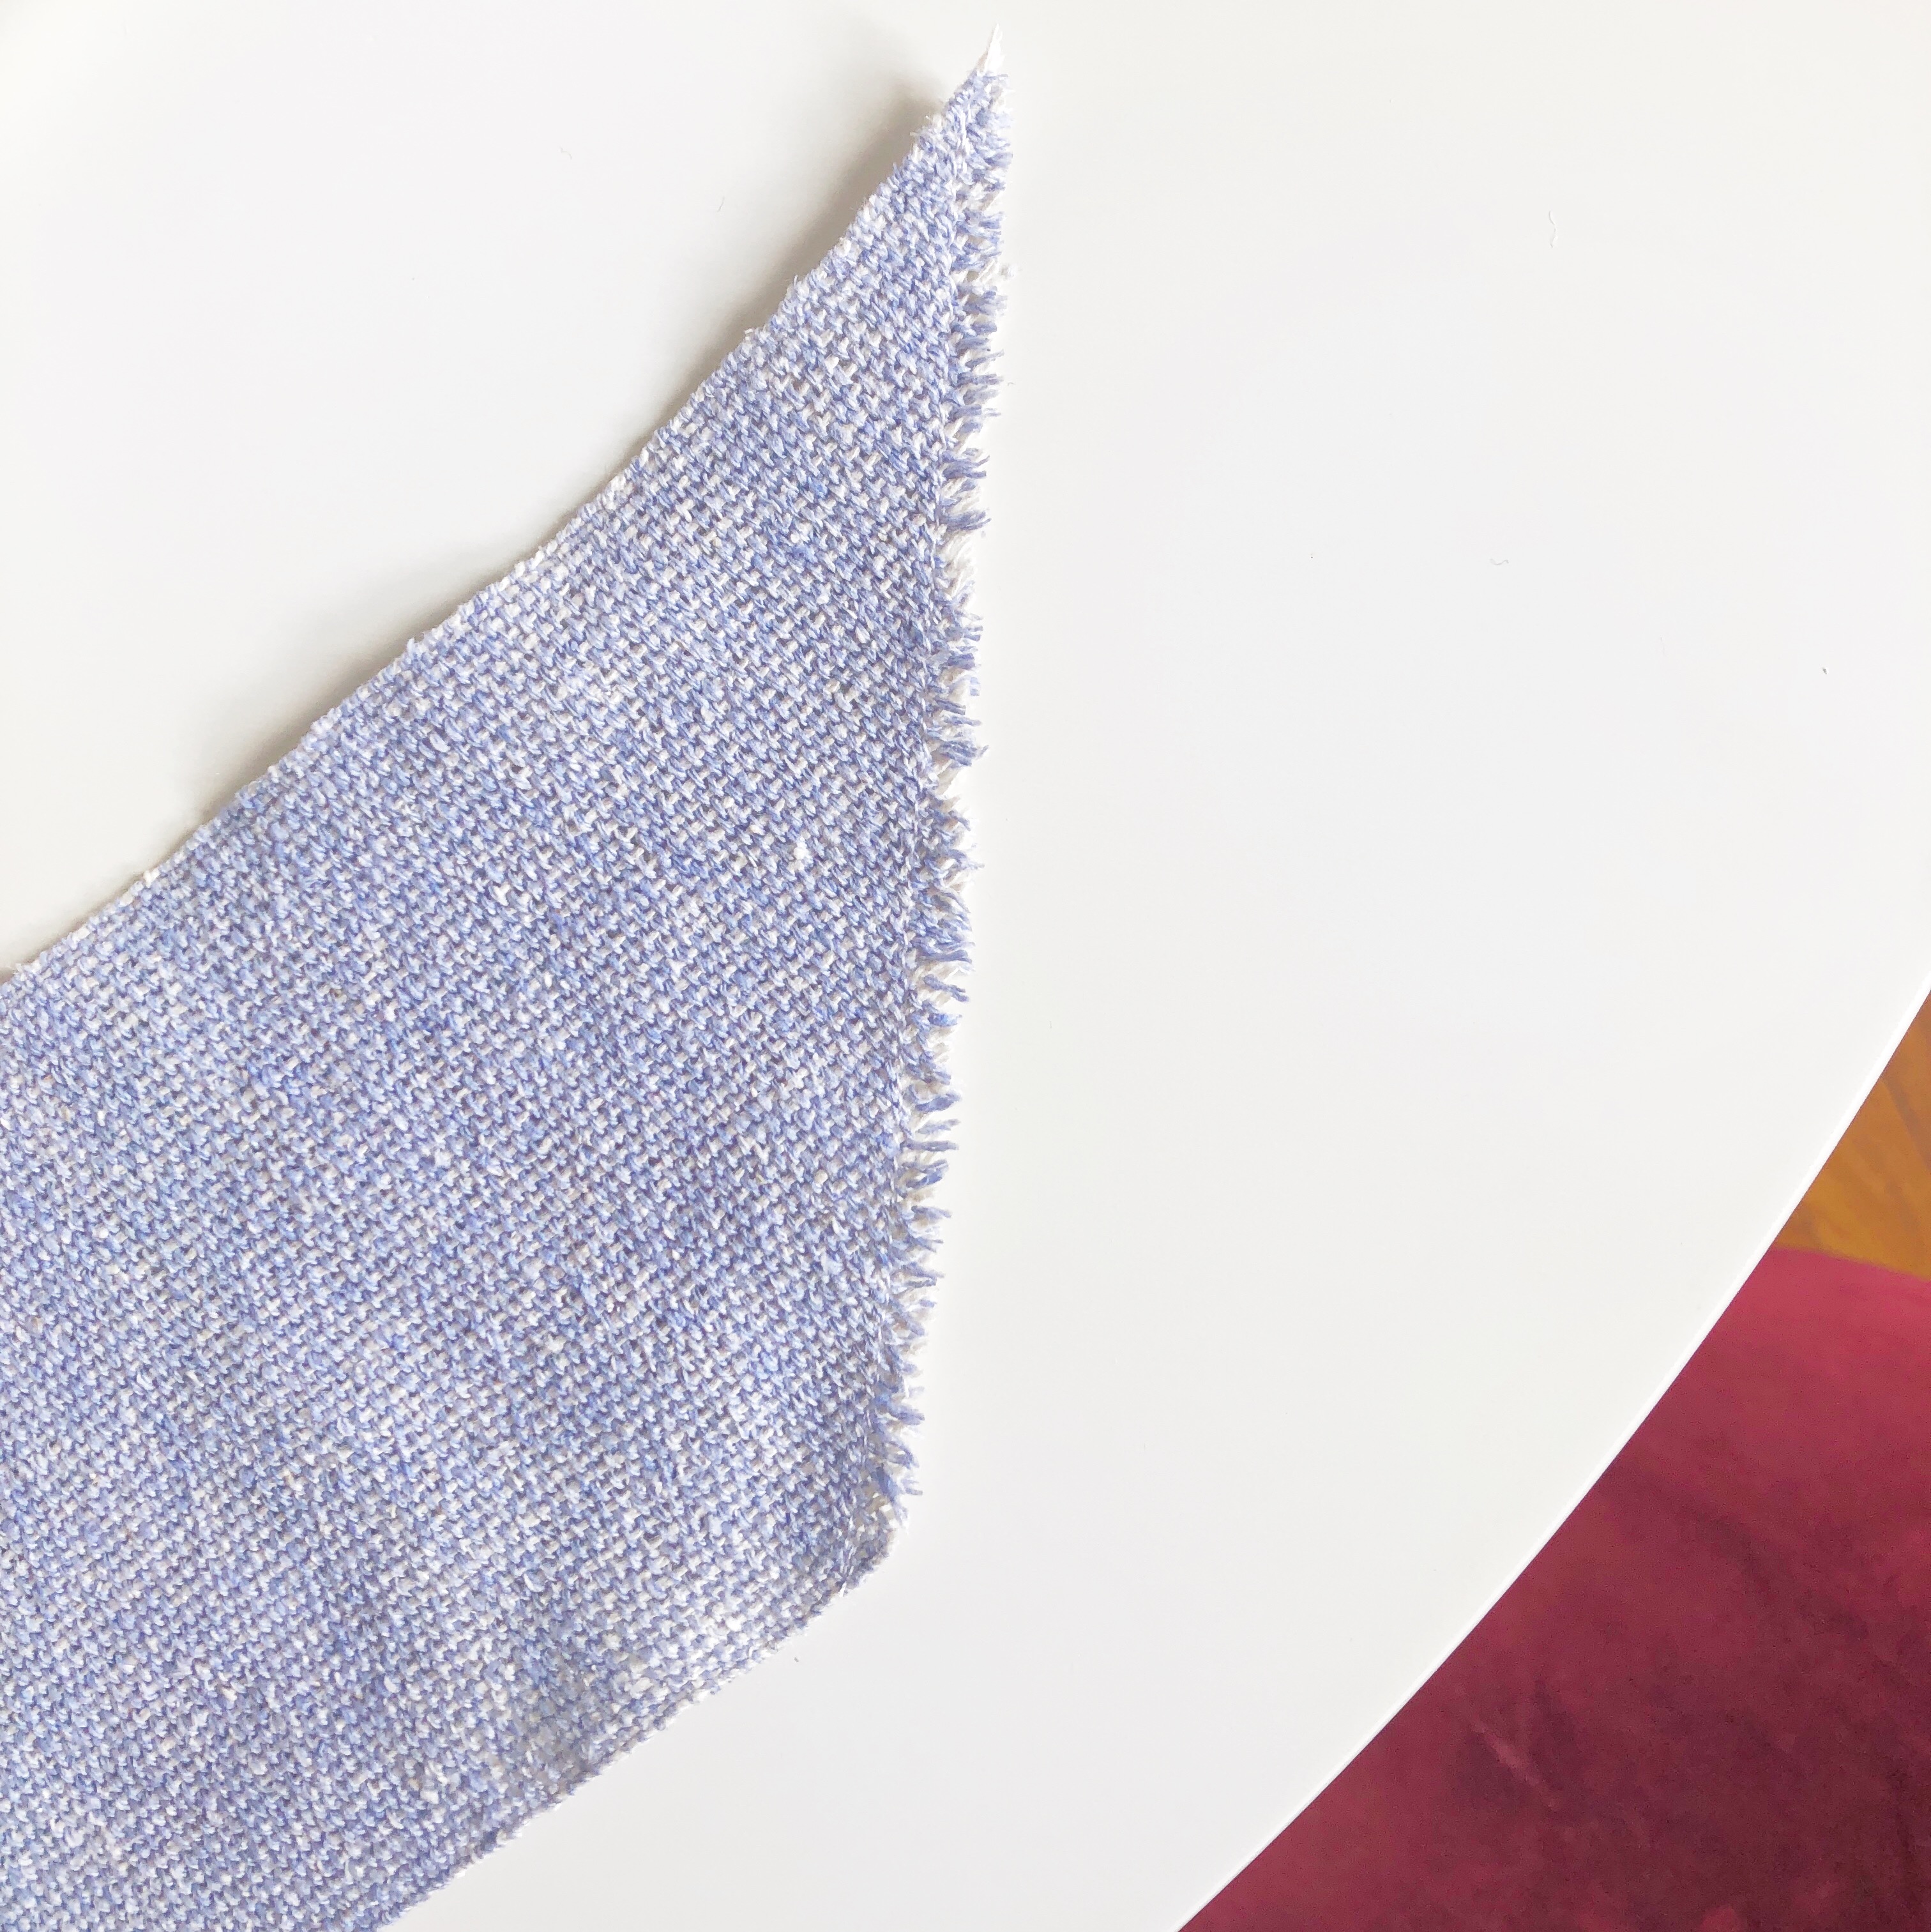
Emma writes: "Weave each scarf to about 43" under tension (and make sure to weave with scrap yarn for 1/2"-1" at the beginning and the end of each). I chose to make each a solid color but you can also experiment with stripes and color blocks. Once you have finished weaving follow these finishing instructions and reference the photos below:

  1. Cut scarves apart in the center of the scrap yarn spacer. 
  2. Fold one end over on the diagonal so that it creates a triangle. I lined up the edge of the scarf with the selvedge to make sure it was square. 
  3. Cut along the crease to create a raw diagonal edge.
  4. Set up your sewing machine for a fairly small stitch. I set mine to about a 4 on the dial and adjusted the tension accordingly. Do some tests on the scraps of fabric cut from the ends of the scarf.
  5. Line up your raw edge on the 3/8" hem line on your sewing machine. Straight stitch down the diagonal edge. Use back stitch at the beginning and end to secure the stitches. 
  6. Trim the raw edge a bit closer to the stitched line and fluff the fringe a bit to bring out the frayed edge. The stitches are hardly noticeable. Repeat on each edge for both scarves. 
  7. Wash and air dry your scarves. Press with a warm iron and lots of steam. I found that washing and ironing made a huge difference in the softness of the fabric."
Silk Noil Neck Scarves Free Weaving Pattern
     
Silk Noil Neck Scarves Free Weaving Pattern
   
Silk Noil Neck Scarves Free Weaving Pattern
 
Silk Noil Neck Scarves Free Weaving Pattern
                 
Silk Noil Neck Scarves Free Weaving Pattern
                
Silk Noil Neck Scarves Free Weaving Pattern