
Shopping Cart
*continental US addresses only


Weave-Along ~ Arianna Funk will be hosting a Weave-Along for this project the week of September 14-18, 2020. You can find the photos and videos here on our website or via Arianna's Instagram.
Weaving rya in the Scandinavian way involves making rows of knots on a tabby base. These pillows take their inspiration from “slitrya”, which were blankets mimicking animal skins. Unlike rya woven for the floor, slitrya are lighter, more flexible, and sometimes more sparsely knotted. These pillows use linen and cotton--Duet andMallo--instead of the more traditional wool. Rya really lets beautiful yarns shine. This is a great introduction to rya, since you don’t change colors across a row and can concentrate on getting the knotting down.
You can download an updated version of this pattern and purchase a kit here.
Designed byArianna Funk for GIST: Yarn & Fiber
We recommend this project for intermediate-advanced weavers with some sewing experience.
Need some help getting started? Check out Resources for Beginner and Intermediate Weavers.


1.Warp the loom with a total of 340 ends, 76" long, using Mallo in Frost. Thread for plain weave (see draft below). Center for a weaving width of 22.5" and sley 1-2 ends per dent in a 10 dent reed, 1-1-1-2 ends per dent in a 12 dent reed, or 1 end per dent in a 15 dent reed.
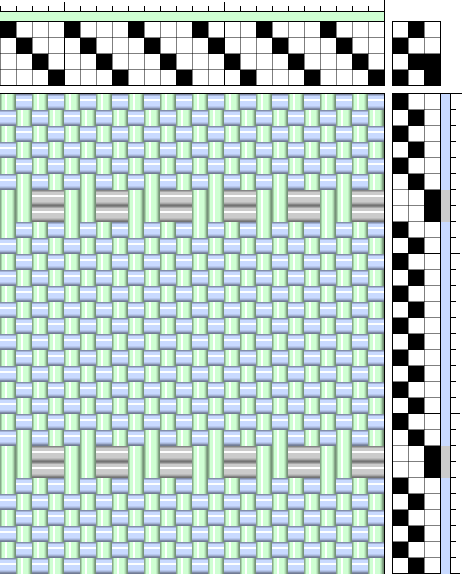
Weaving rya in the Scandinavian way involves making rows of knots on a tabby base. The first tabby section is longer than the final tabby section to compensate for the rya pile that hangs down about 1". (Not shown in the draft above). You want the tabby sections to appear relatively similar when you sew it into a pillow.
2. To prepare the pile yarn, I make butterflies that will be used to create a continuous chain of loops and knots that will be cut into pile afterward. This method ensures that there is minimal yarn waste. For this pattern I made one or two butterflies at a time of the combination I was currently using.
Follow the chart below to track what color combination you will be using in a given row. I usually wind a few yarn cakes of the colors I’ll be using in the butterflies so that I can pull two threads of the same color at the same time. Each butterfly should be about two arm spans long--I know we all have different arm lengths but it’s a good general, organic measurement. Once you’ve measured out all six threads, wind them in a figure 8 around your thumb and forefinger, leaving a tail at the beginning and fastening the end by winding it very firmly around the cross of the figure eight and tucking the end in. You’ll make your rya knots with the tail and pull from there. You can always re-tie the butterfly as you knot along; I usually have to remake mine many times. The butterfly not only keeps the threads neat and is easy to pull from, but the wound middle makes for an easy little package to pass around the warp ends as you make your knots.
3. Weave 4” tabby. For Pillow A you will use Mallo in Steel as the tabby weft. For Pillow B you will use Duet in Chambray as the tabby weft.The knotted section is about 17 inches long, and consists of 21 rows of knots. Each knotted row is followed by a tabby block that “locks” the rya knots in place, with the exception of the last row, which is followed by the final tabby section.
4. To make the knots, depress and hold treadle 3, which has a basketweave tie-up and makes it easier to knot around pairs of warp ends. You’ll start from the left hand selvedge and skip over 28 ends before starting your knots so that you have a wide tabby selvedge.
In this chart I’ve written the rows out as you weave them in the loom, but technically it doesn’t really matter if you read the chart from top to bottom or bottom to top--the design is mirrored once you get to the middle. Duet in Chambray is marked C and Mallo in Steel is marked S. As an example, rya row 21 on Pillow A will use 5 strands of Chambray and 1 strand of Steel in the butterfly.

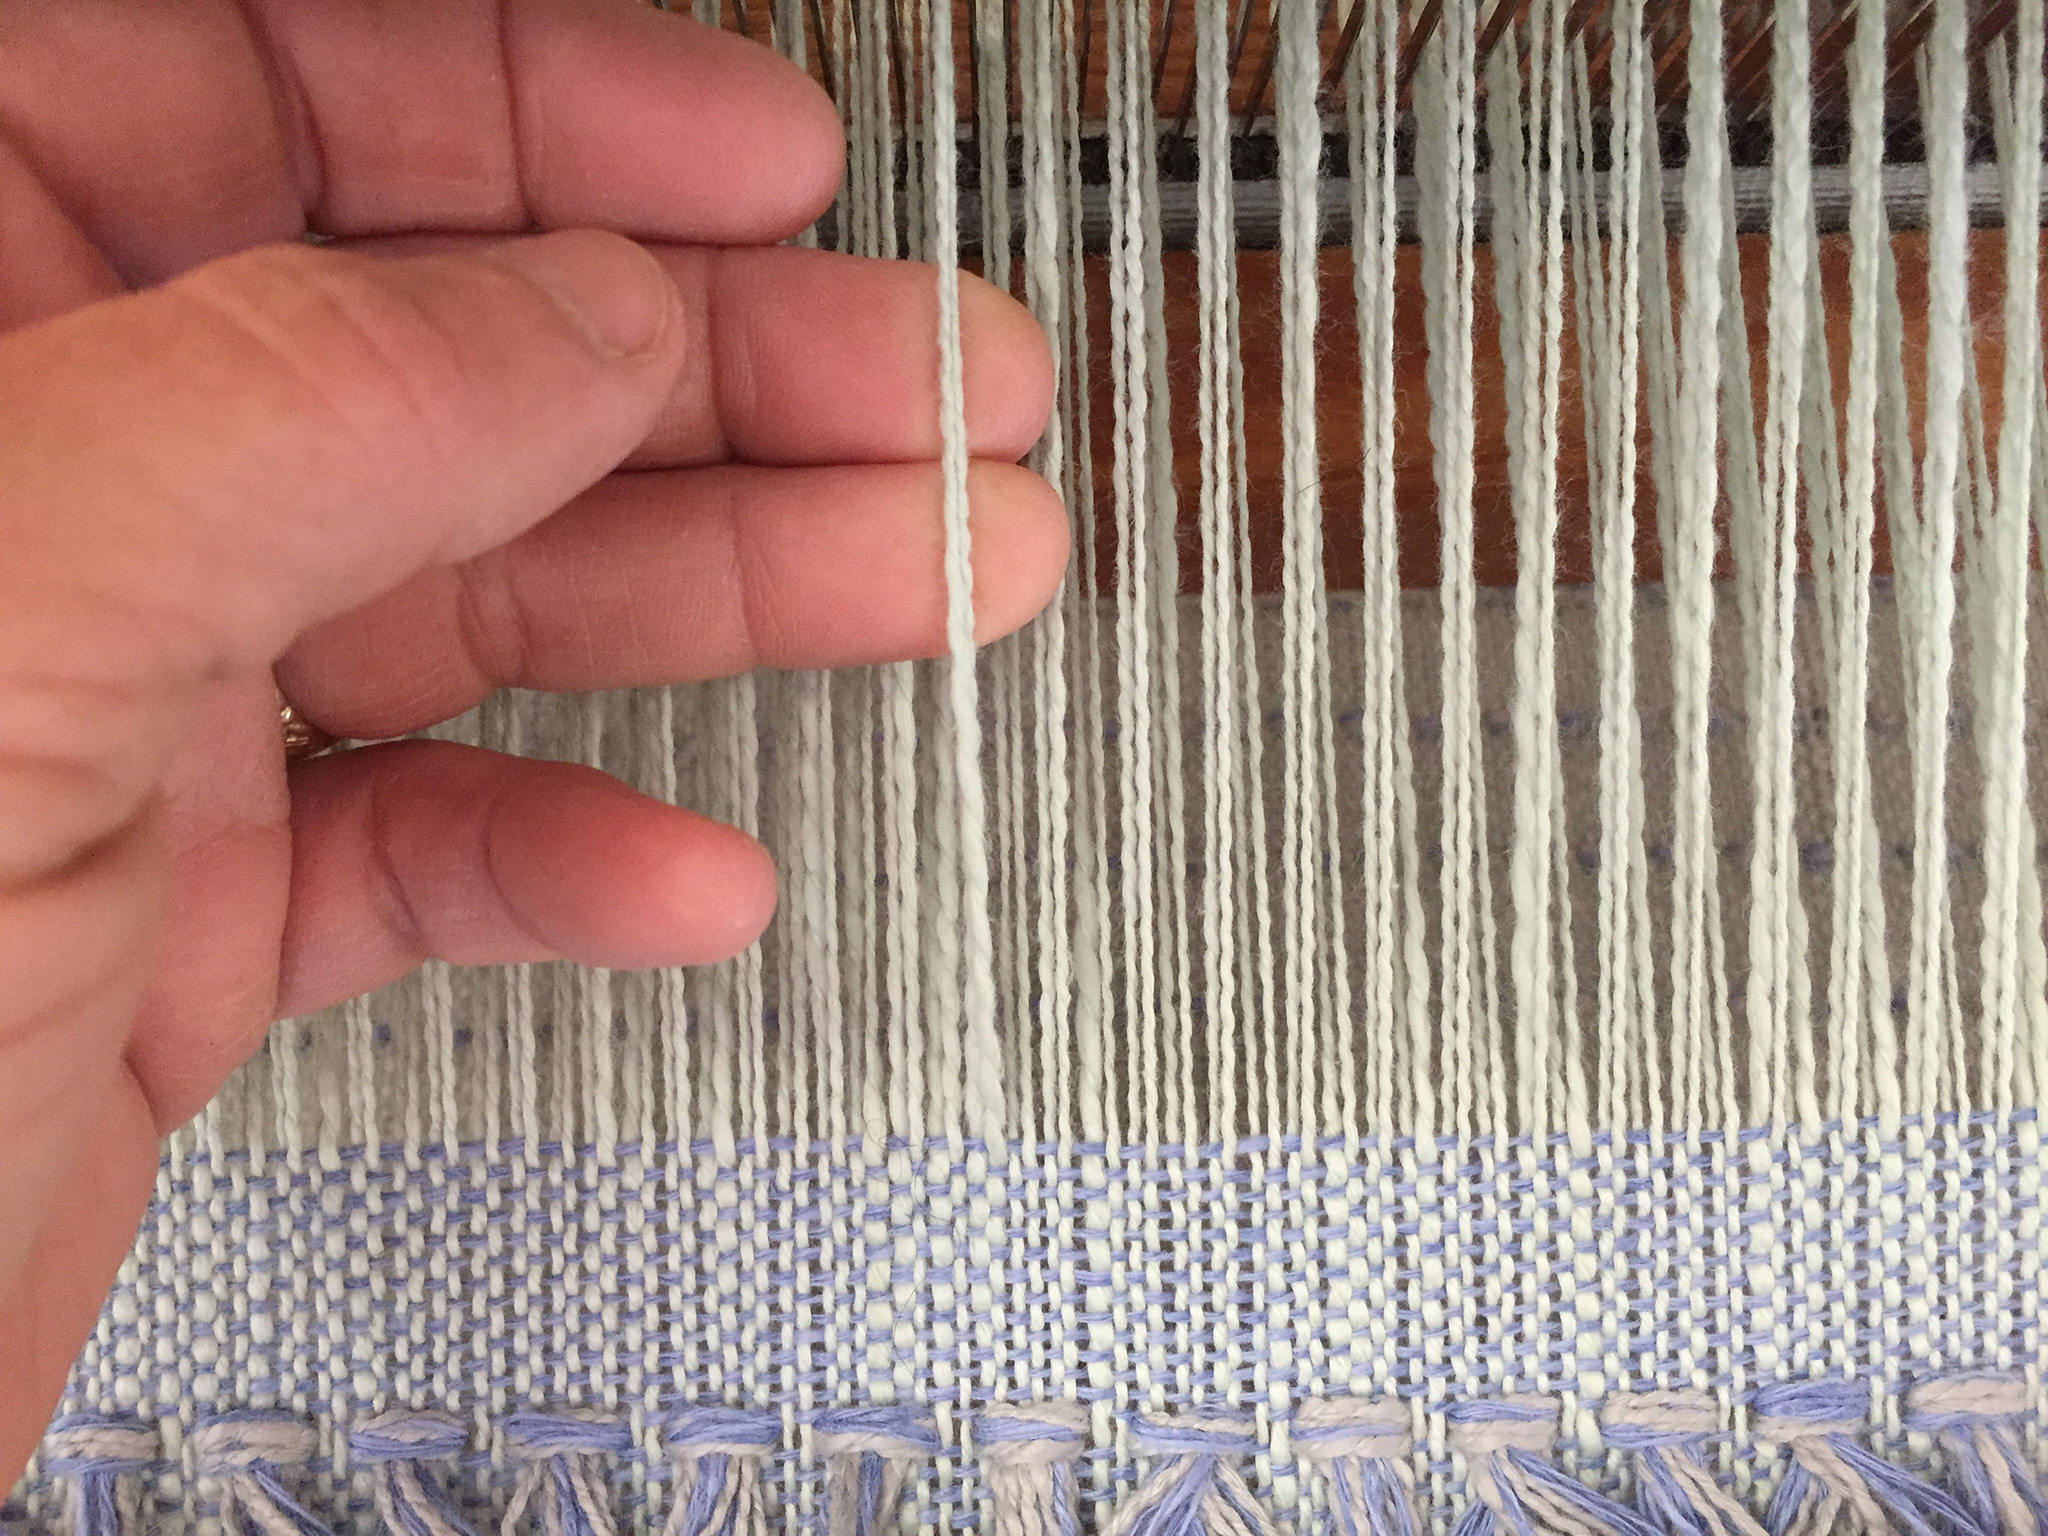
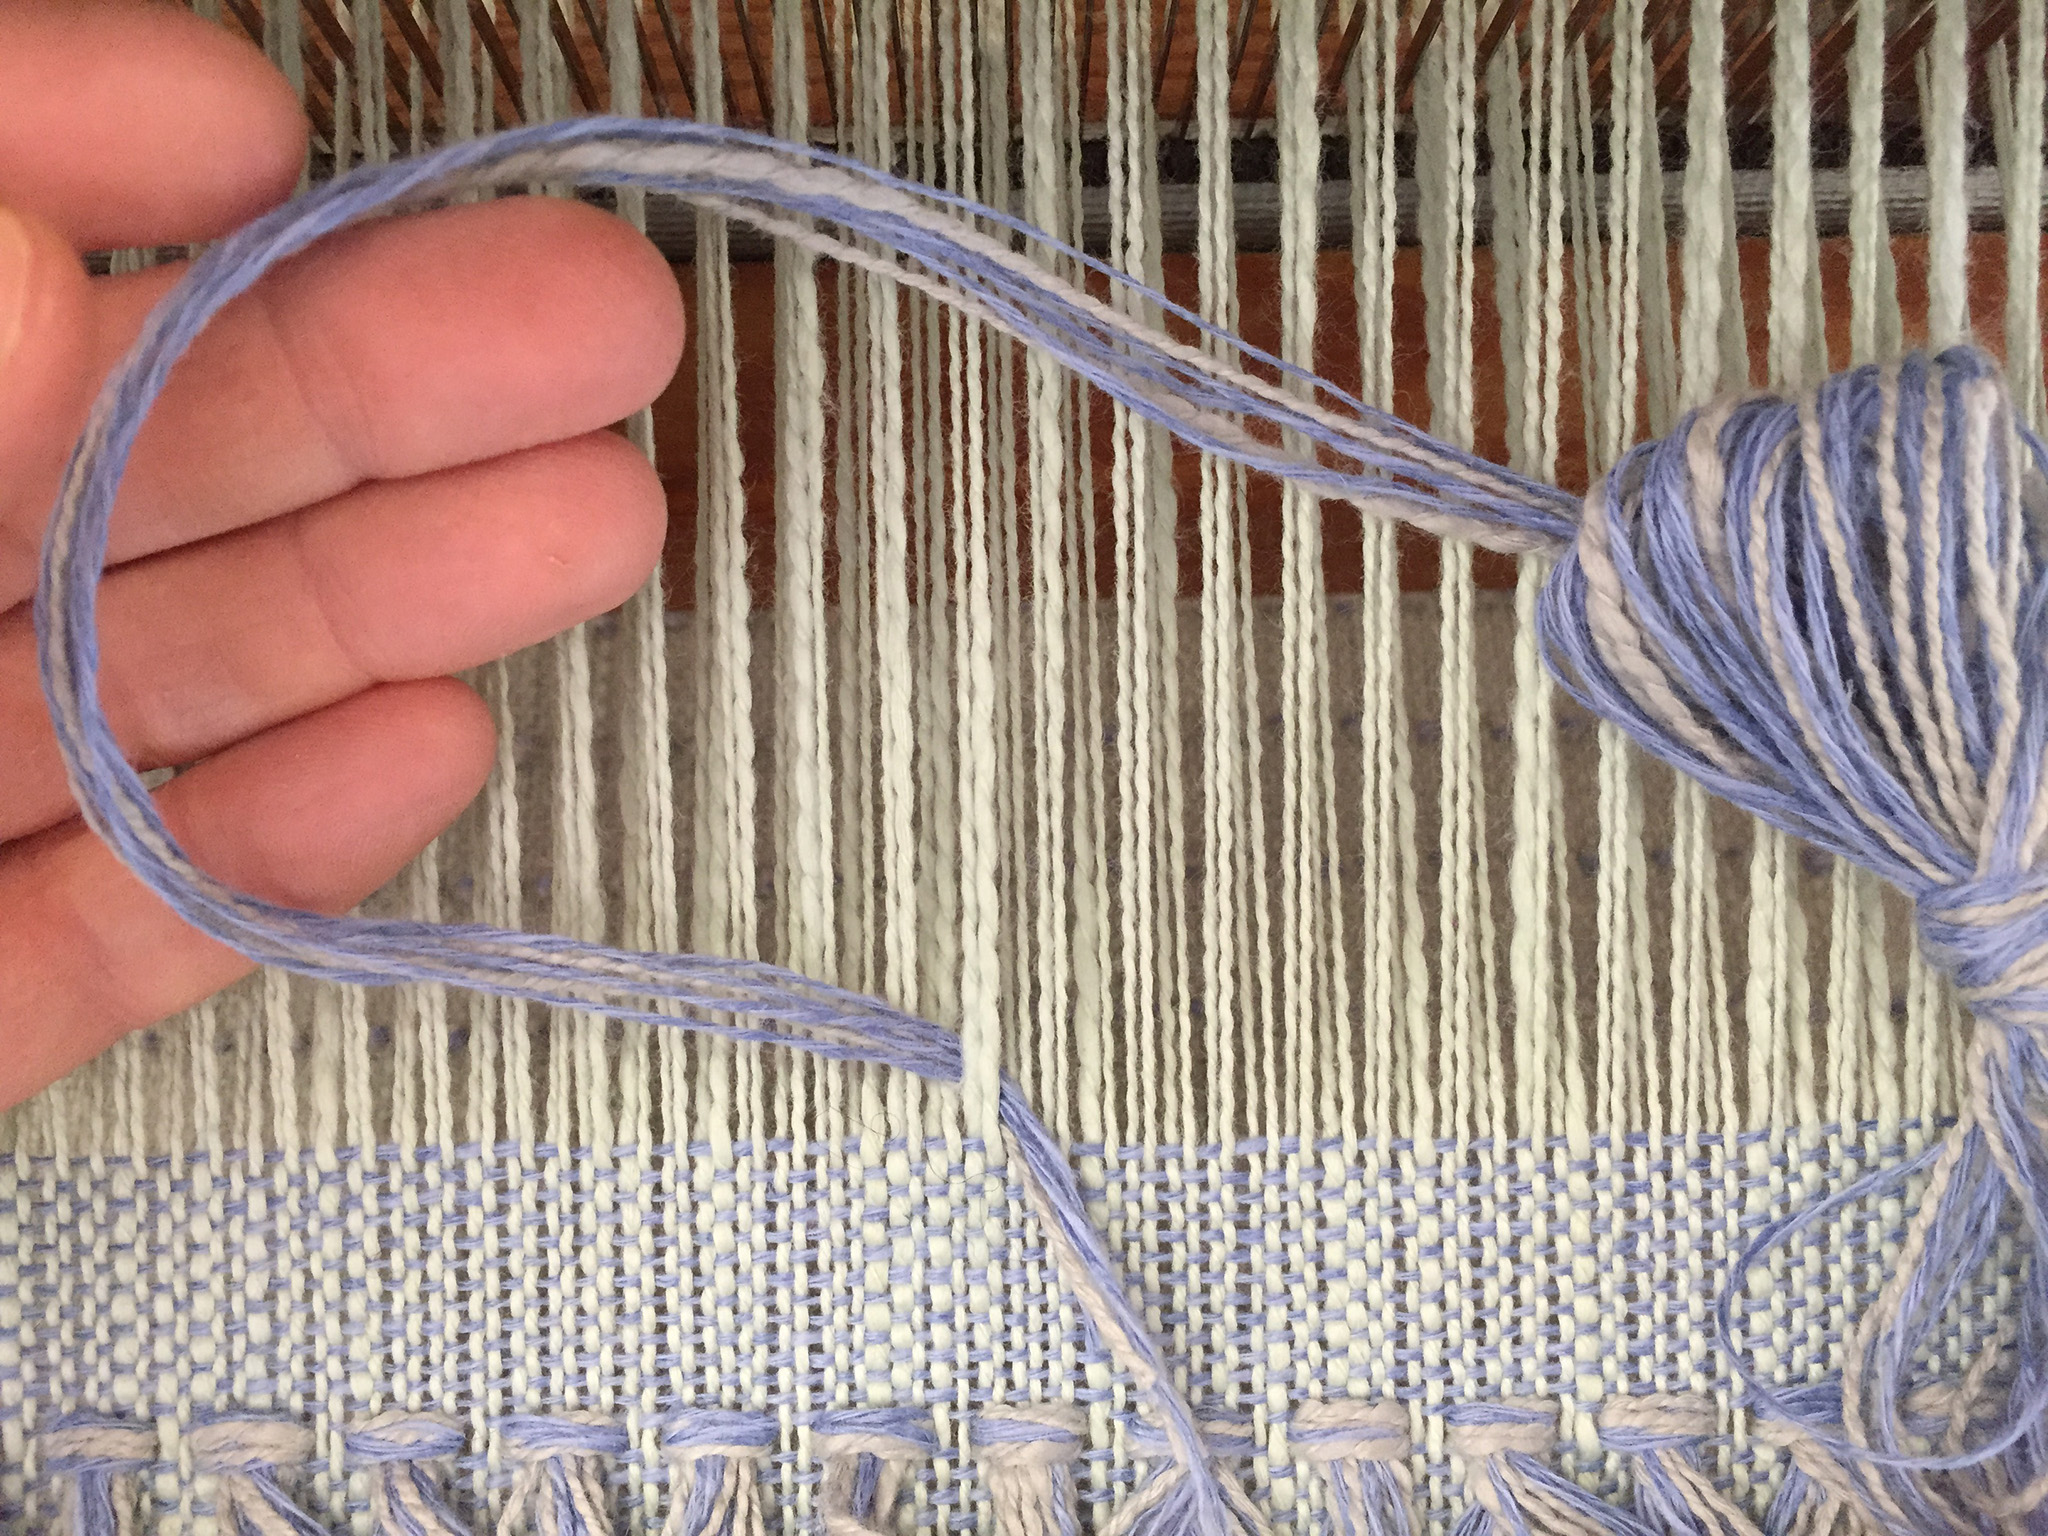
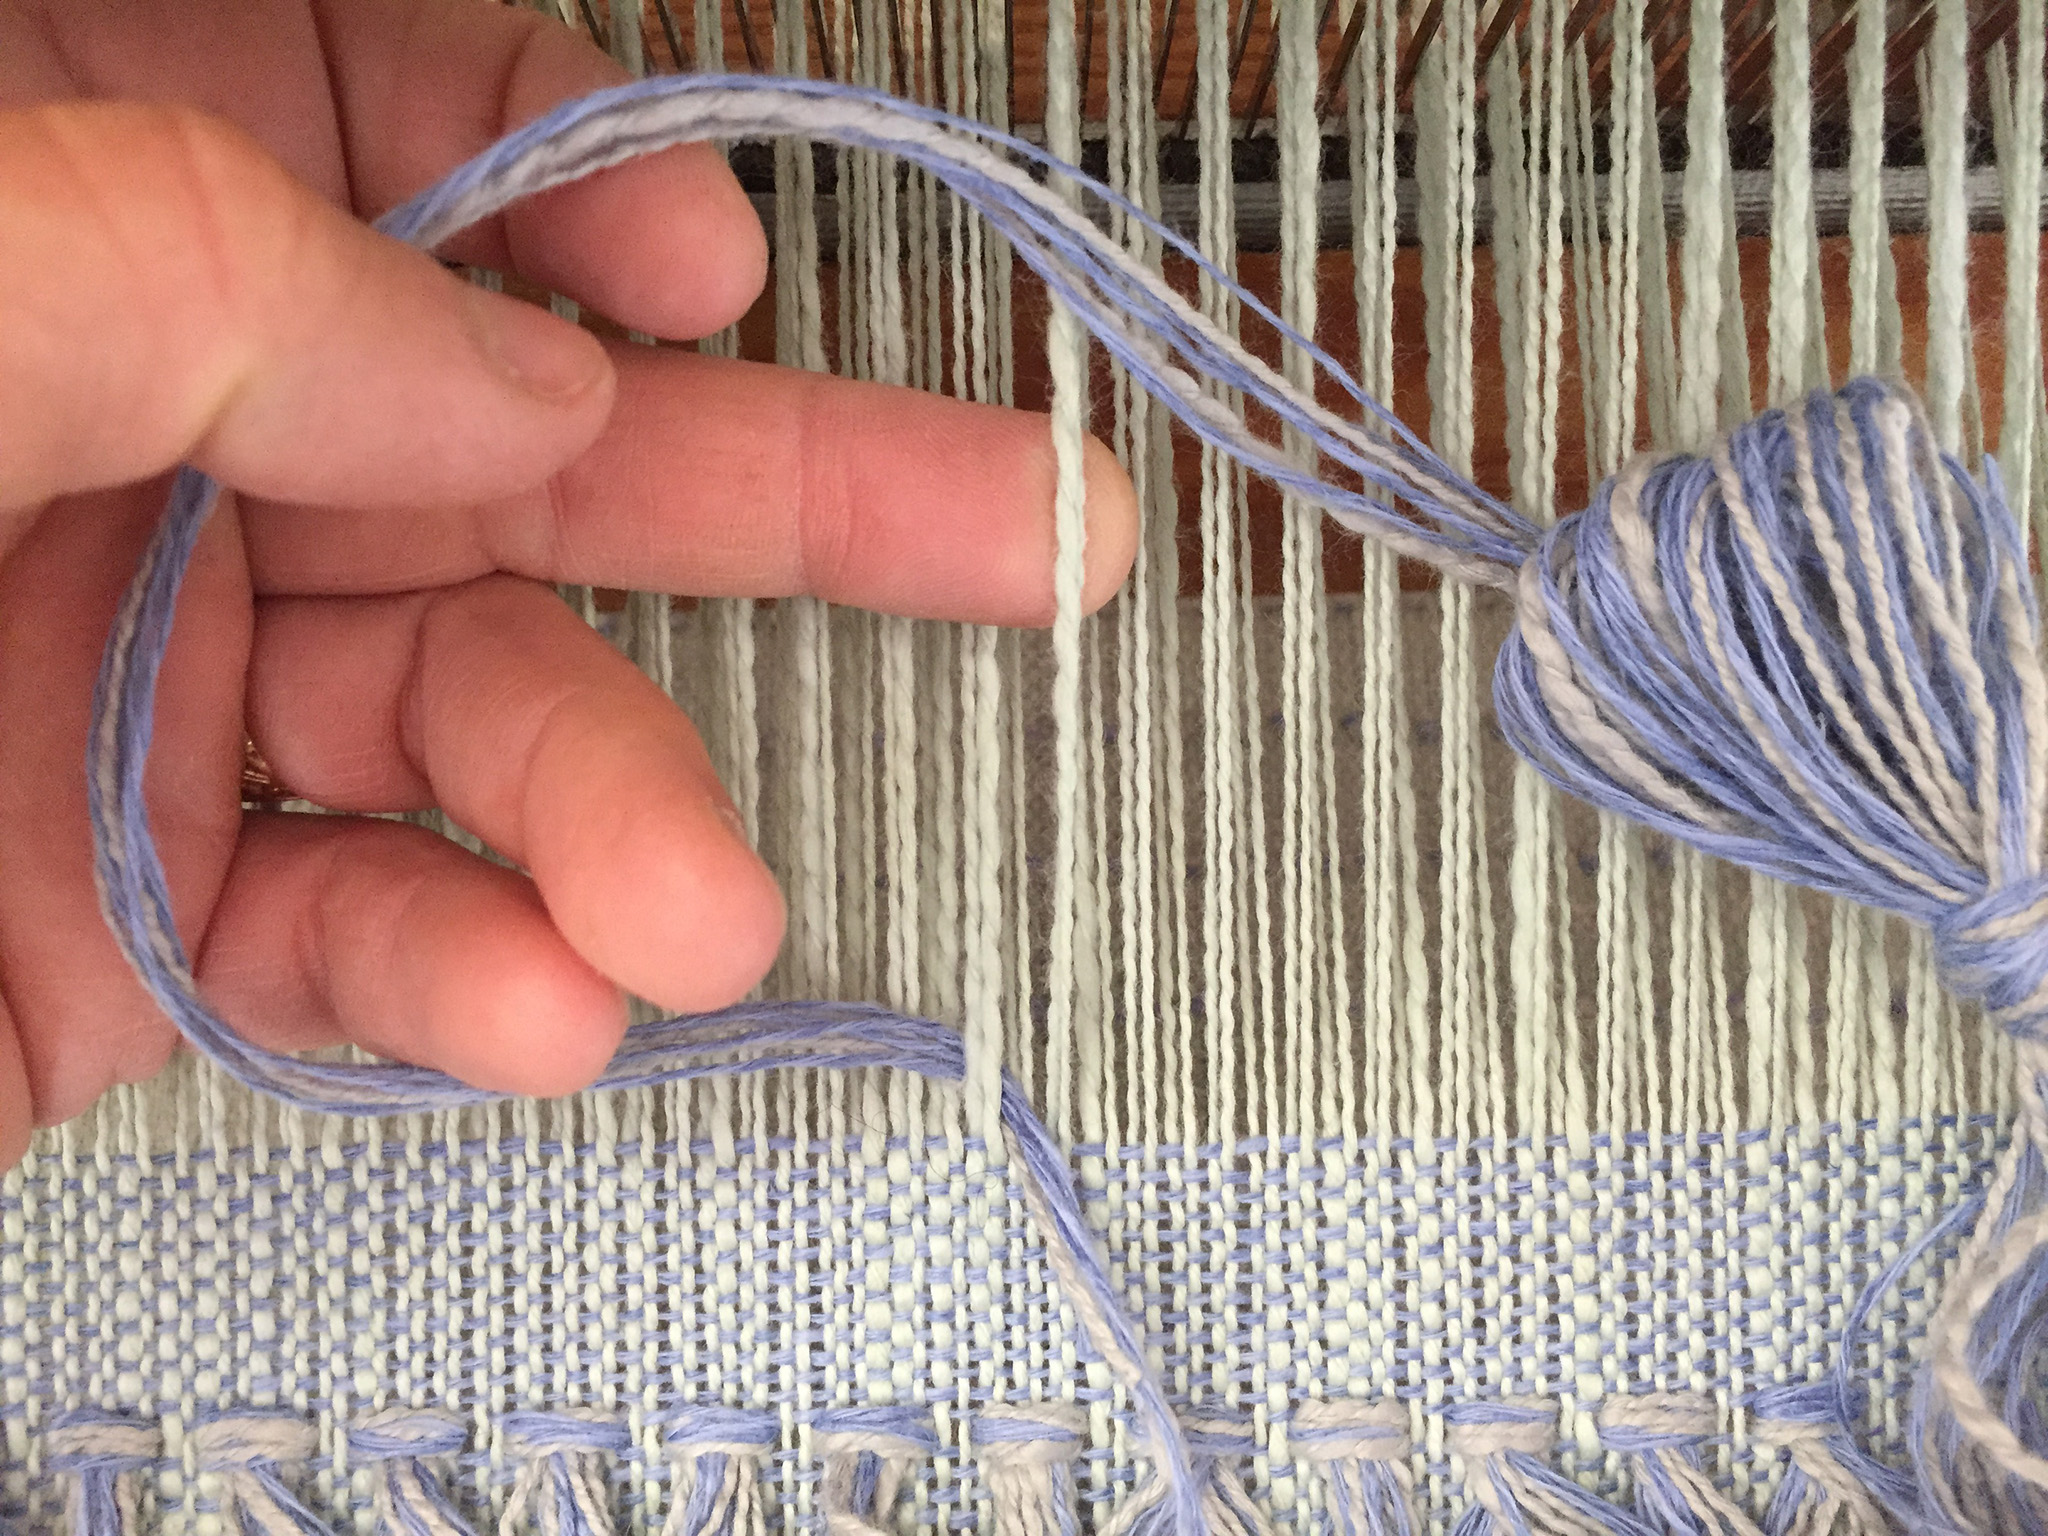
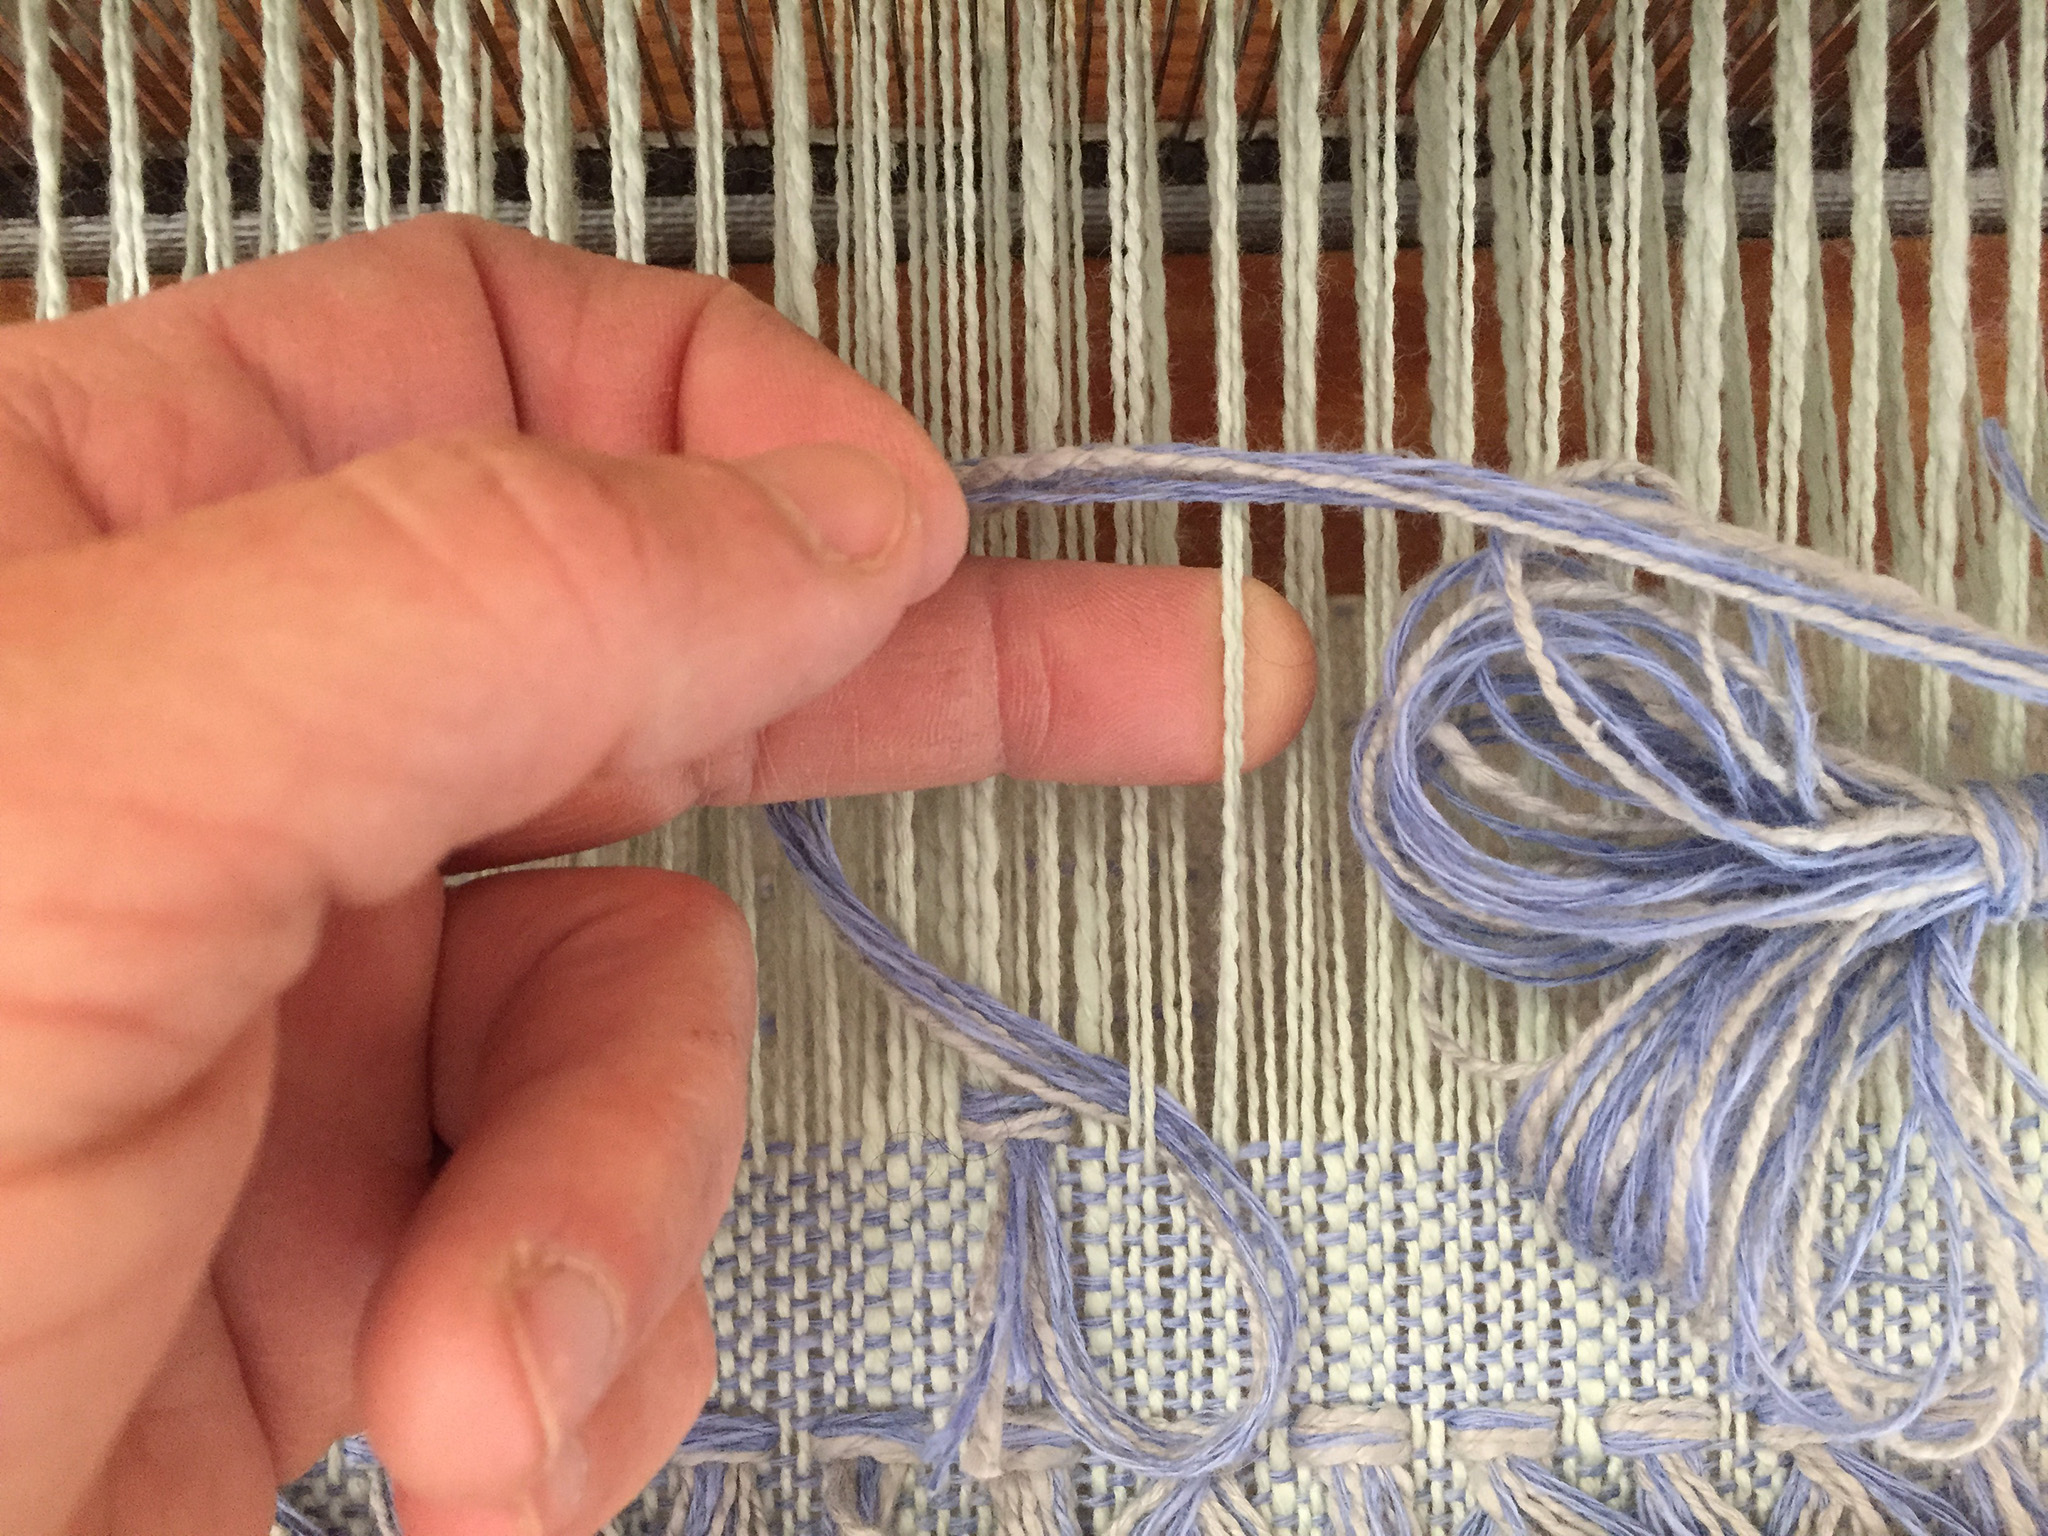
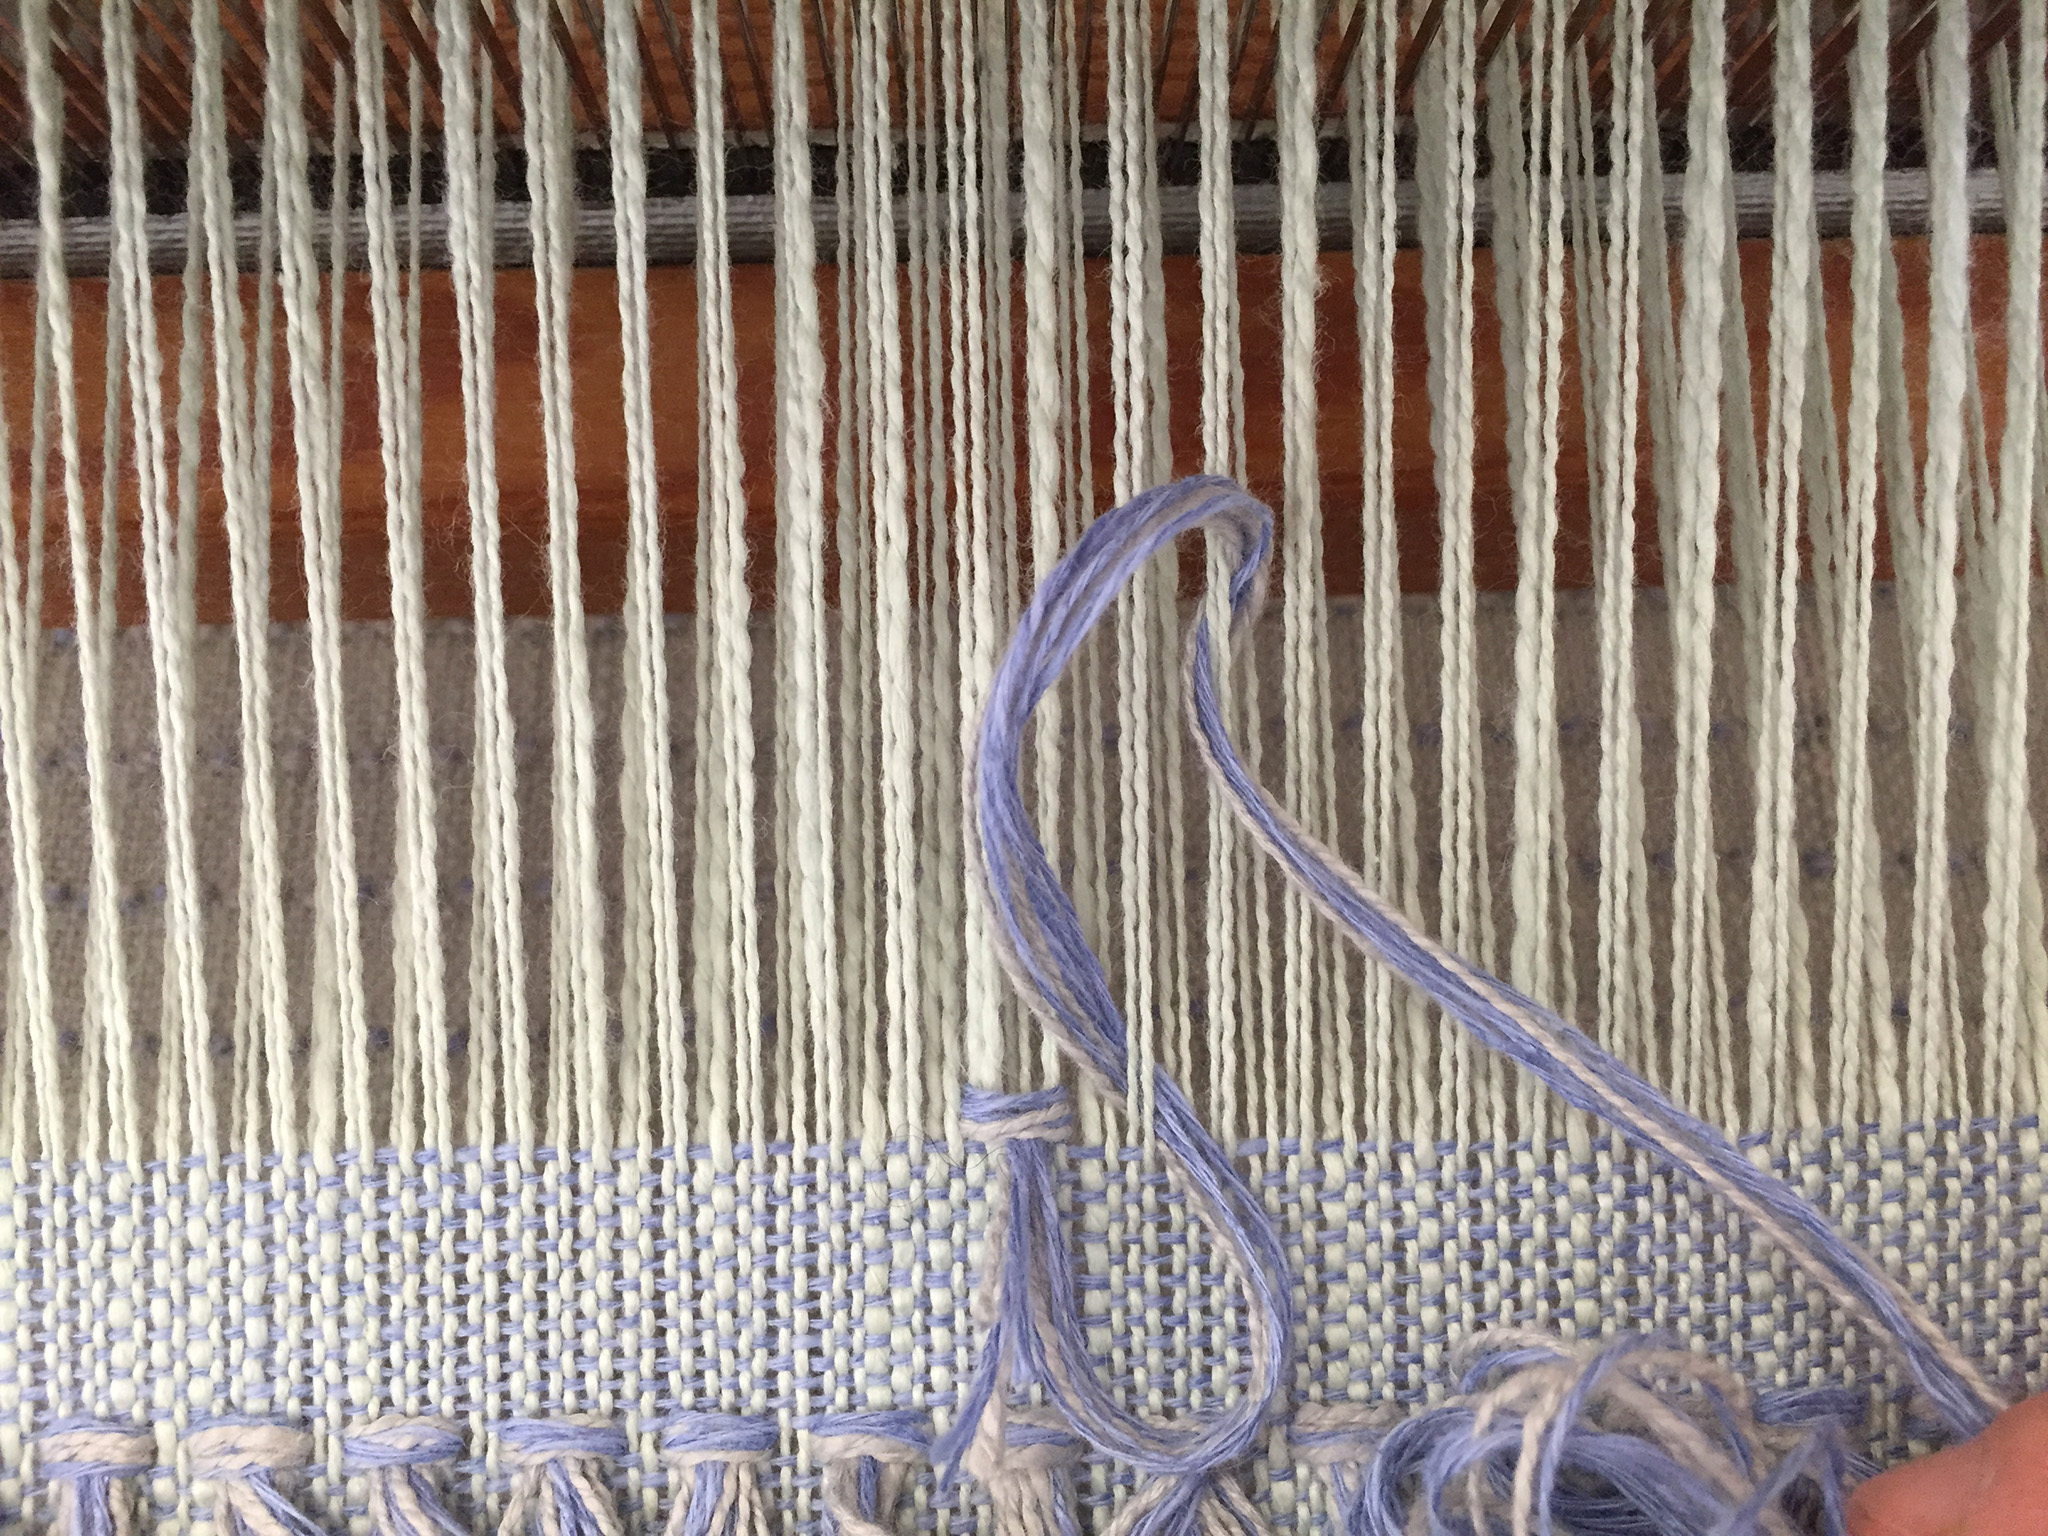
5. Once you’ve got your butterfly ready, you’ll follow the photo instructions below and/or the written description that follows. You will be weaving a 1" pile using this method.

1
2

3
4
5

6

7

8

9
10
11

12
6. Now you’ll weave the “foundation tabby” that will lock the knots in place and create a bit of space between rows. Weave 12 picks of the tabby weft. A row of knots (just the top portion of the knot, not including the loop) + 12 picks should measure a little more than ¾”. The first one or two picks will end up seeming to land “in” the knot, instead of on top of it. When you knot the next row, the rya loops should just graze the knot of the preceding row.
7. Continue in this manner, following the chart. Cut the butterfly off at the end of each row leaving a 1" tail and start again on the left, also with a 1" tail. Make another butterfly if you run out, and when you change color combinations, just undo the butterfly, pull out the one thread you don’t need and replace it with the new color. For example, in Pillow B, the first two rows are both 6 threads of Chambray, and when you change colors for the third row, pull out one Chambray and measure out one Steel as long as the butterfly you have left. If it’s relatively long, you can use that Chambray you pulled out as a starter for the next butterfly you make.
8. After the final row of knots, weave 3” of tabby as a top edge and seam allowance. You can either cut the loops as you go along--it’s very satisfying!--or wait until the end and you’ve got a good podcast to listen to--it takes longer than you’d think. Make sure to weave a few picks with scrap yarn before beginning the second pillow.
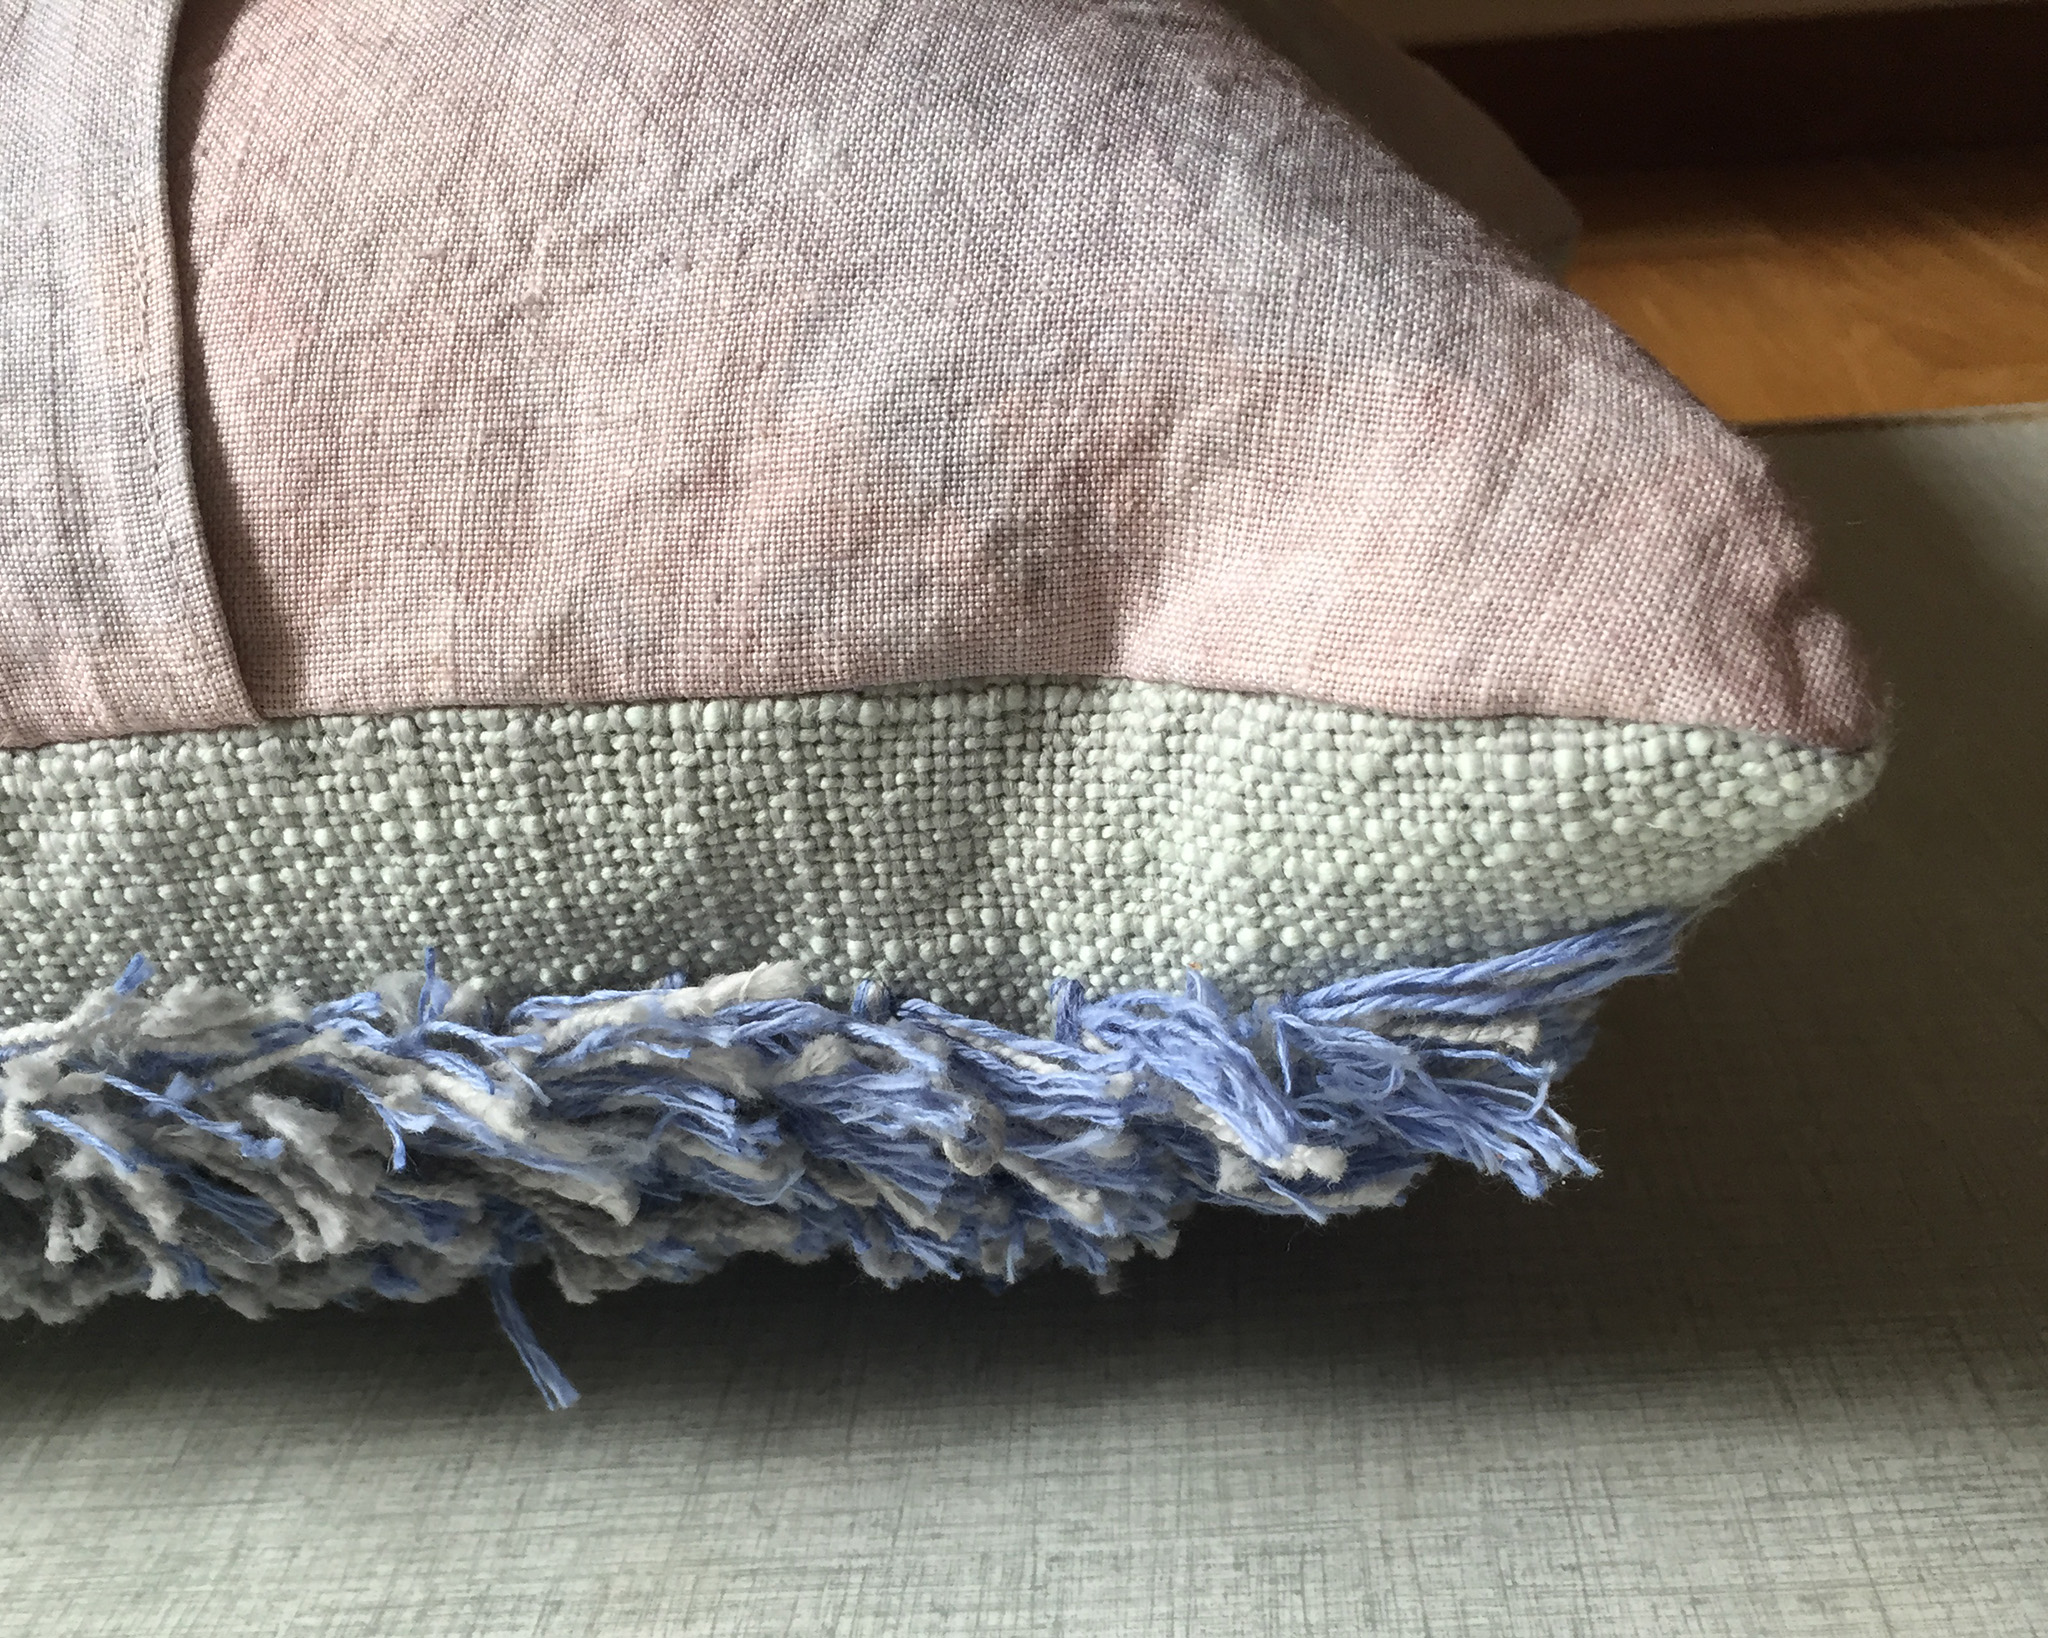
9. Take your fabric off the loom and cut the pillows apart at scrap yarn marker. Zigzag stitch the raw edges of your pillows and wash gently by hand. Let dry completely flat. Be sure to also wash (pre-shrink) your backing fabric before sewing if you want to be able to wash the pillows and not just spot-clean. After washing, each pillow should measure ~20" W x 20" L give or take. Don't worry if this is not exact--mine measured about 19.5" W x 20.5" L.
10. To sew the pillows, I adapted the instructions from this post on Instructables: How to Sew an Envelope Pillow Cover. If you have another pillow sewing method that you prefer, feel free to use that instead.
Cut two pieces of backing fabric, ~21” x 14”. I used hand-dyed linen--any cotton or linen fabric will work well. Machine hem one long edge of each piece of backing. Lay the backing pieces down on your woven front piece, right sides together, with the top backing piece first and the bottom backing piece second. Sew the pieces together with a ½“ seam allowance. Turn and put in your 20" x 20" pillow forms.
Here are some tips if you would like to weave these pillows on your rigid heddle loom. We have adjusted the pattern to fit a 12.5 dent heddle (12 will also work) and reduced the weaving width to 23". If you have a wider rigid heddle loom, feel free to use the original weaving width. If you have a 15 dent heddle you do not need to adjust the epi.
To adjust to 12.5 epi on a rigid heddle loom, center for 23” width at reed and thread one end per hole and slot for 280 ends.
To identify the threads you will tie the rya knots around, place the heddle in the down position so only the slot threads are up (140 threads are raised).
Starting from the right selvedge, skip the first 11 raised threads, then with your pick up stick, pick up two threads on to the stick, skip 2, pick up 2, skip two…across your warp, ending on a pick up 2 and skipping the last 11 raised threads on the left selvedge.
Push the pickup stick to the back of the loom. Weave as directed.
To make the rya knots, leave your heddle in neutral, slide the pickup stick forward and place it on it’s edge against the back of the reed. This will raise the threads you will tie your rya knots around. Tie the knots as directed. Slide the pickup stick to the back of your loom when done knotting and continue to weave as directed.
Arianna Funk graduated from Friends of Handicraft School in Stockholm in 2017, became a card-carrying journeyman weaver the same year and was awarded the ‘large medal of honor’ for her journeyman work. She is a founding member of Studio Supersju, a group of forward-thinking weavers.
In addition to running Weave of the Month Club, she is a teacher and advisor for students in the foundation year at Friends of Handicraft, and writes drafts for Väv Magasinet and Handwoven. Her book of weaving drafts, Att Väva, which she co-wrote with Miriam Parkman, came out in Swedish in March 2020. They hope to publish it in English early next year.
