
Shopping Cart
*continental US addresses only

Do you remember your first broken warp thread? I do - I was at my parents house alone, working happily on one of my mum’s looms when a warp end snapped. I had no idea what to do, and, if I’m being honest, I was too impatient to Google it effectively. I had been having so much fun! If I had only known how simple it was to fix a broken warp thread - I could have been back at it in only a few minutes.
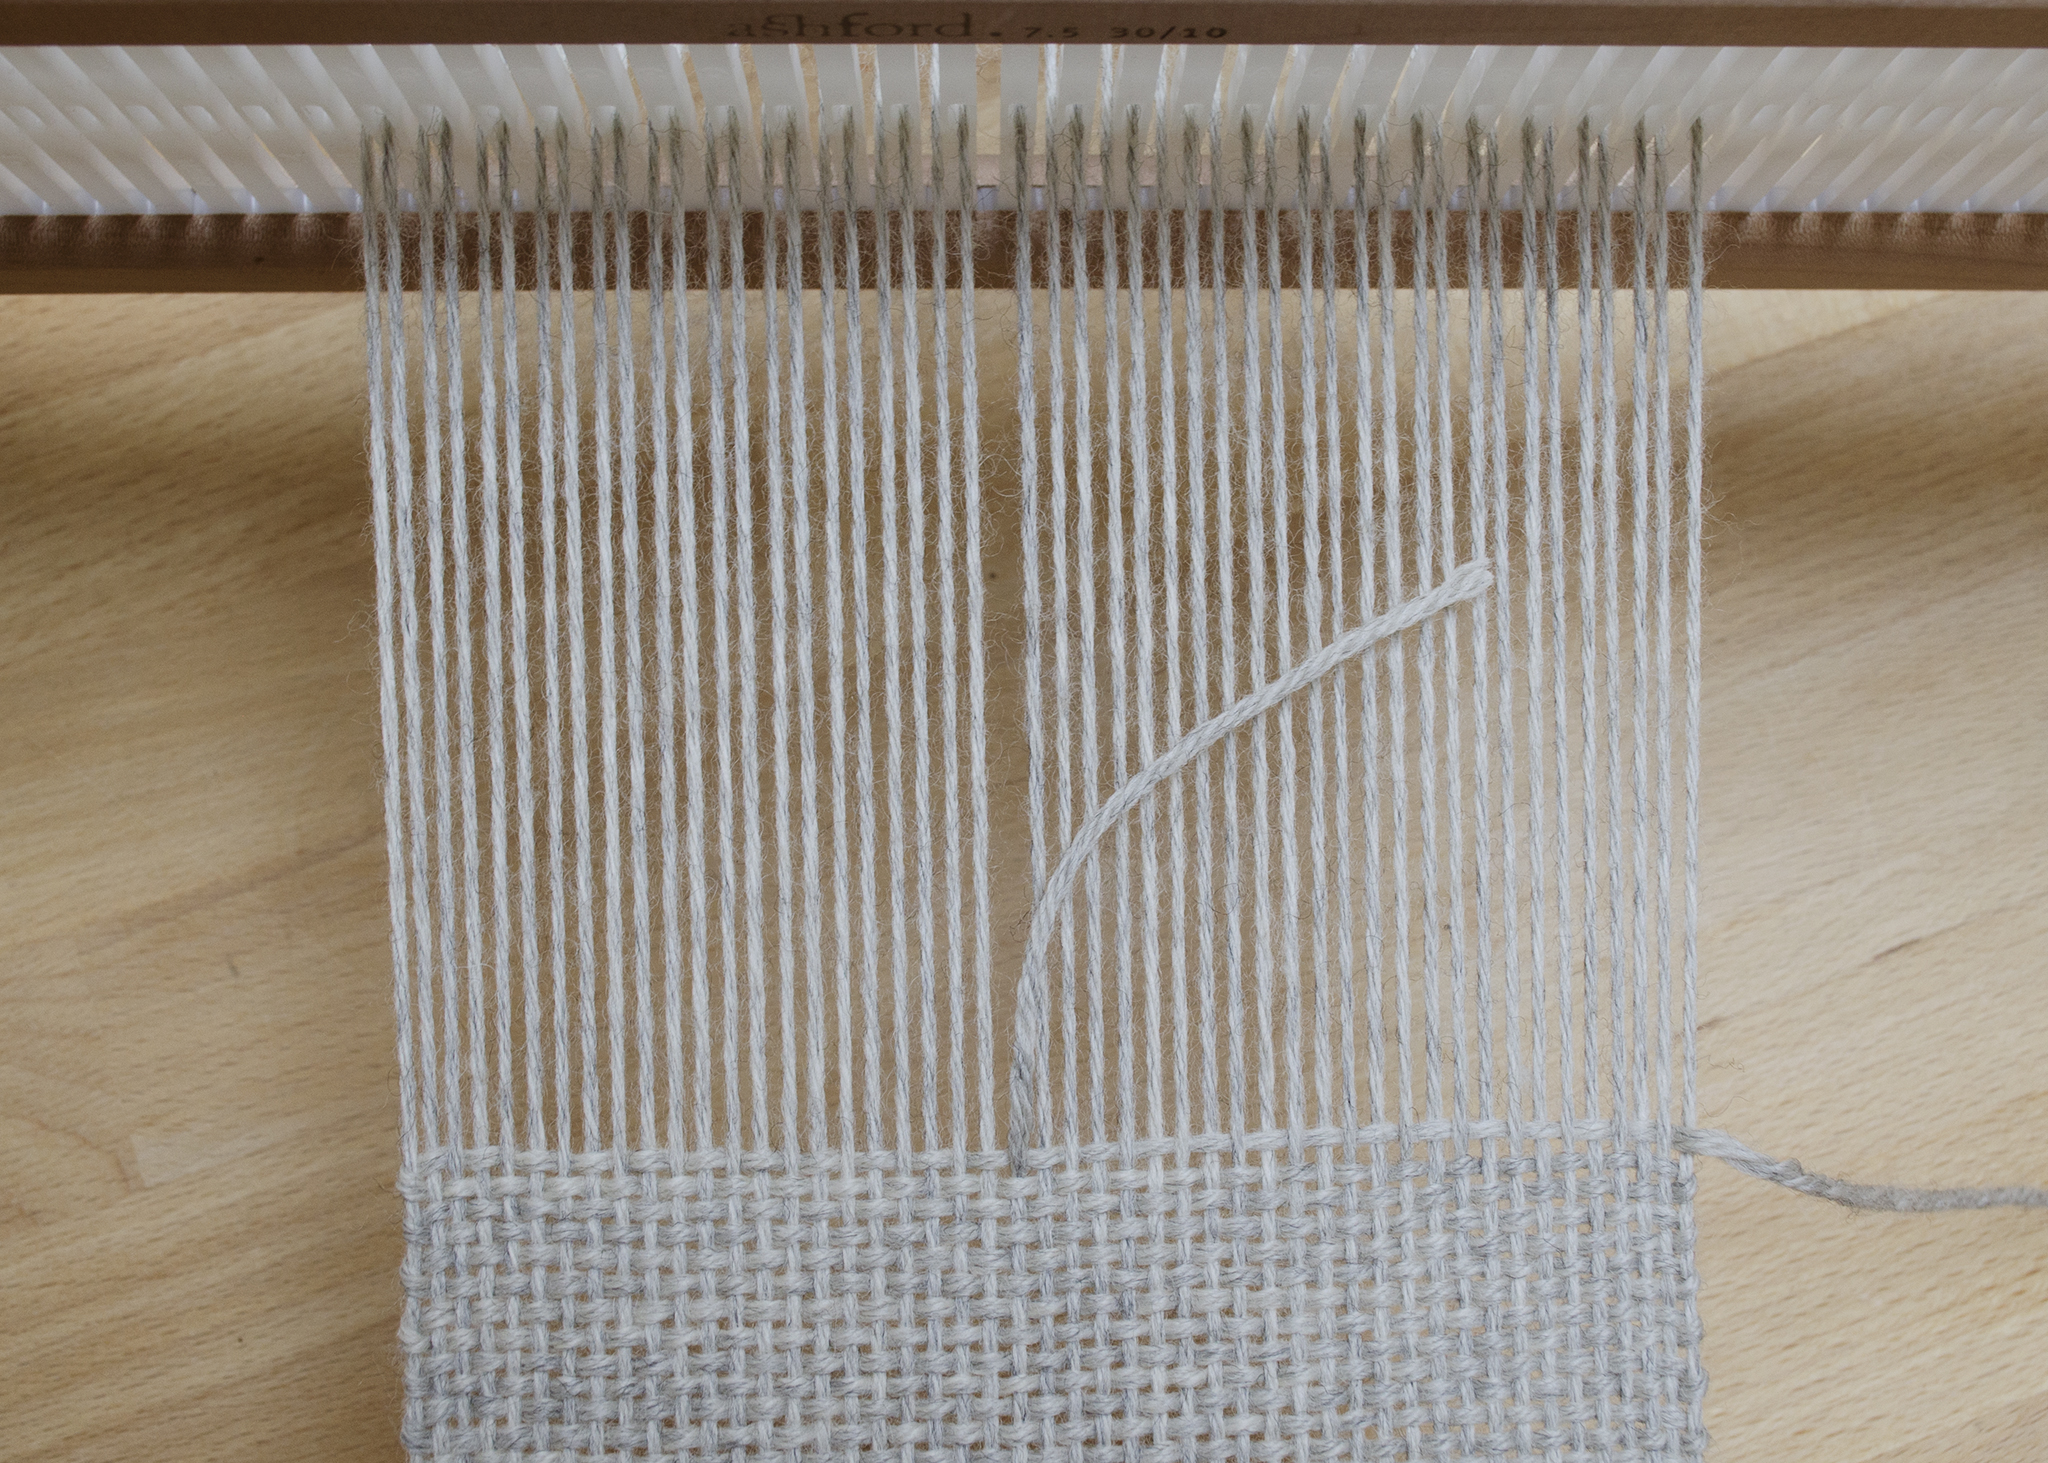
Regardless of how careful a weaver you are, we all break warp threads. Sometimes it’s because we’ve beamed our warp funny or we’ve been packing our weft a bit too enthusiastically. Whatever the reason is, a broken warp thread does NOT spell disaster (or ugliness!) for your finished textile - you likely have all the tools to do it already.
The first thing you’re going to want to do is gather your repair kit. You’re going to need 3 things:
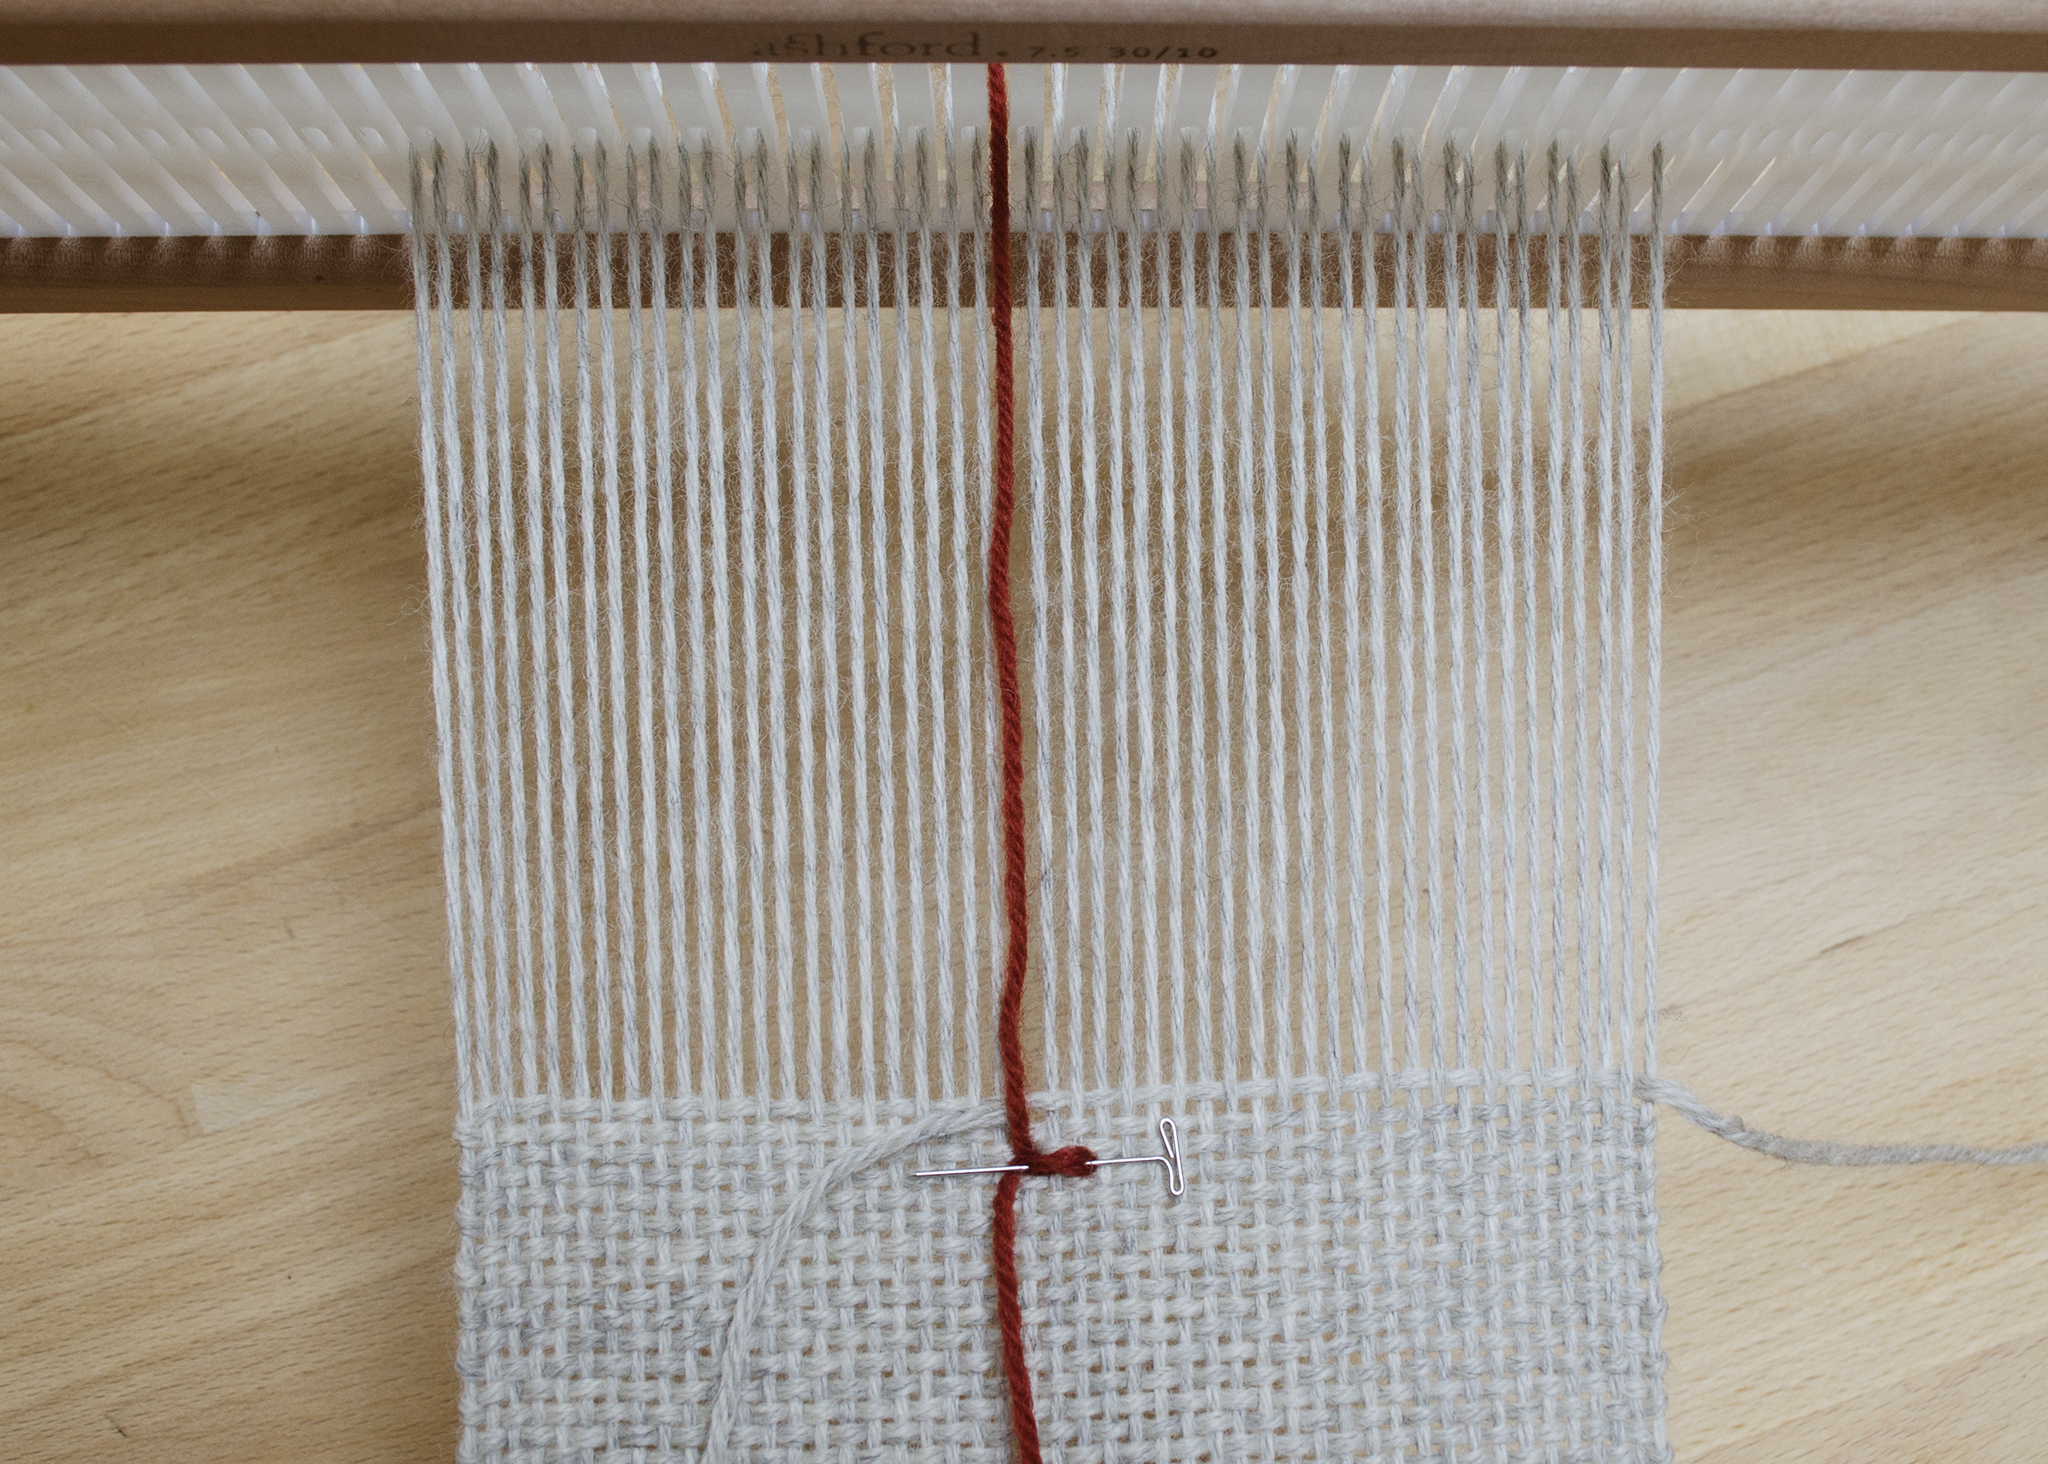
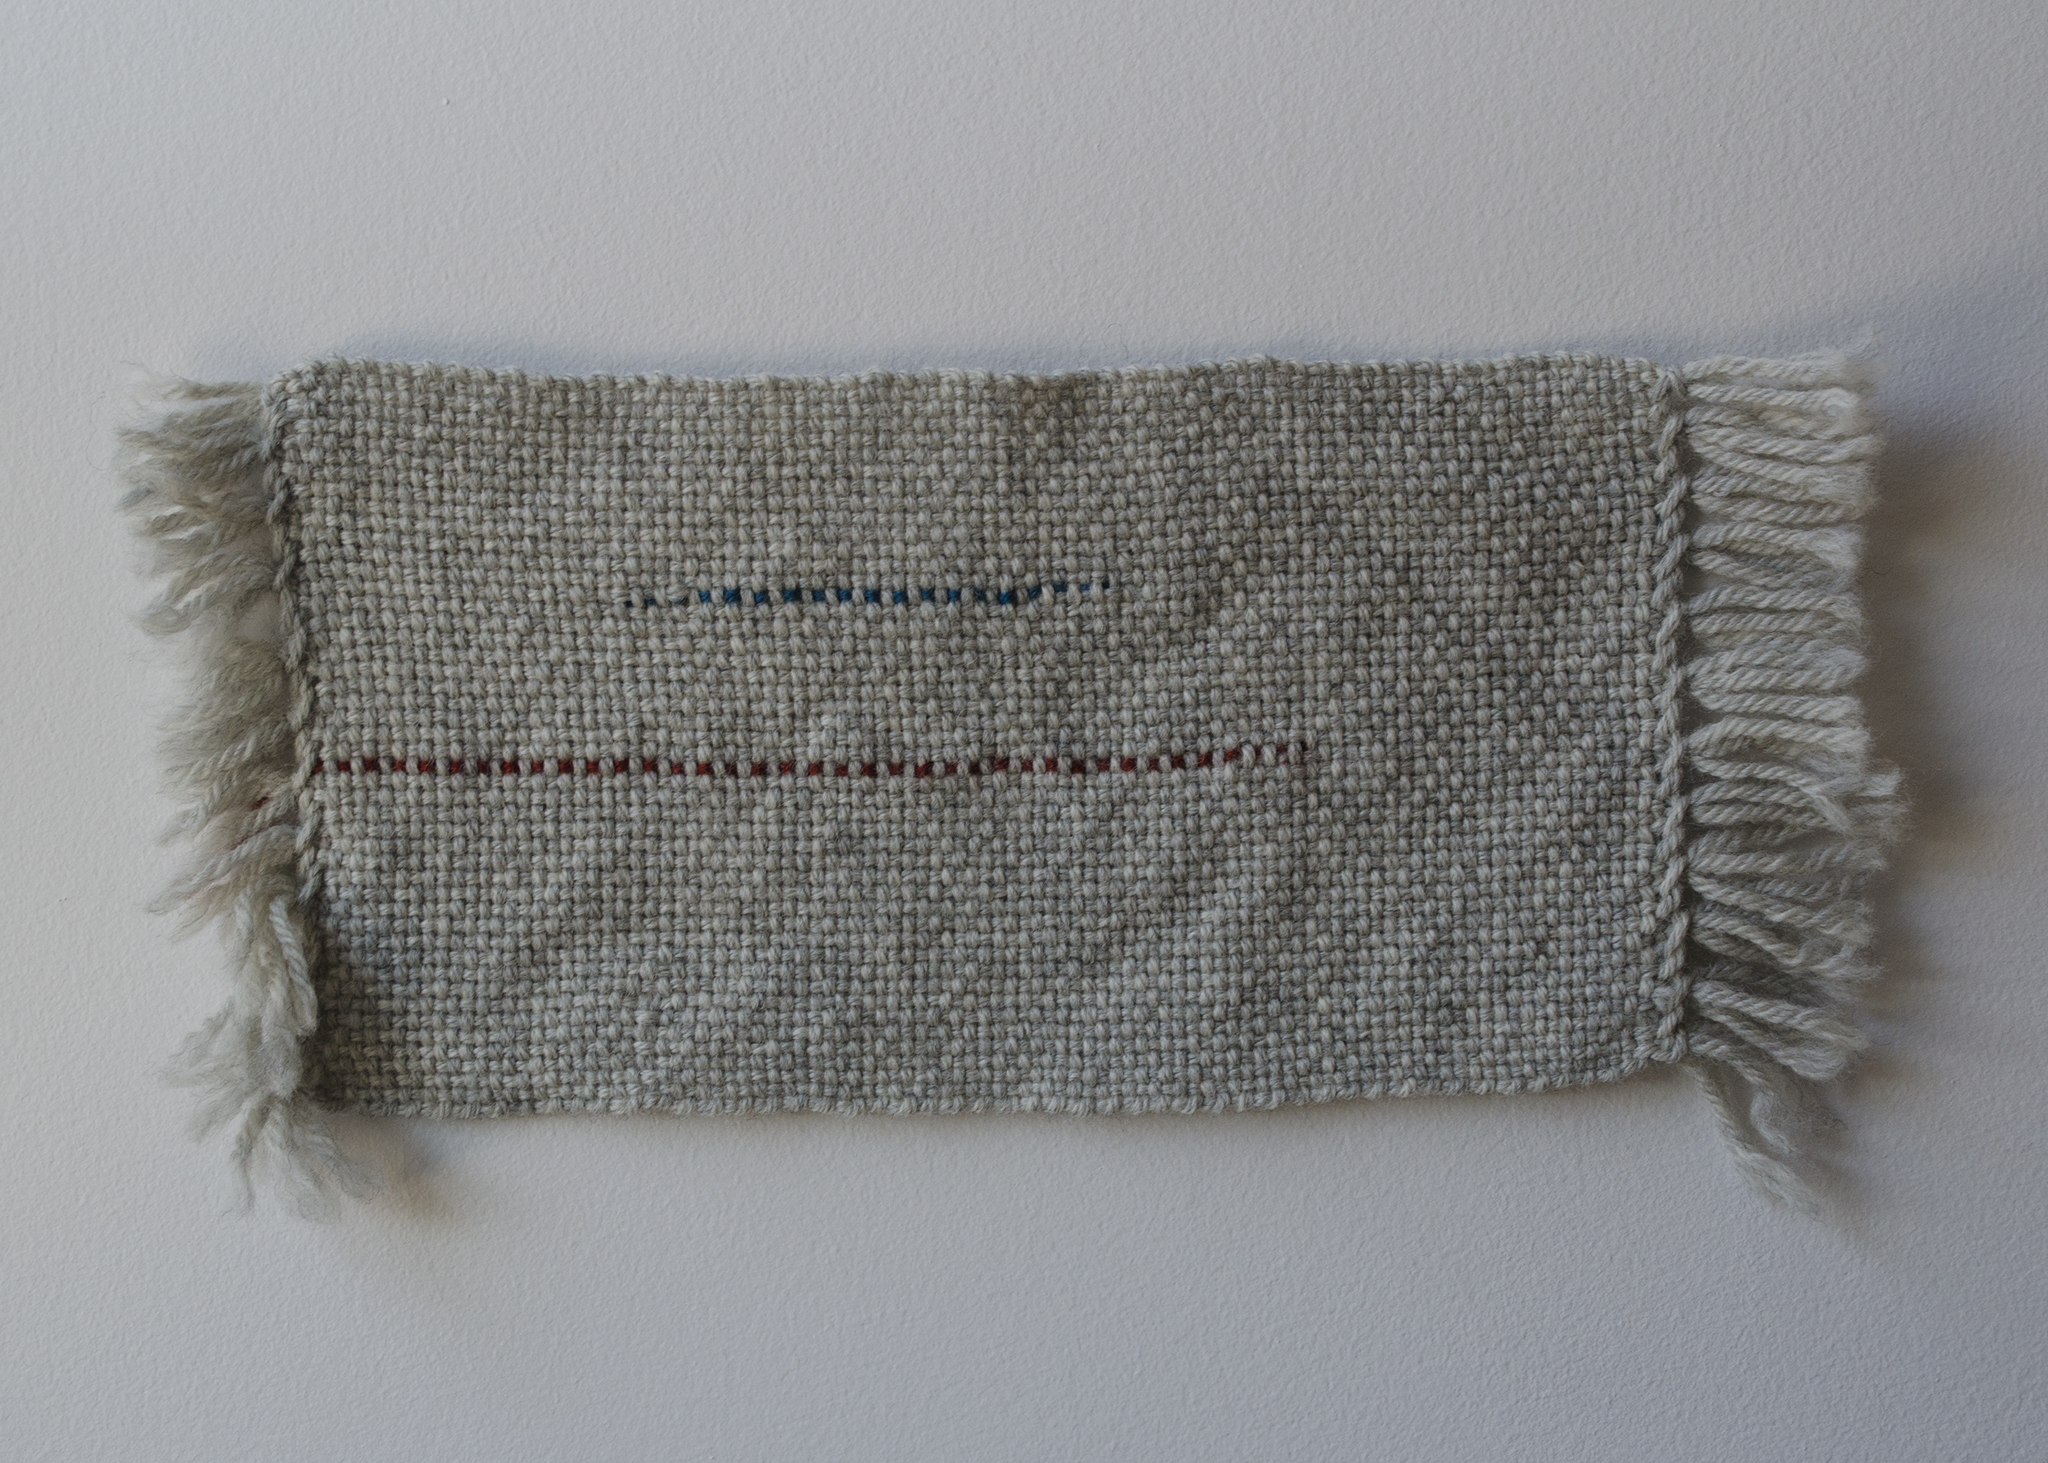
Measure off a piece of your repair yarn. I’m using a red thread in these pictures, but in your project you want to use a matching thread so that your repair is seamless. The length of the repair thread needs to be at least the length of your remaining warp; I like to add an extra 10” to be safe.
Secure your T pin or darning needle in your cloth a few wefts down from where your thread broke. Then wrap your repair thread around the pin in a figure eight shape. I don’t worry too much about it being exactly lined up, but I do want to make sure that it’s tight on the pin and won’t slide off - that’s where a T pin is helpful. I’ve used a sewing pin in a pinch, but they’re not really sturdy enough - you want something strong, since your repair warp will be put under tension next!
To complete your repair, you’re going to want to add weight to your repair end. There are a few things you can use to add weight:

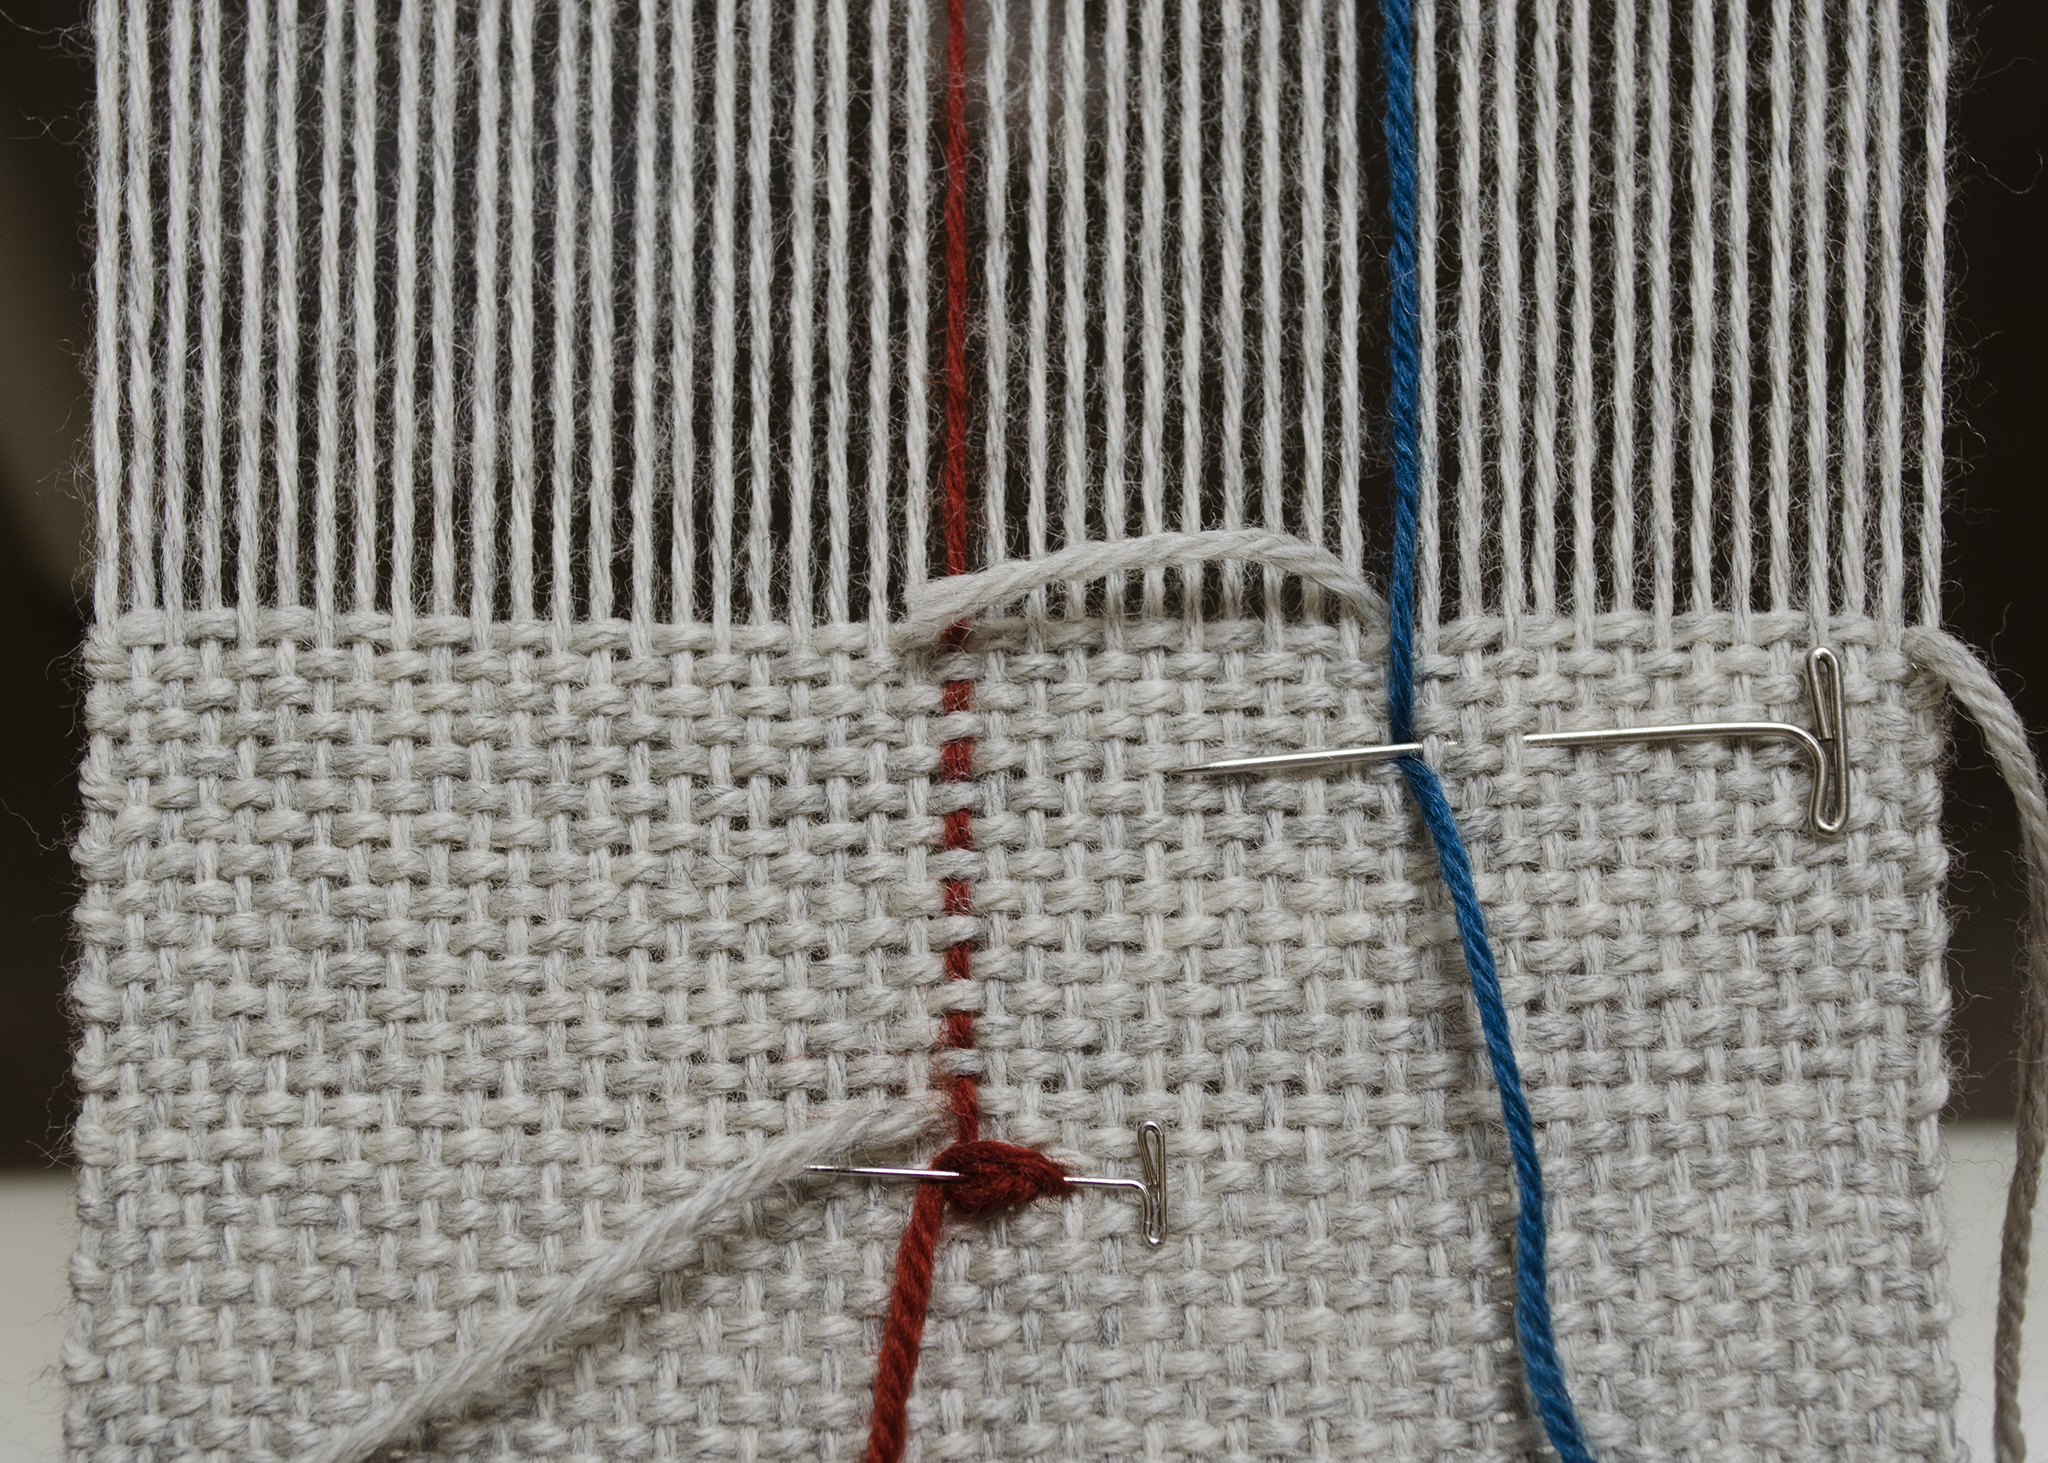
Hang the weight off the back of your loom and match the tension so that your repair thread isn’t tighter or looser than its mates - that’s why I like pennies and washers, because you can make small adjustments easily. Adjust the length that the weight hangs off your loom as you weave to keep it from coming up over your back beam and becoming loose. Keep in mind that when the end of the warp comes over the back, the mate of your broken thread will get loose - when this happens, attach a second weight to it to keep everything tensioned correctly.
If you’re working with a longer warp you can use your repair thread to bridge the gap between the break. The process is the same as above and illustrated using a blue thread - I make a repair warp end, attach it to my web and then weave as usual. When I’ve woven 5-10” I check back with my original warp - if it’s long enough that it can be drawn back through my heddle and wrapped around a T pin, I carefully take the weight off my repair yarn and bring its tail to the front of my weave. I reinsert the original broken warp and wrap it around another T pin, being careful to match the tension with the rest of the warp. Then I keep weaving! In this method there are two spare ends to needle weave in after you’re finished weaving, but it’s sometimes easier to reintroduce your original warp thread than having weights dangling off the end of your loom for the entire project.
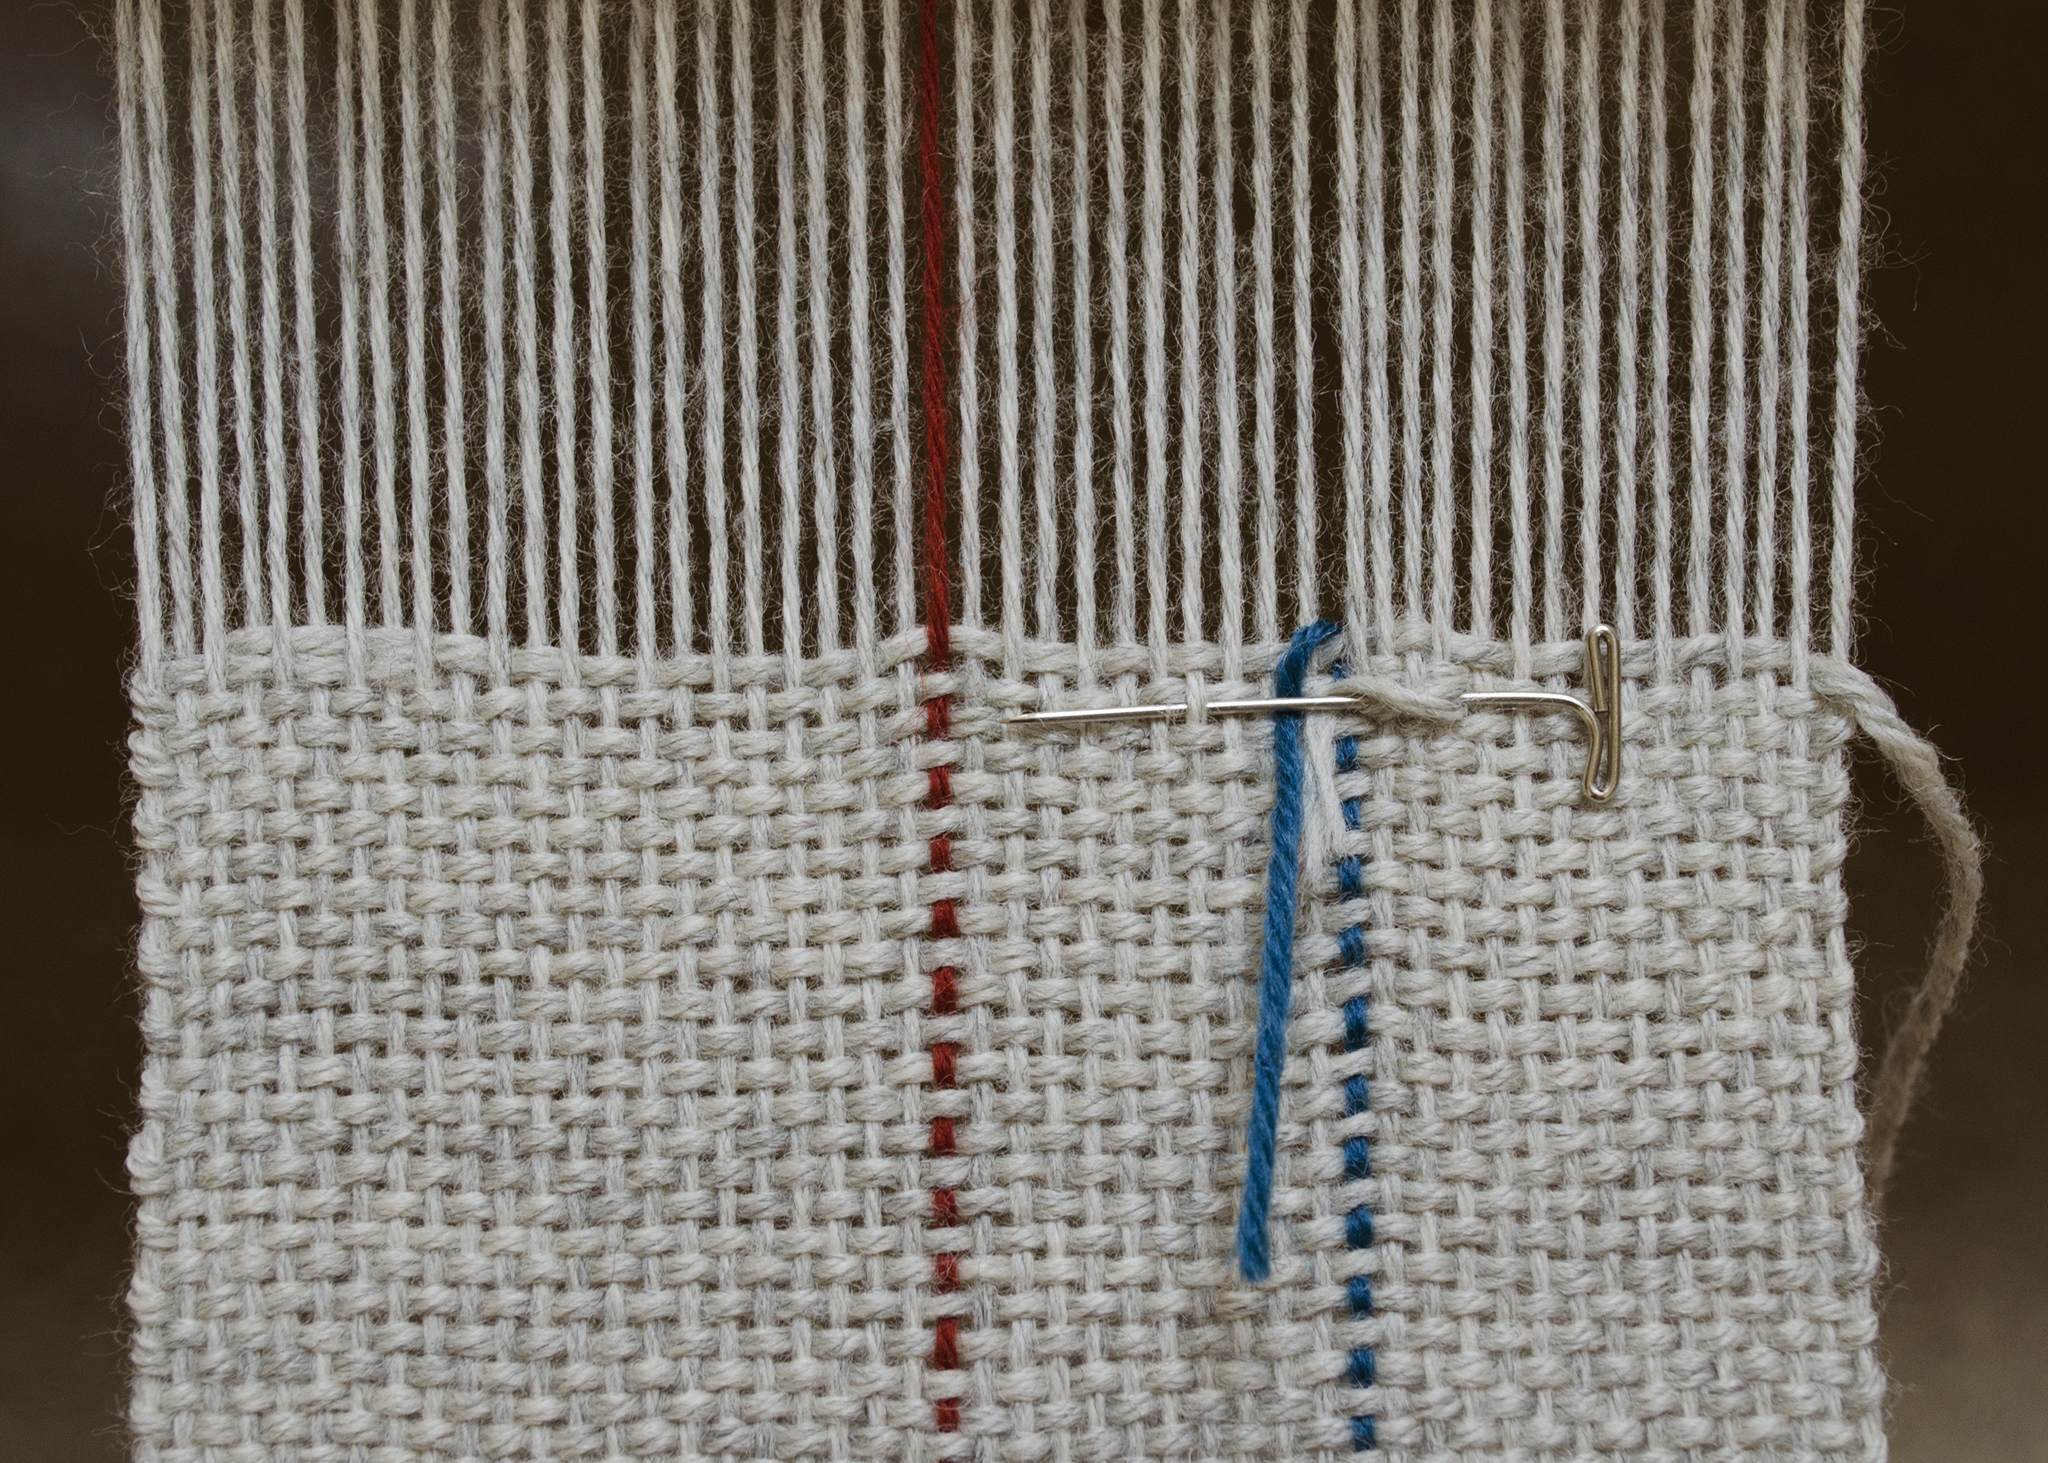
Once your cloth is off the loom, you can tidy up your broken warp thread. Remove the T pin and use a darning needle to needle weave the repair thread into your original warp - a few ends will do. Leave the ends hanging long and clip them close to the surface of the cloth after you’ve washed and finished it.


I hope that helps give you confidence in fixing your next broken warp thread - every time you fix one it gets easier, I promise! If you’re experiencing a lot of broken warp threads, it might be time to take a break and think through each step. Sometimes re-tying a warp helps to even out tension problems that are causing warp threads to break, while other times, I’ve tightened my warp too much and repeating rubbing from my heddle is causing ends to snap. Even the way we throw our shuttles (and whether we’re lefties or righties) can influence the wear and tear on our warps, so if you’re having persistent problems, take a closer look at your process.
Amanda Rataj is an artist and weaver living and working in Hamilton, Ontario. She studied at the Ontario College of Art and Design University and has developed her contemporary craft practice through research-based projects, artist residencies, professional exhibitions, and lectures. Her textile focus of the material and conceptual nature of vernacular, everyday objects used for the home and body; her work (and weaving patterns) are available at her website, and at Guildworks, or by commission.
