Shopping Cart
*continental US addresses only

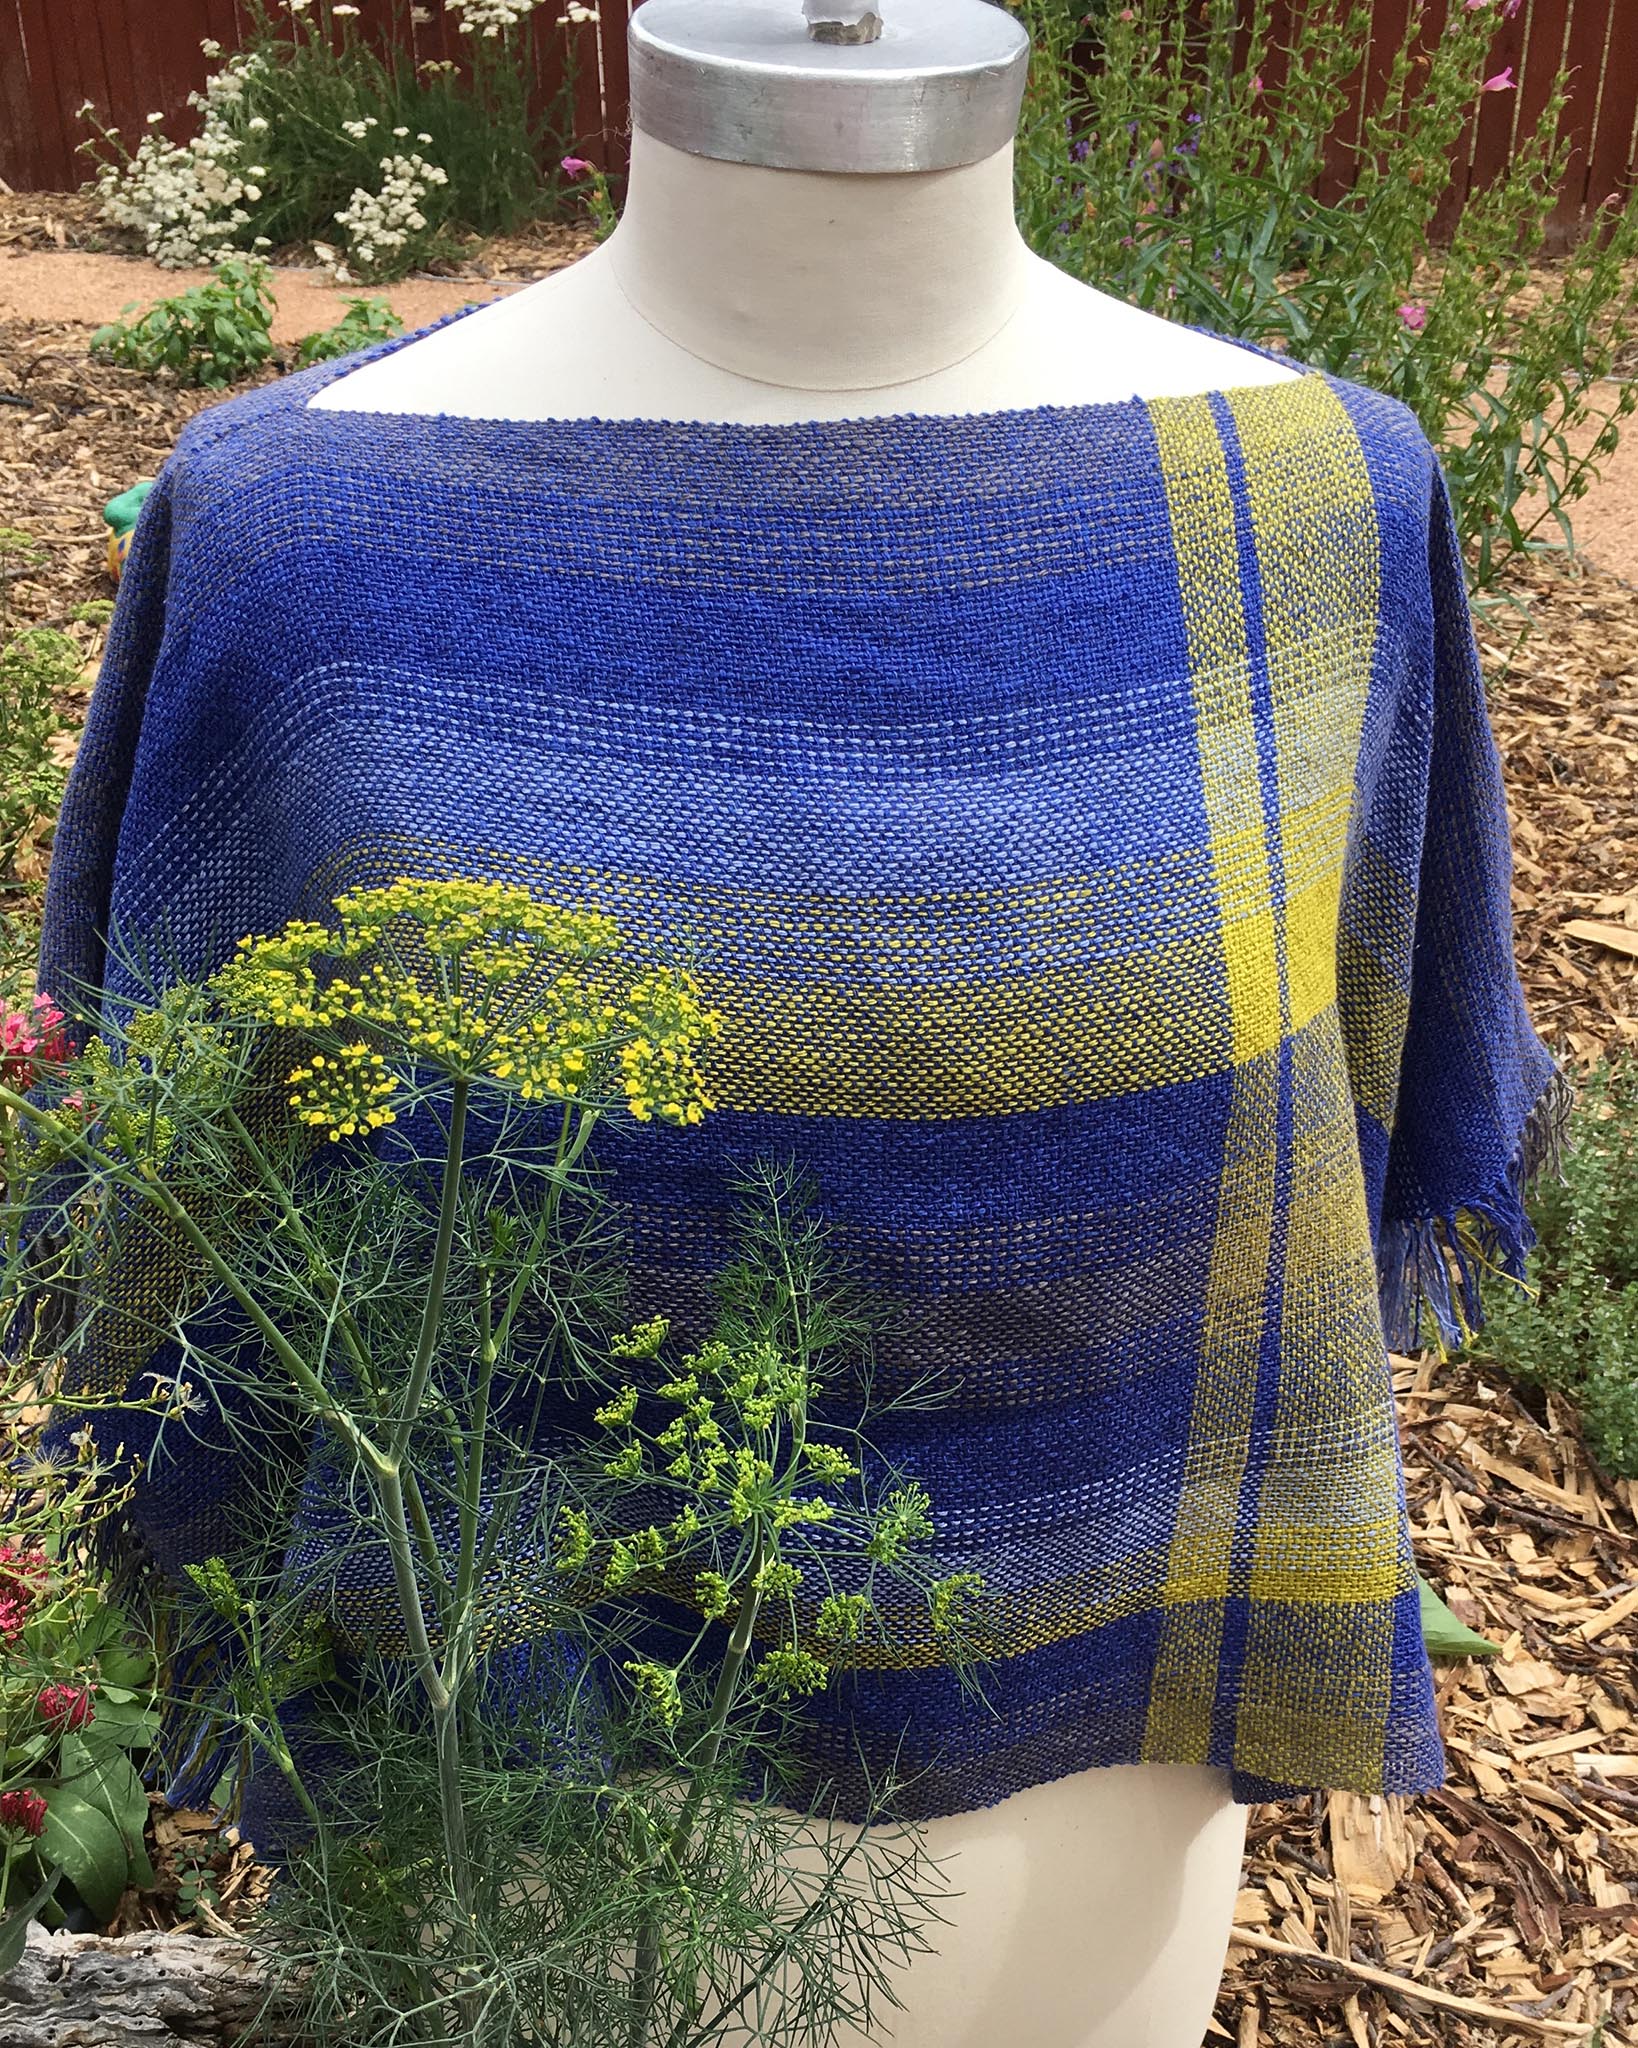
The Duet Boxy Top is woven with 4 colors of Duet Cotton/Linen Weaving Yarn on a rigid heddle loom and then sewn by hand into a versatile and one-of-a-kind garment.
You can download an updated version of this pattern and purchase a kit here.
Designed by Lois Weaver for GIST: Yarn & Fiber.
Need some help getting started? Check out Resources for Beginner and Intermediate Weavers.


Warp & Weft: 5 cones of Duet Cotton/Linen Weaving Yarn

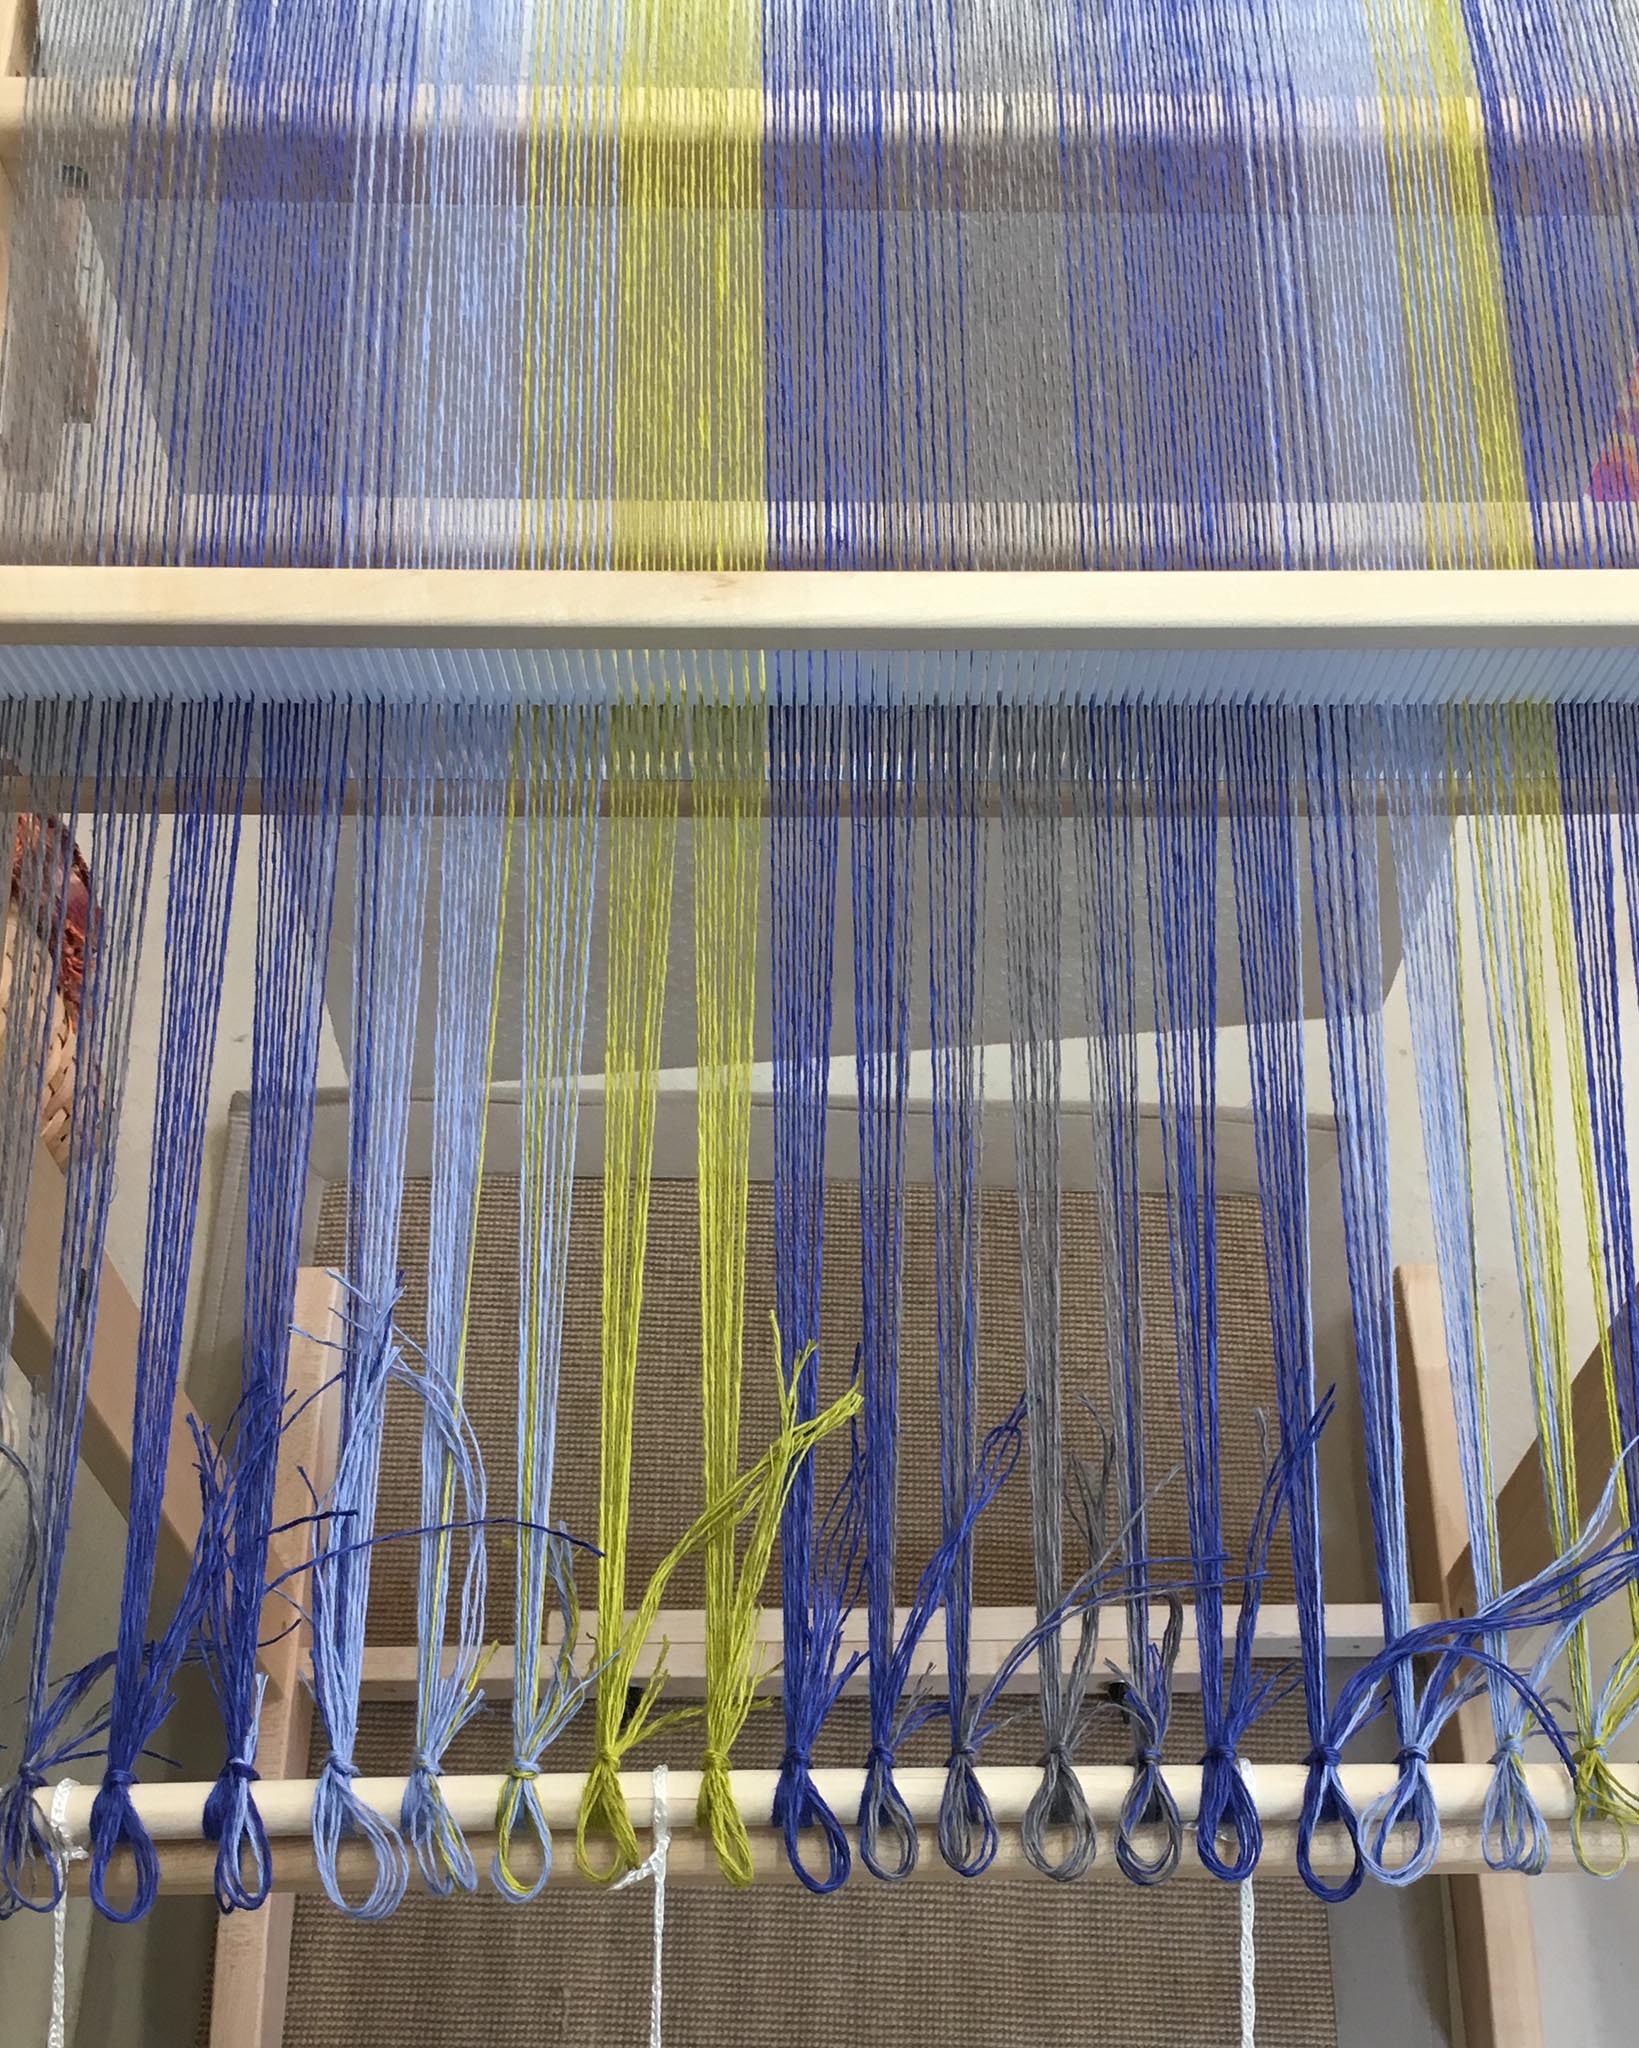
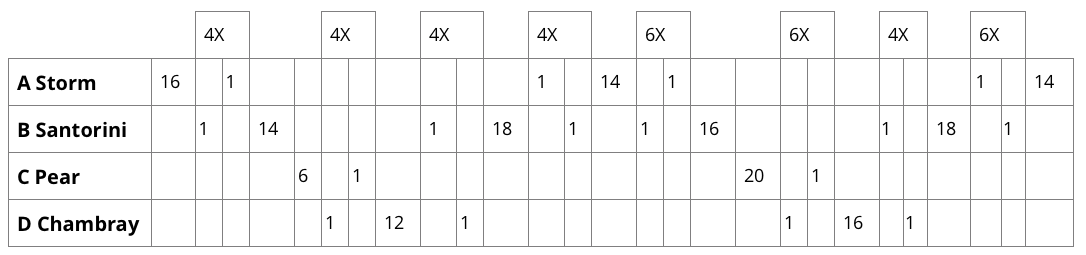
Lois writes, "For this project, I’ve gradated stripes by alternating one thread of one color with one thread of the next color. This visually blends the colors between stripes. You may choose to skip this part outlined in the color threading chart below, and simply warp solid stripes for a bolder look. If using a rigid heddle loom, I recommend theindirect warping method."
Color A =Storm, Color B =Santorini, Color C =Pear, Color D =Chambray
Warp Color Order: Wind your warp in the following order for a total of 240 warp ends.
Threading Sequence: To create a gradation throughout the stripes in your warp, follow the threading sequence below.
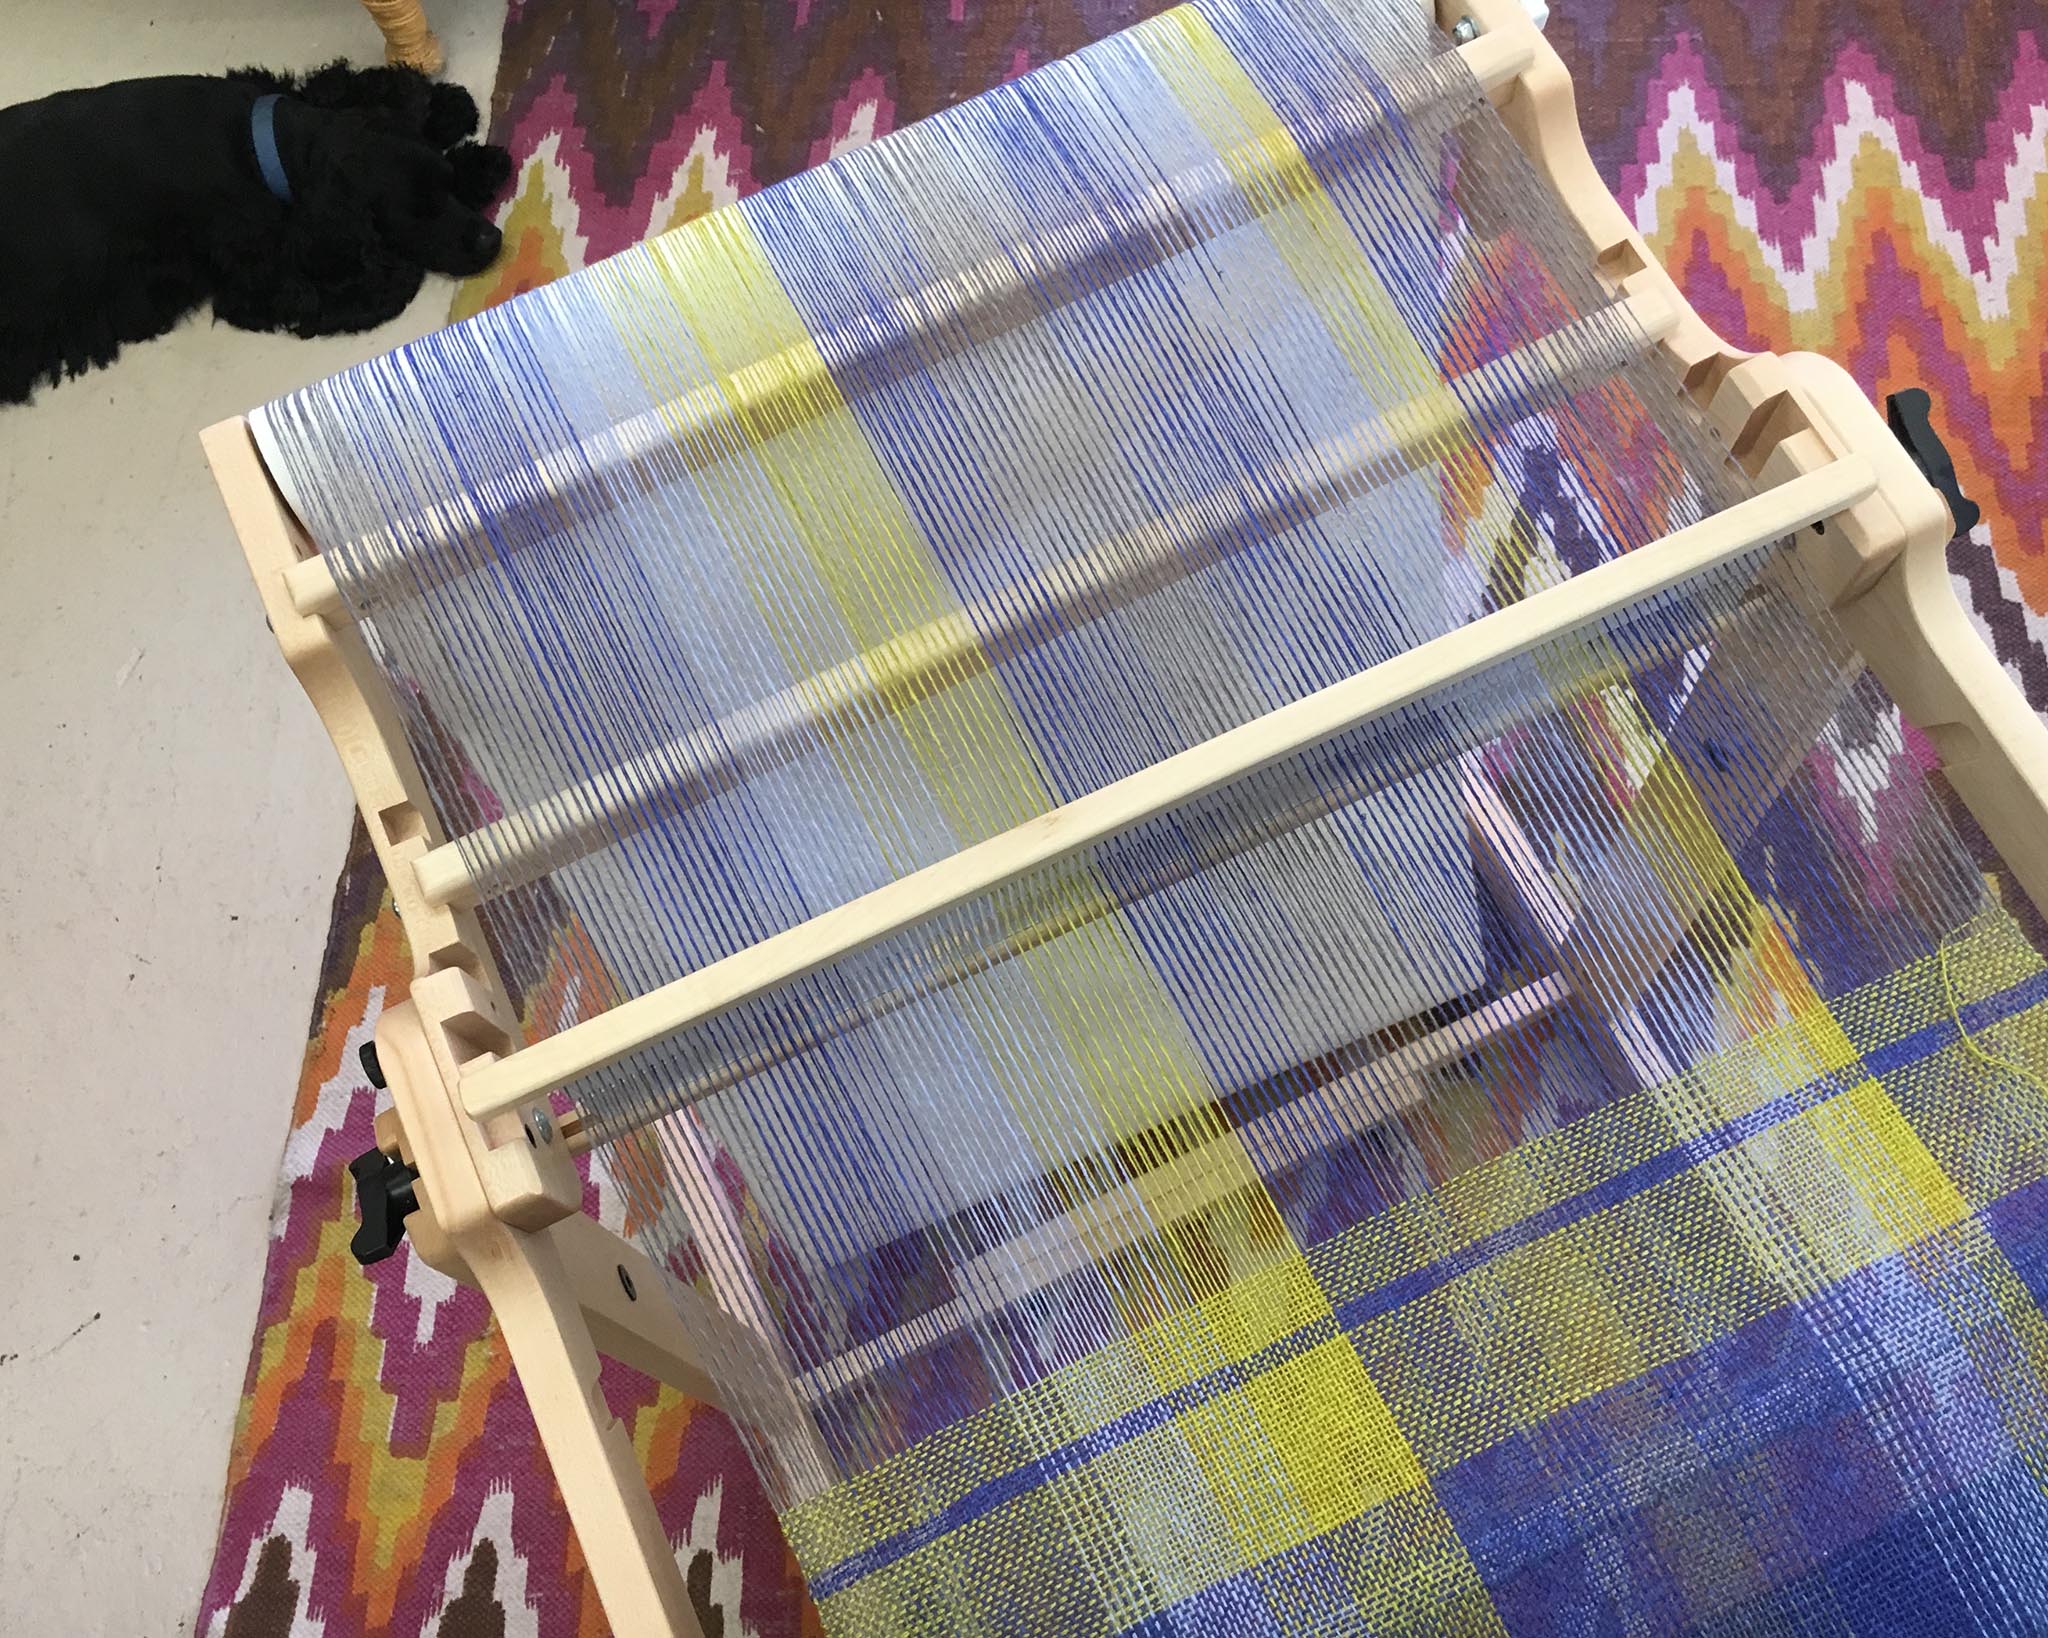
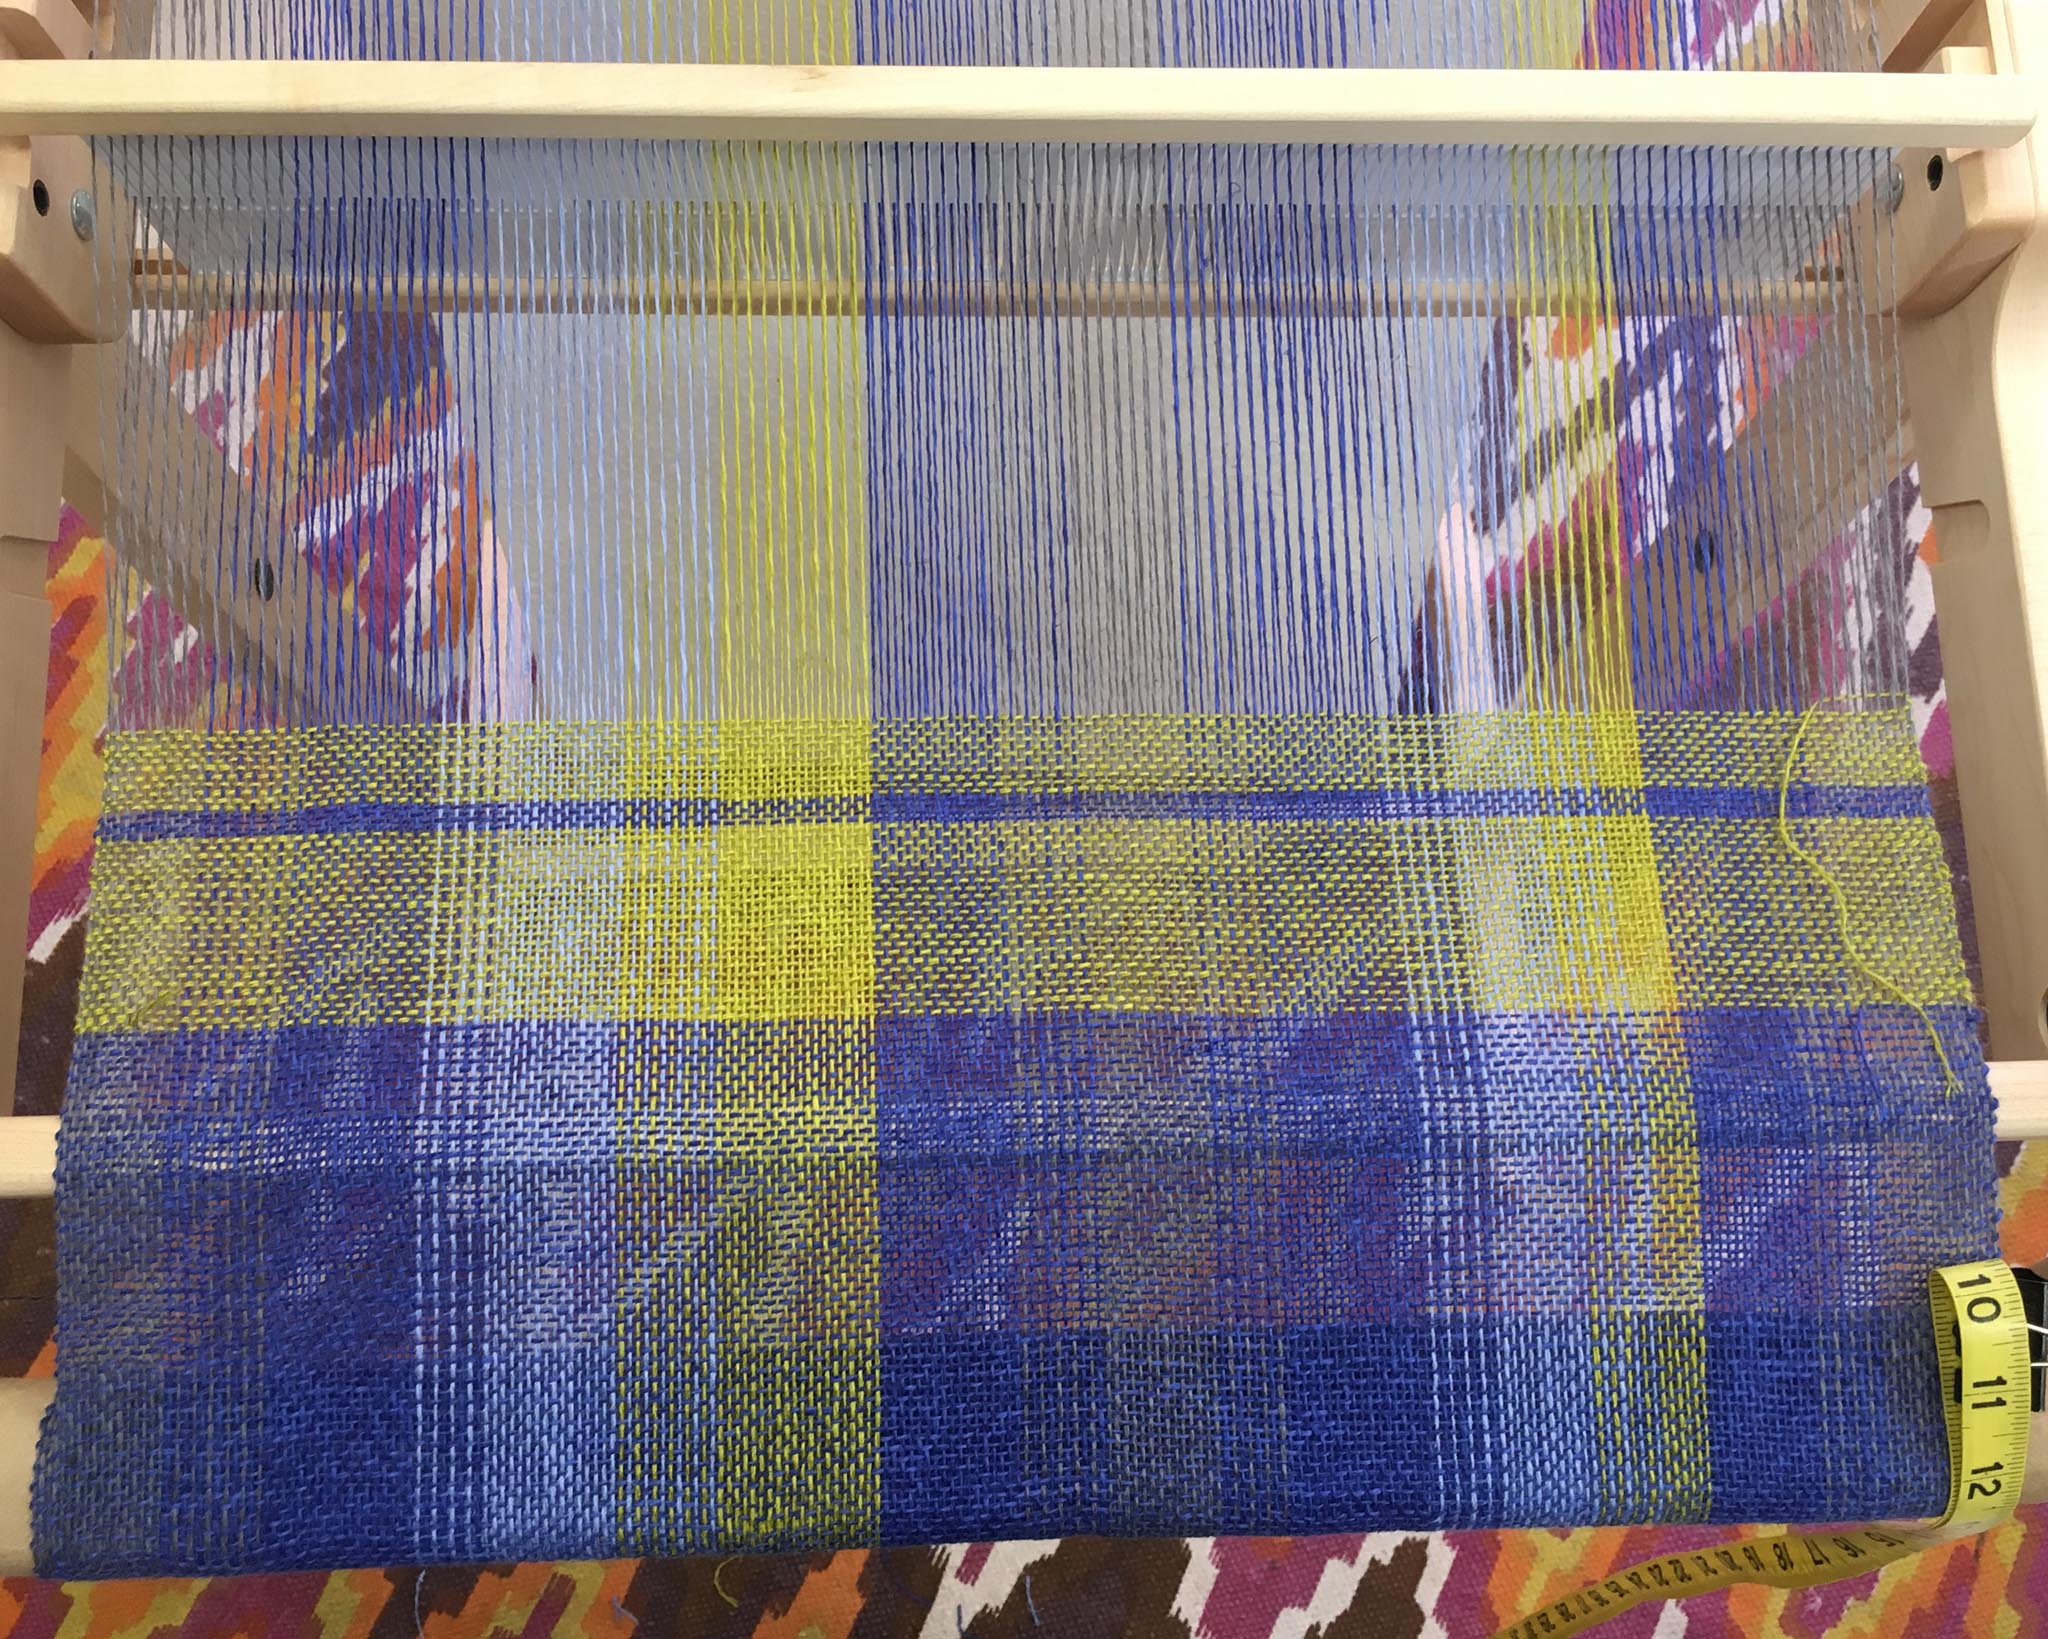
Weft Color Order: This project is woven as two 38” long panels on one warp. Add a 10" spacer with contrasting yarn between the two panels which will be removed later for fringe. Always measure the woven length with the loom off tension.
Panel 1:
Spacer: Add a 10" spacer between the 2 panels with contrasting yarn
Panel 2:
Finishing: Lois writes, "Measure the two woven panels. If they aren’t both exactly the same length, pull a few weft threads out of the longer panel before tying the fringe. Tie four threads together across in an overhand knotted fringe. Trim some of the excess length off of the fringe before wet finishing to prevent tangling. Hand wash in a warm bath with a mild detergent. Hang to dry. Give it a good steam press. Trim fringe to 2”.


Lois writes,"This top is generous enough in width to fit most sizes. To make a longer version, use a wider loom or weave a second warp to add to the bottom for length. If you want more width through the bust line, weave longer panels. This is a simple project which requires no sewing machine. All seams are hand stitched. Of course, a sewing machine could be used if you prefer instead of hand stitching."
Sewn Dimensions: 36" W x 18 ¼” L in the front and back
Shoulder Seams: Following the steps below and using Color A yarn, you will stitch the shoulder edges together from the fringed edge to 6 ¼” on either side of the marked center (total neck opening is 12 ½”).
1. Lay panels flat, side by side with centers matched and selvedge edges together. Weft stripe will be on the left side of front panel.
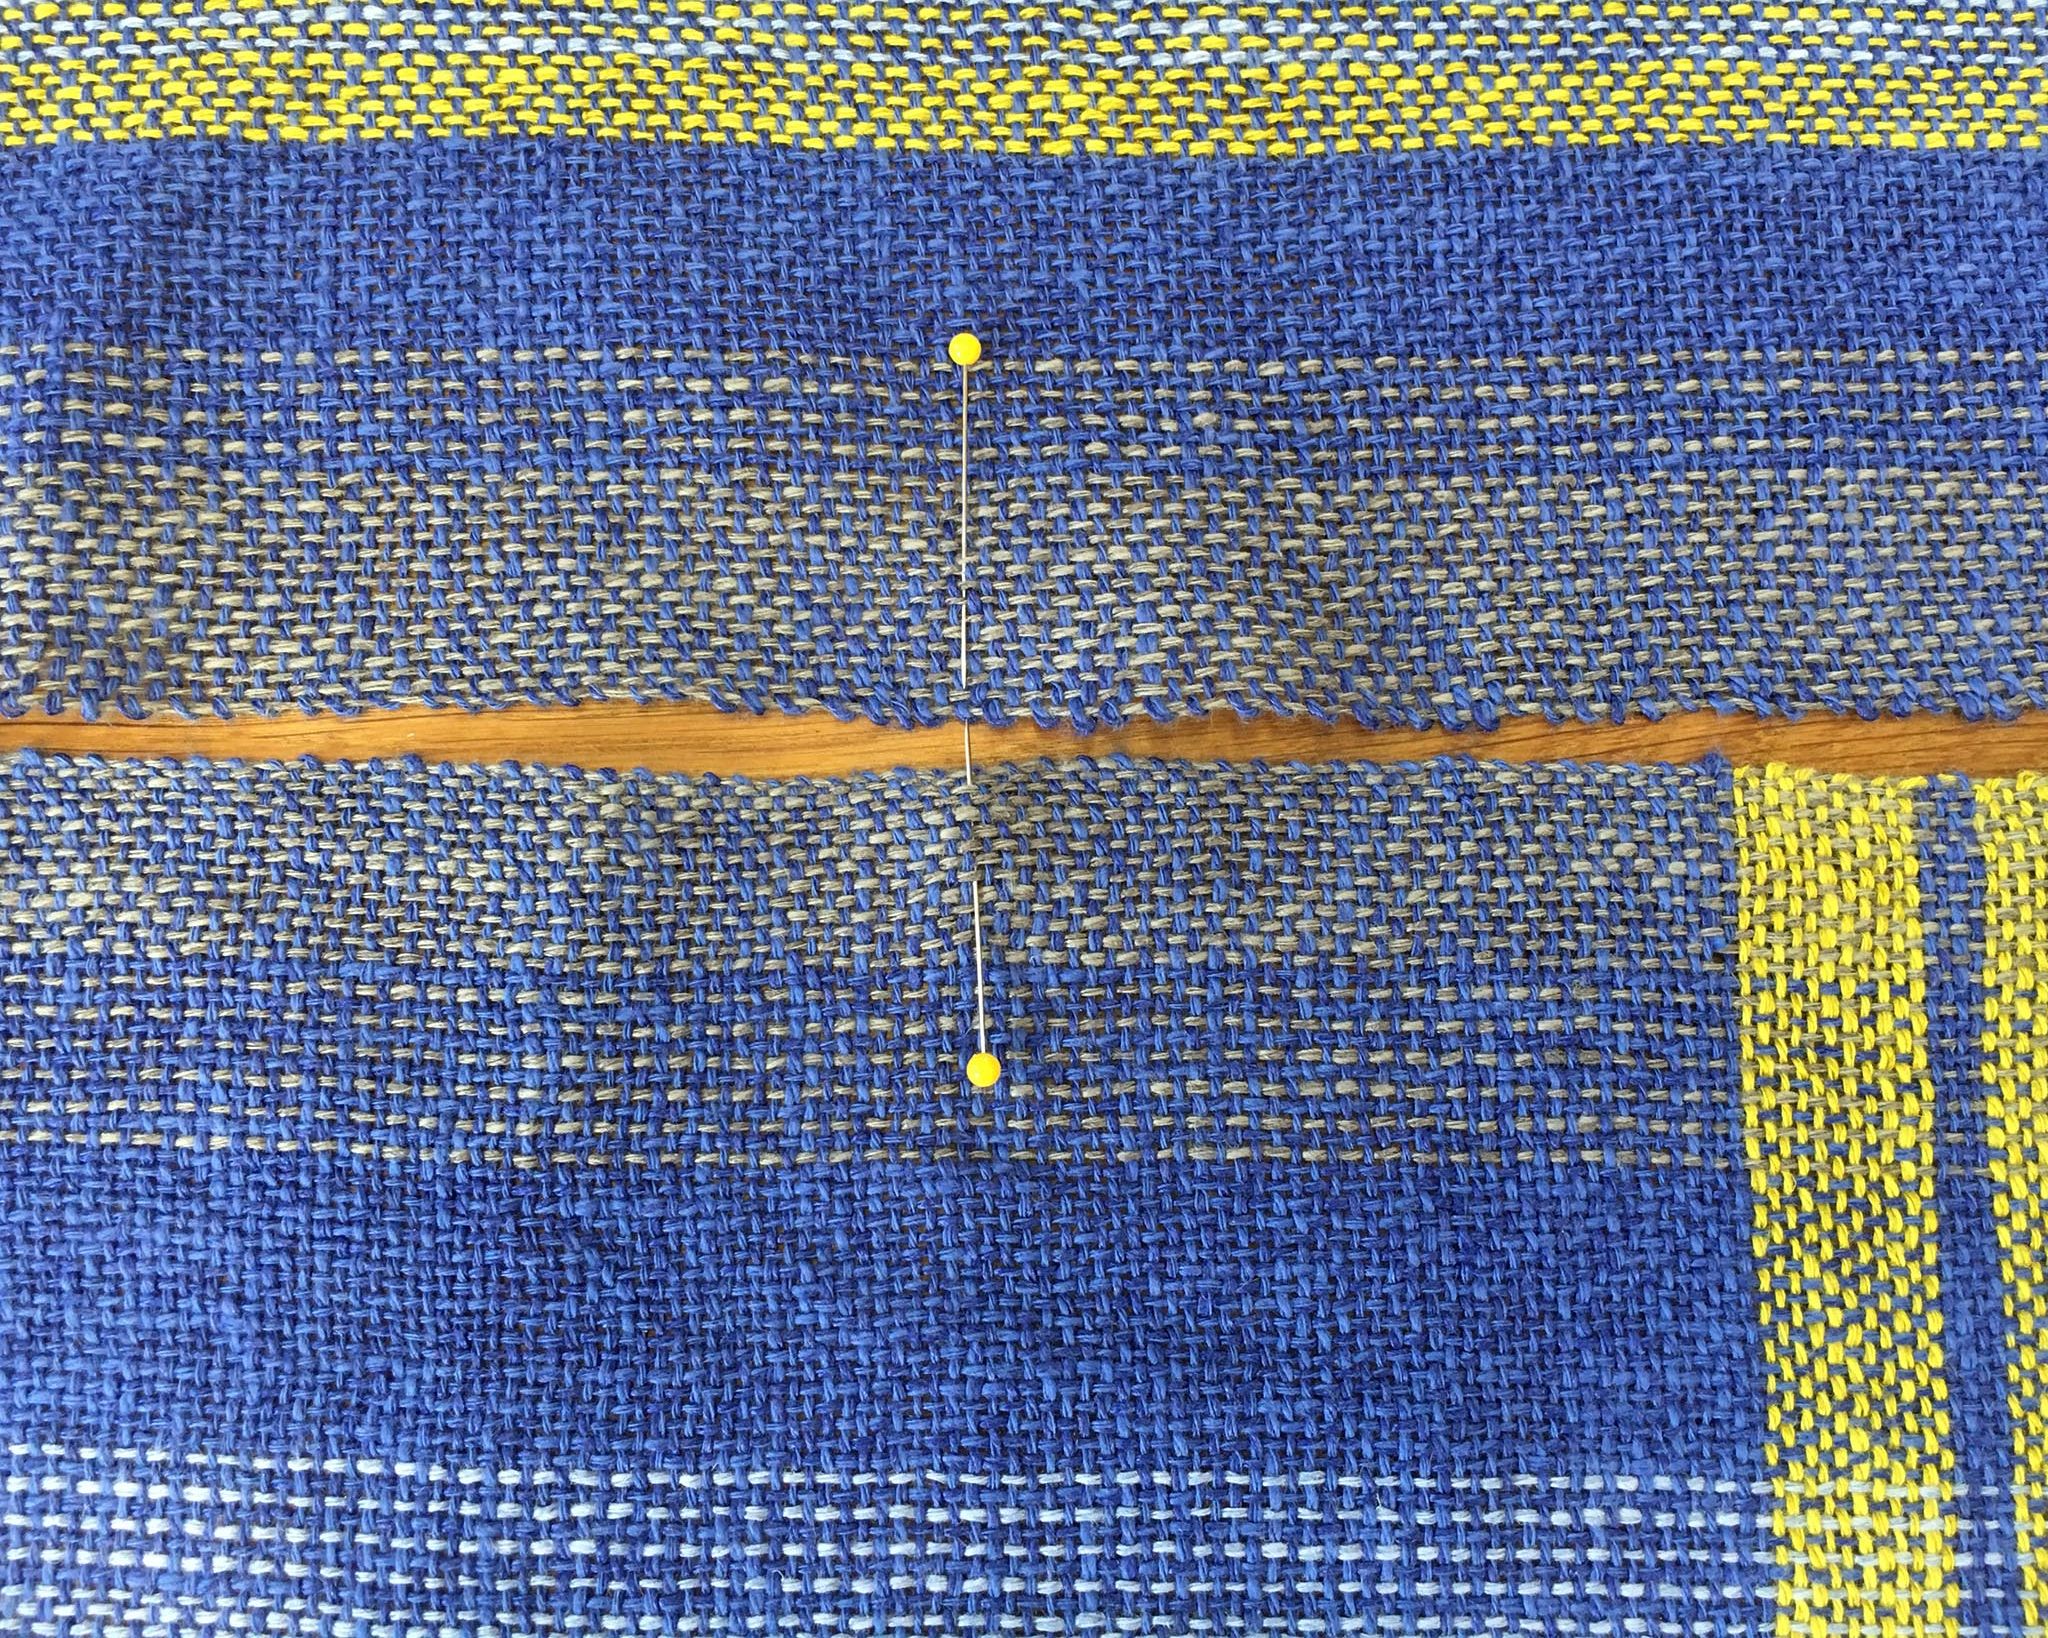
Center mark
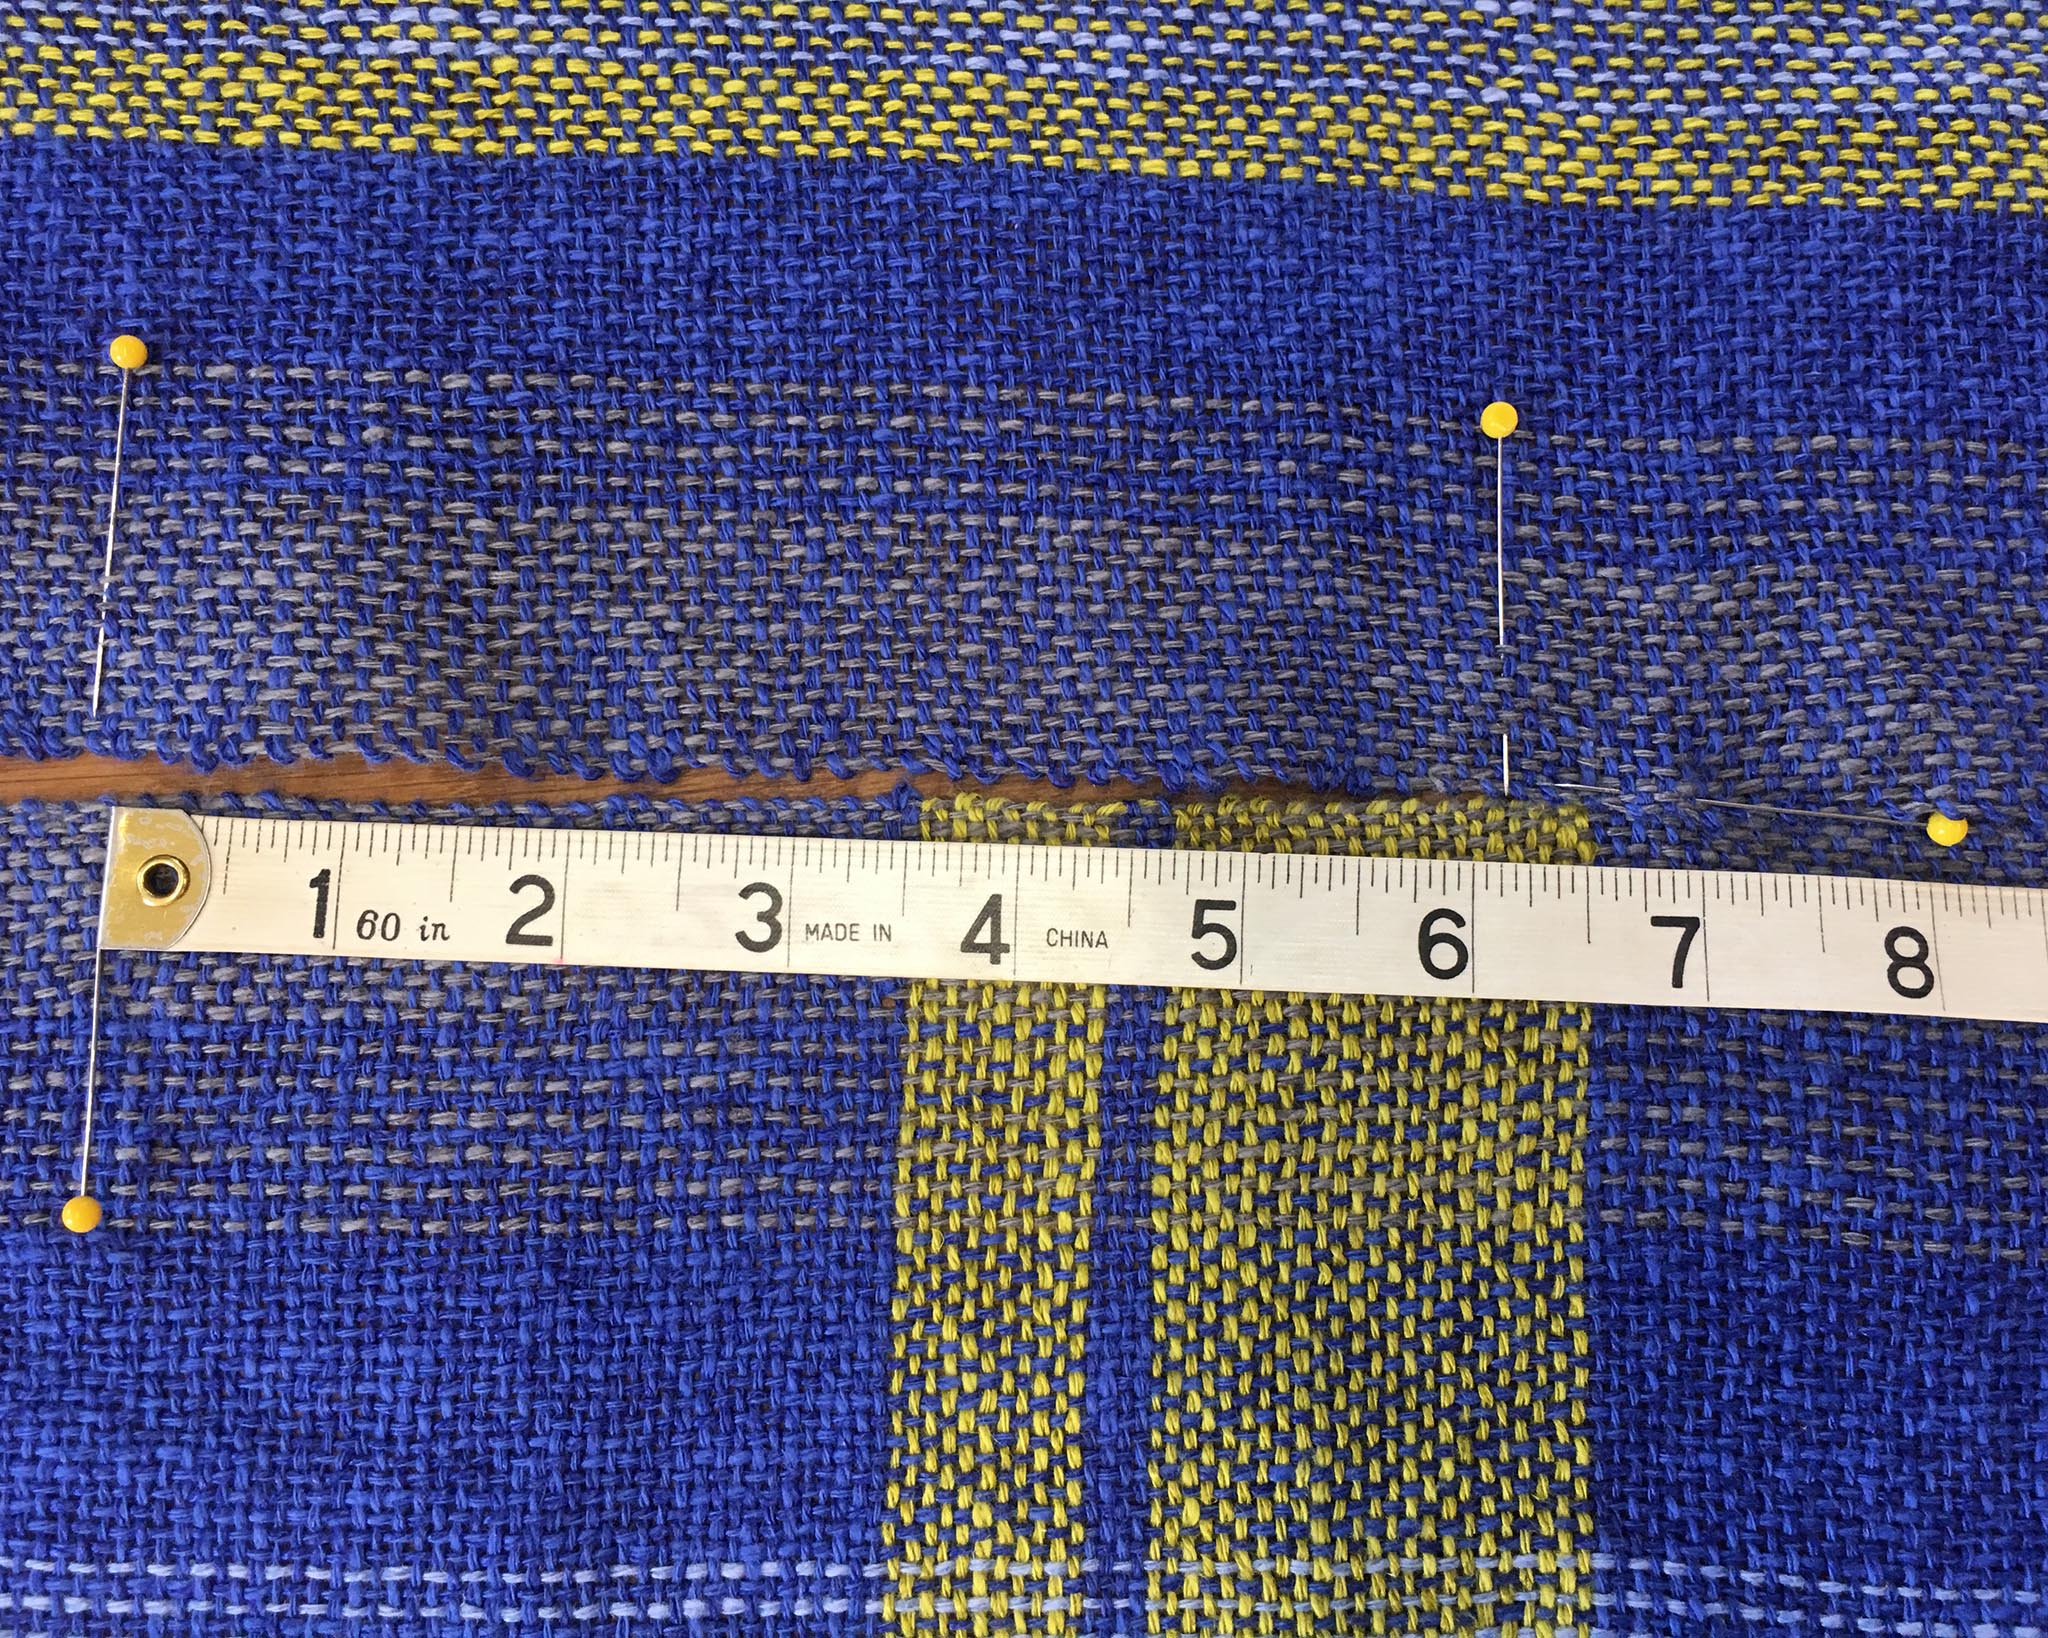
Measure 6 ¼” from center on both sides so that the neck opening measures a total 12 ½” wide
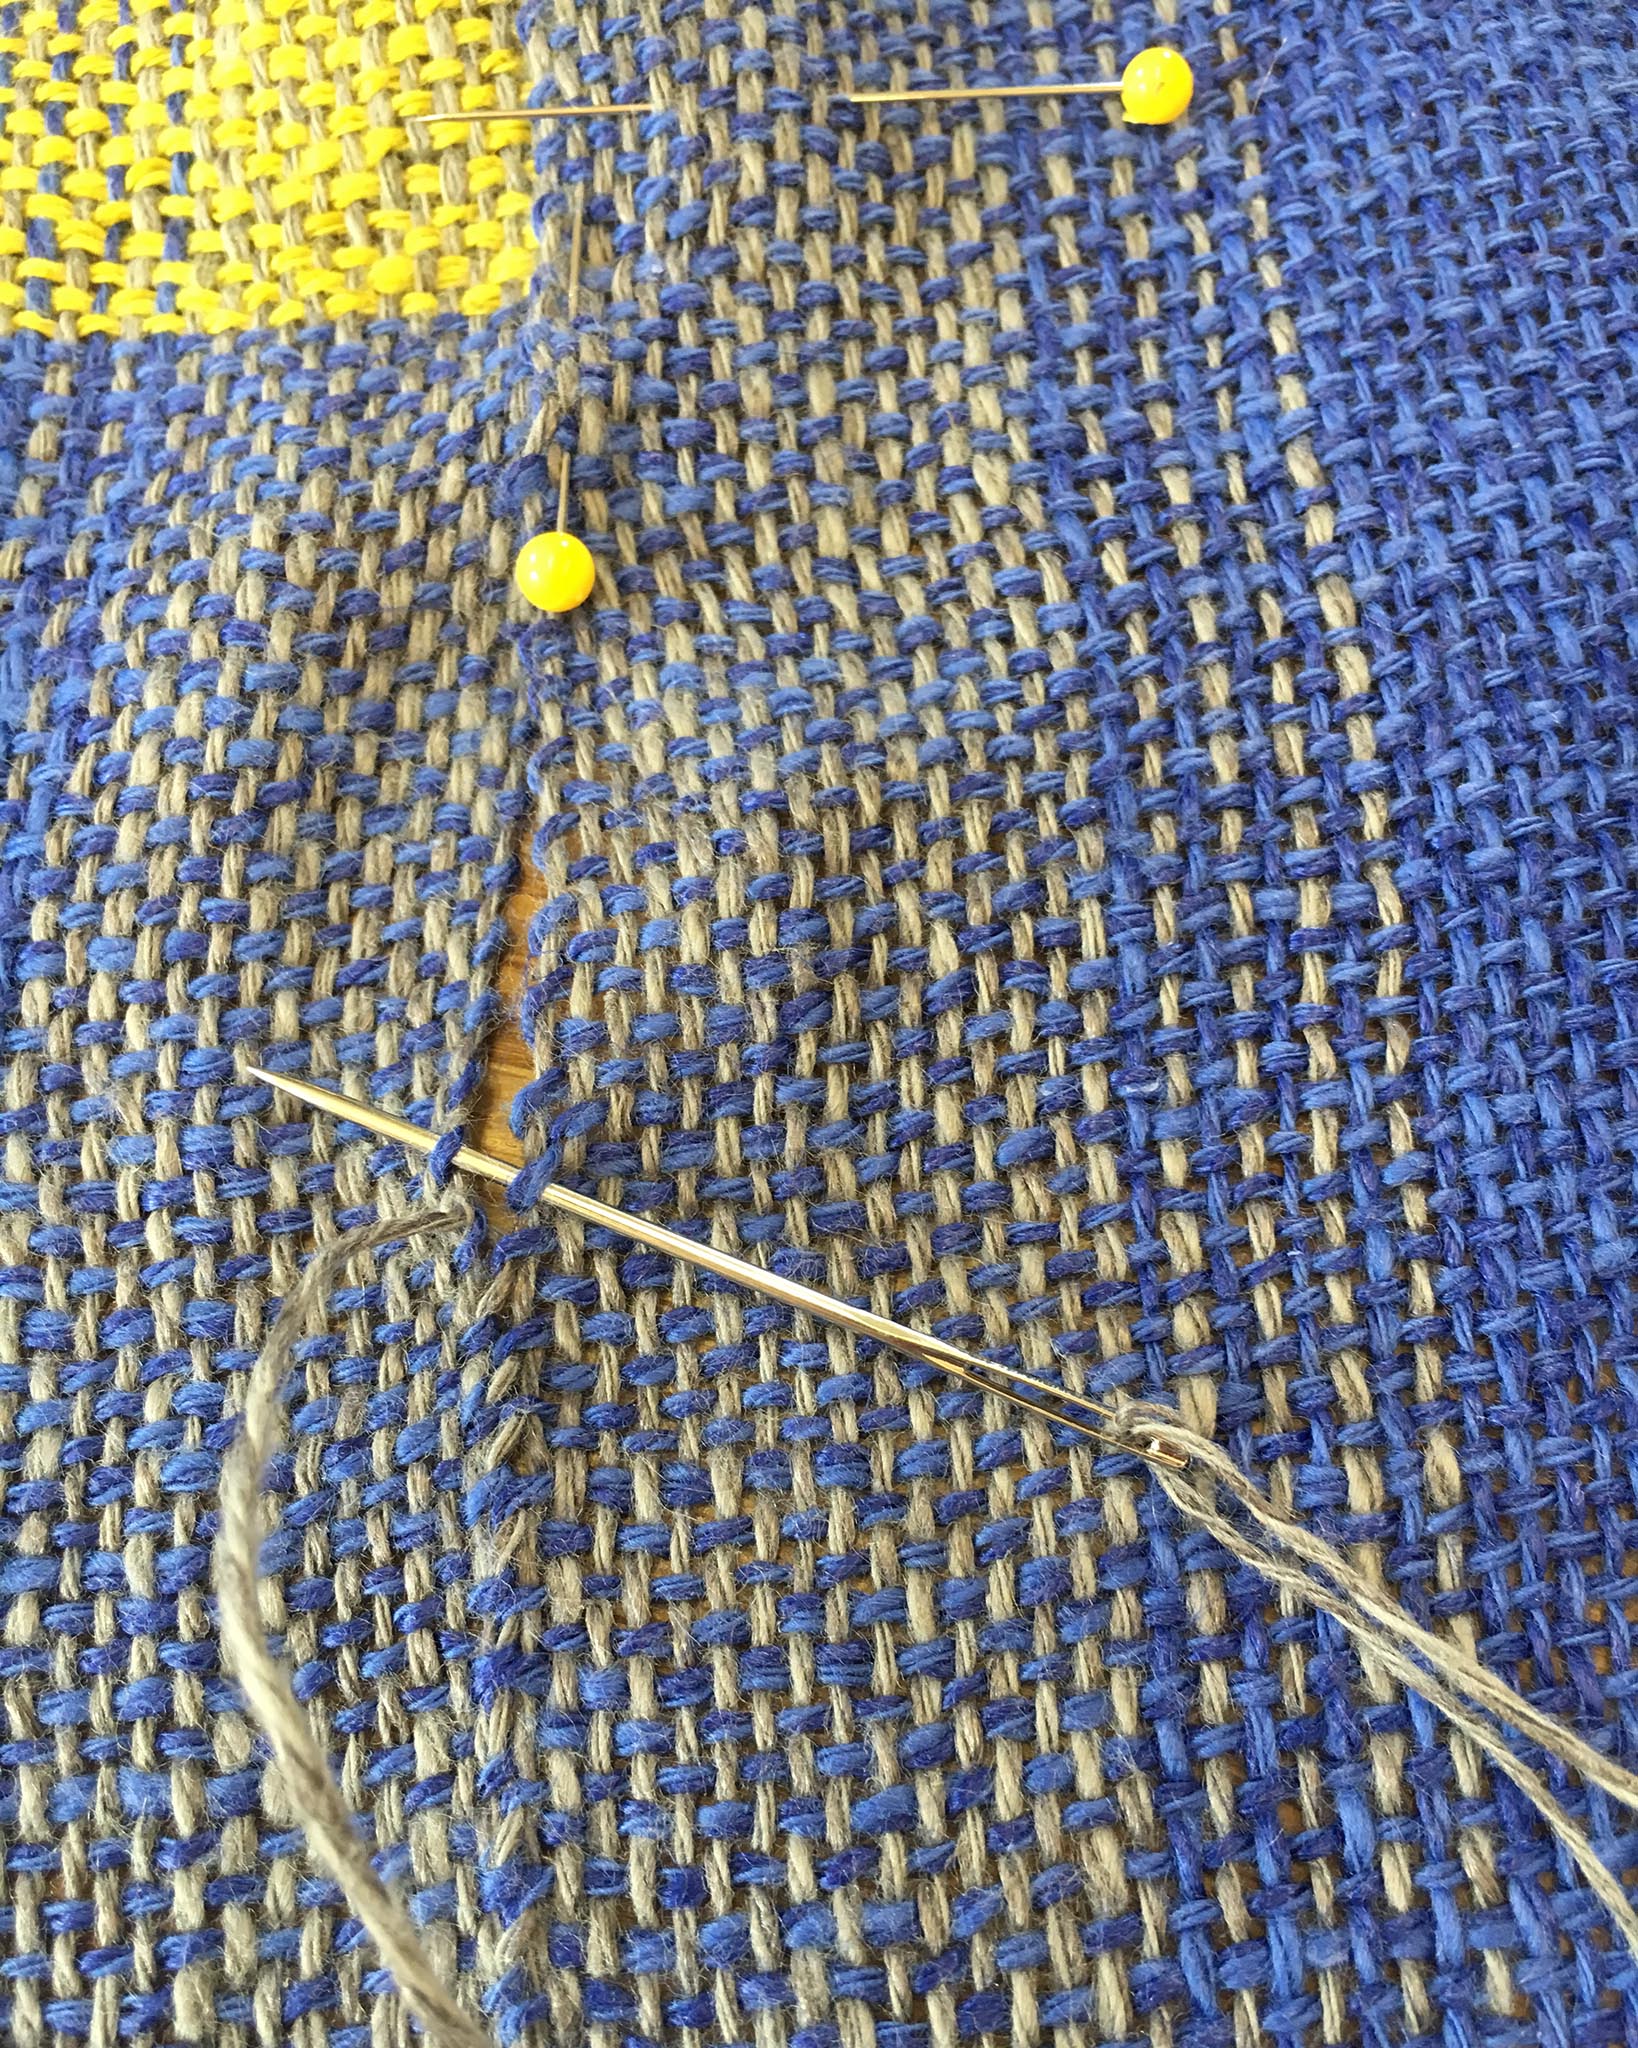
2. You will begin sewing the shoulders at one of the fringed edges. Before you begin, on the underside needle weave approximately 1” towards the selvedge edge of the fabric. Backstitch to secure the thread.
3. Stitch by picking up selvedge loops only, pulling panels together loosely. If selvedge loops are not equal, periodically pick up two loops together on the longer side to even it out.
4. At both sides of neck opening, needle weave and backstitch on the underside as in the beginning and secure the stress points at the neck edge with a few extra stitches.
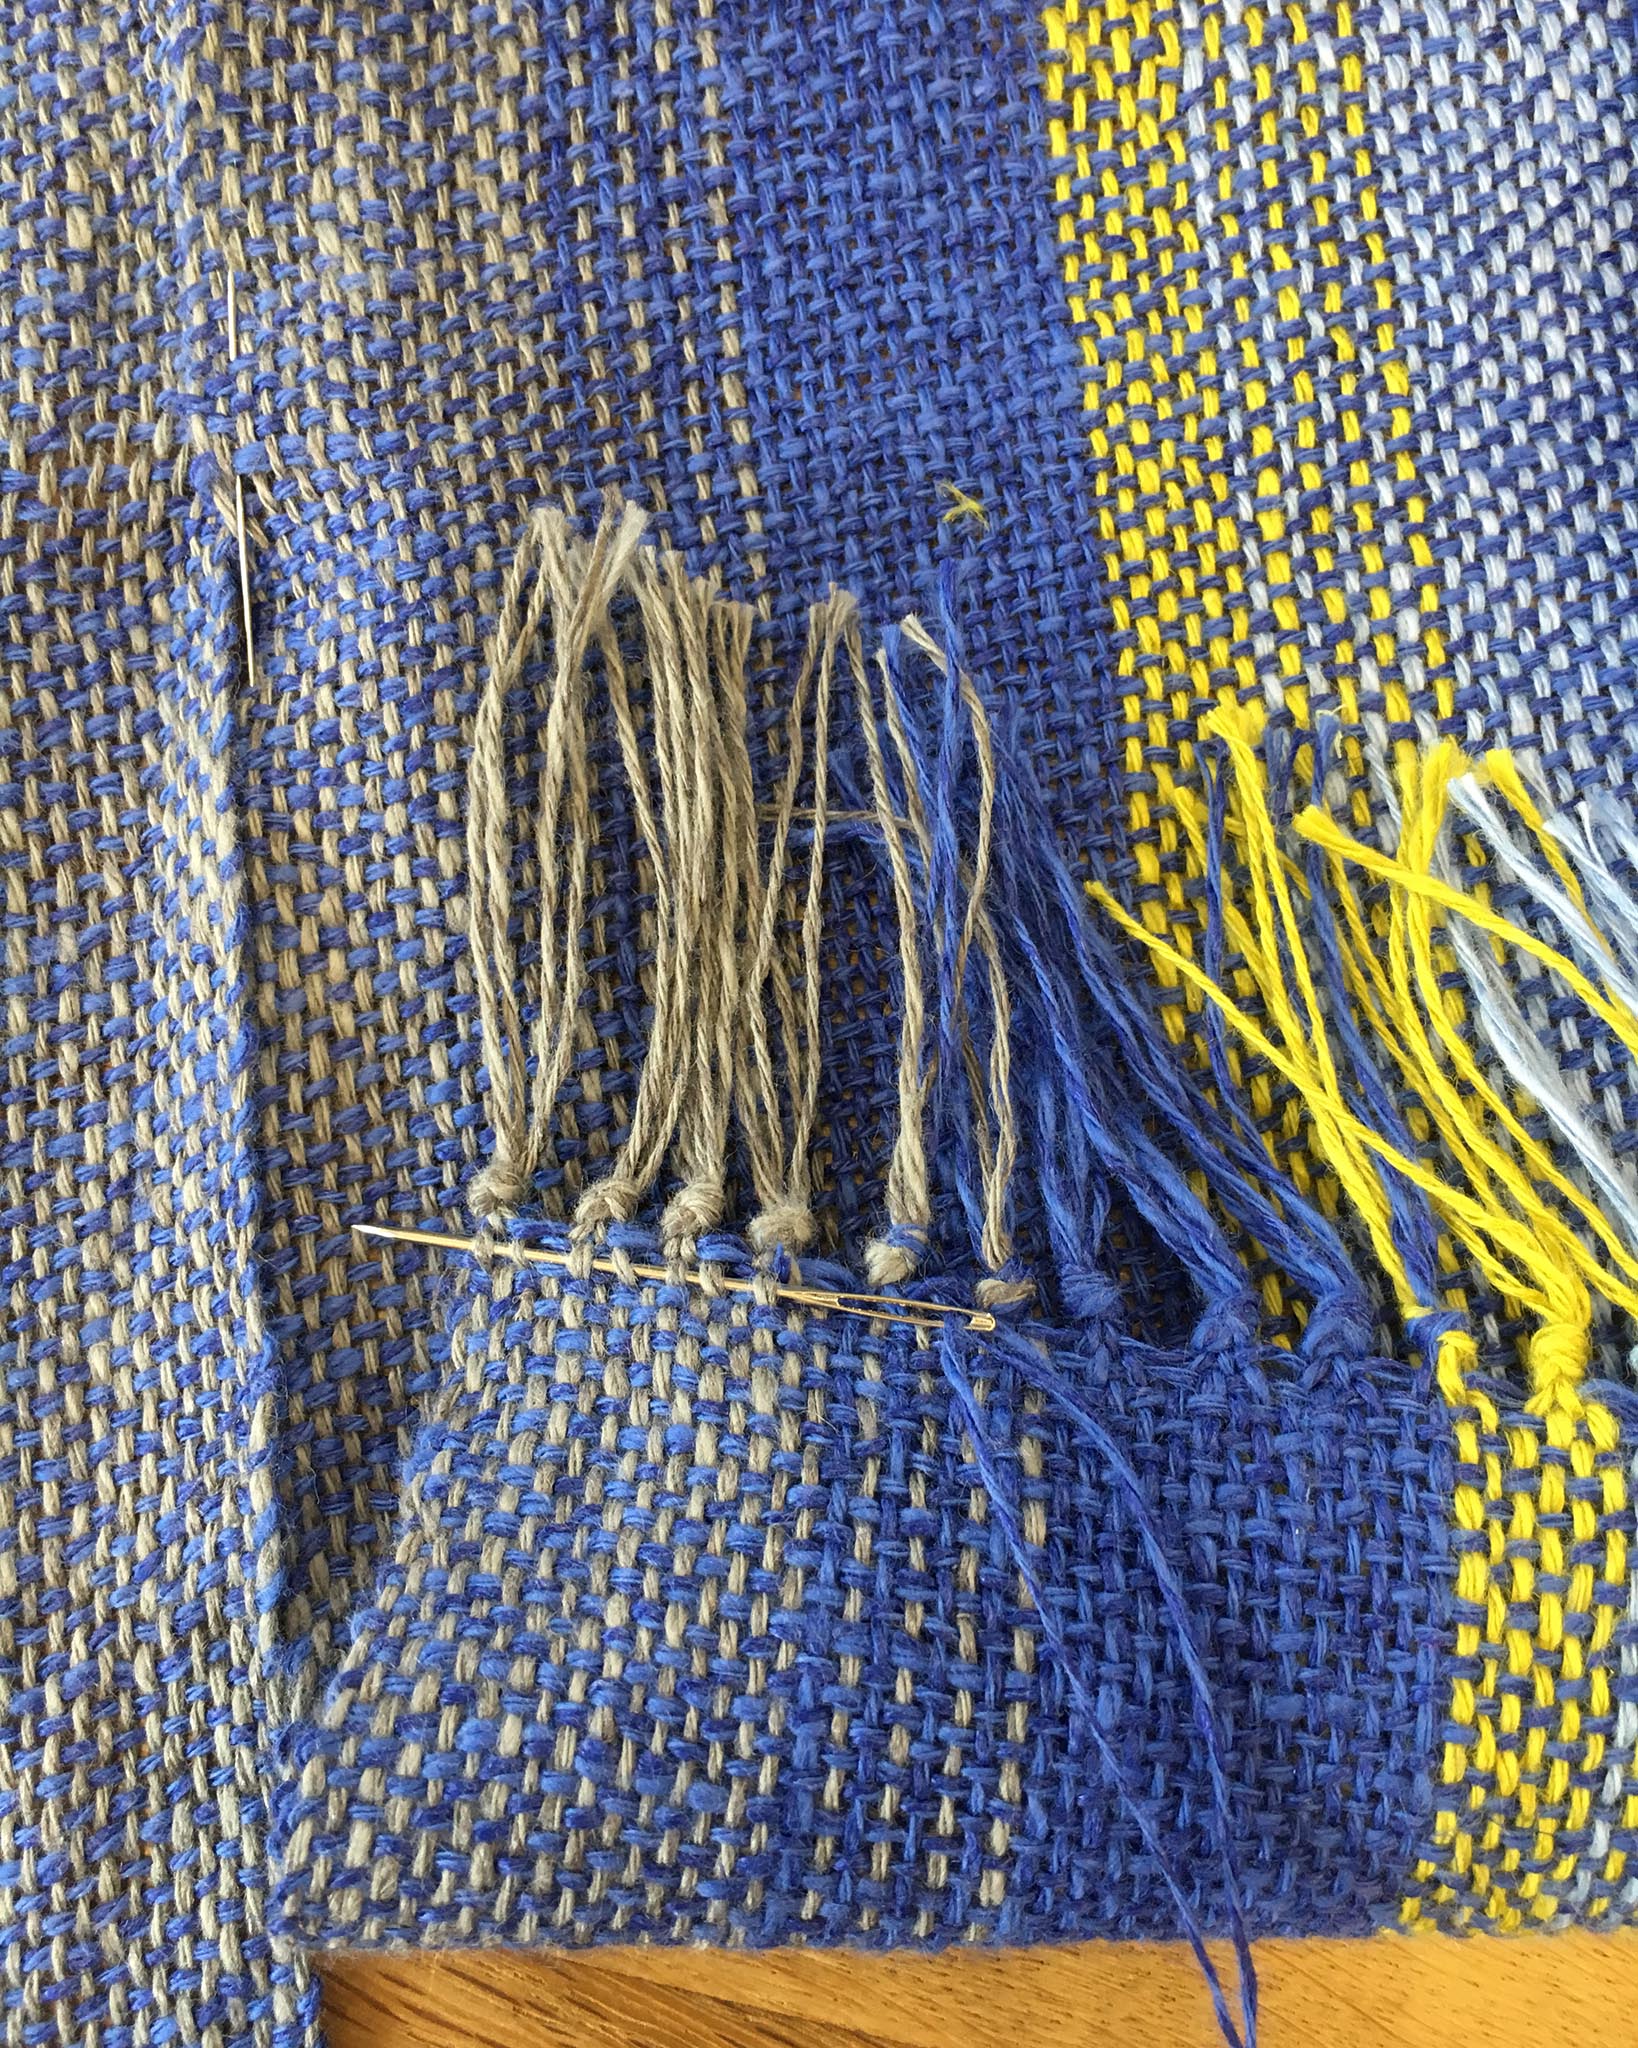
Securing the thread before sewing the shoulder seams
Sewing the shoulder seams
Side Seams: With wrong sides together, match up fringed edges. Using a length of Color B, this time stitch through both panels close to the fringe from the bottom edge a total of 9 ½ “. Begin and end as in shoulder seams.

Sewing the side seams

Finished!
Lois writes, "Many things inspire my designs. This time it was the new Duet yarn that had just arrived in my studio. The colors are vibrant and some of my favorites to wear. The slubby yarn of cotton and linen was just inviting me to weave a summer top. We were scheduled to leave town for a lengthy vacation a week or so later, and I certainly didn’t want to wait until I got home to try out this yarn. Adrenalin kicked in and I quickly designed, wove and sewed the top. I wanted to make a simple garment that required minimal tools and yet was attractive and comfortable to wear. And now I have a new piece to pack along, perfect for a cool evening on my summer vacation."
Lois Weaver has been weaving professionally in one way or another for 25 years. After quitting her day job at midlife and enrolling in a fiber arts program, weaving called to her and she never looked back. It has taken her from selling her wares in shows and galleries in Virginia to production weaving in Colorado. After moving to New Mexico, she began teaching. This led to designing patterns for her students. She now sells her patterns through her Etsy shop. Her specialty has always been wearables.
Lois now lives in Pueblo, Colorado. When she’s not in her studio there, you will find her with her husband and Cocker Spaniel traveling in their recently renovated RV complete with her handwoven textiles looking for fiber events and other adventures.